Friday, June 25, 2021

Happy Birthday Chick

Happy Friday!  It's Jeanne today and I have a card for that spring chicken in your life.  This card uses the Country Farm Chicks from the new release and some older birthday dies.  This new release features adorable farm themed dies.

I started this card by die cutting the chick, presents and balloons from various colors of cardstock.

Next I cut an A2 base from white and a gingham panel 4 x 5 1/4 inches.  Using the second largest of the Scalloped Rectangles I cut my top panel from white.

The sentiment is stamped centered at the top of the scalloped panel.  Then I adhered all the panels together, centering them.

 
I added the chicken and presents centered on  the bottom.

I wanted to put strings on my balloons.  To do this I put double sided tape on the back of the balloons and added the strings.

I placed foam dots on top of the string and popped them up off the card.

I love these new Country Farm dies.  They make such fun summer cards!  Be sure to visit the online store where they are on sale for a limited time.

Products used:


Thanks for visiting today!  I hope you have a fun and creative weekend!


Thursday, June 24, 2021

Greetings!

 Hello Scrapping Cottage Friends 

It is Pam creating with you today!

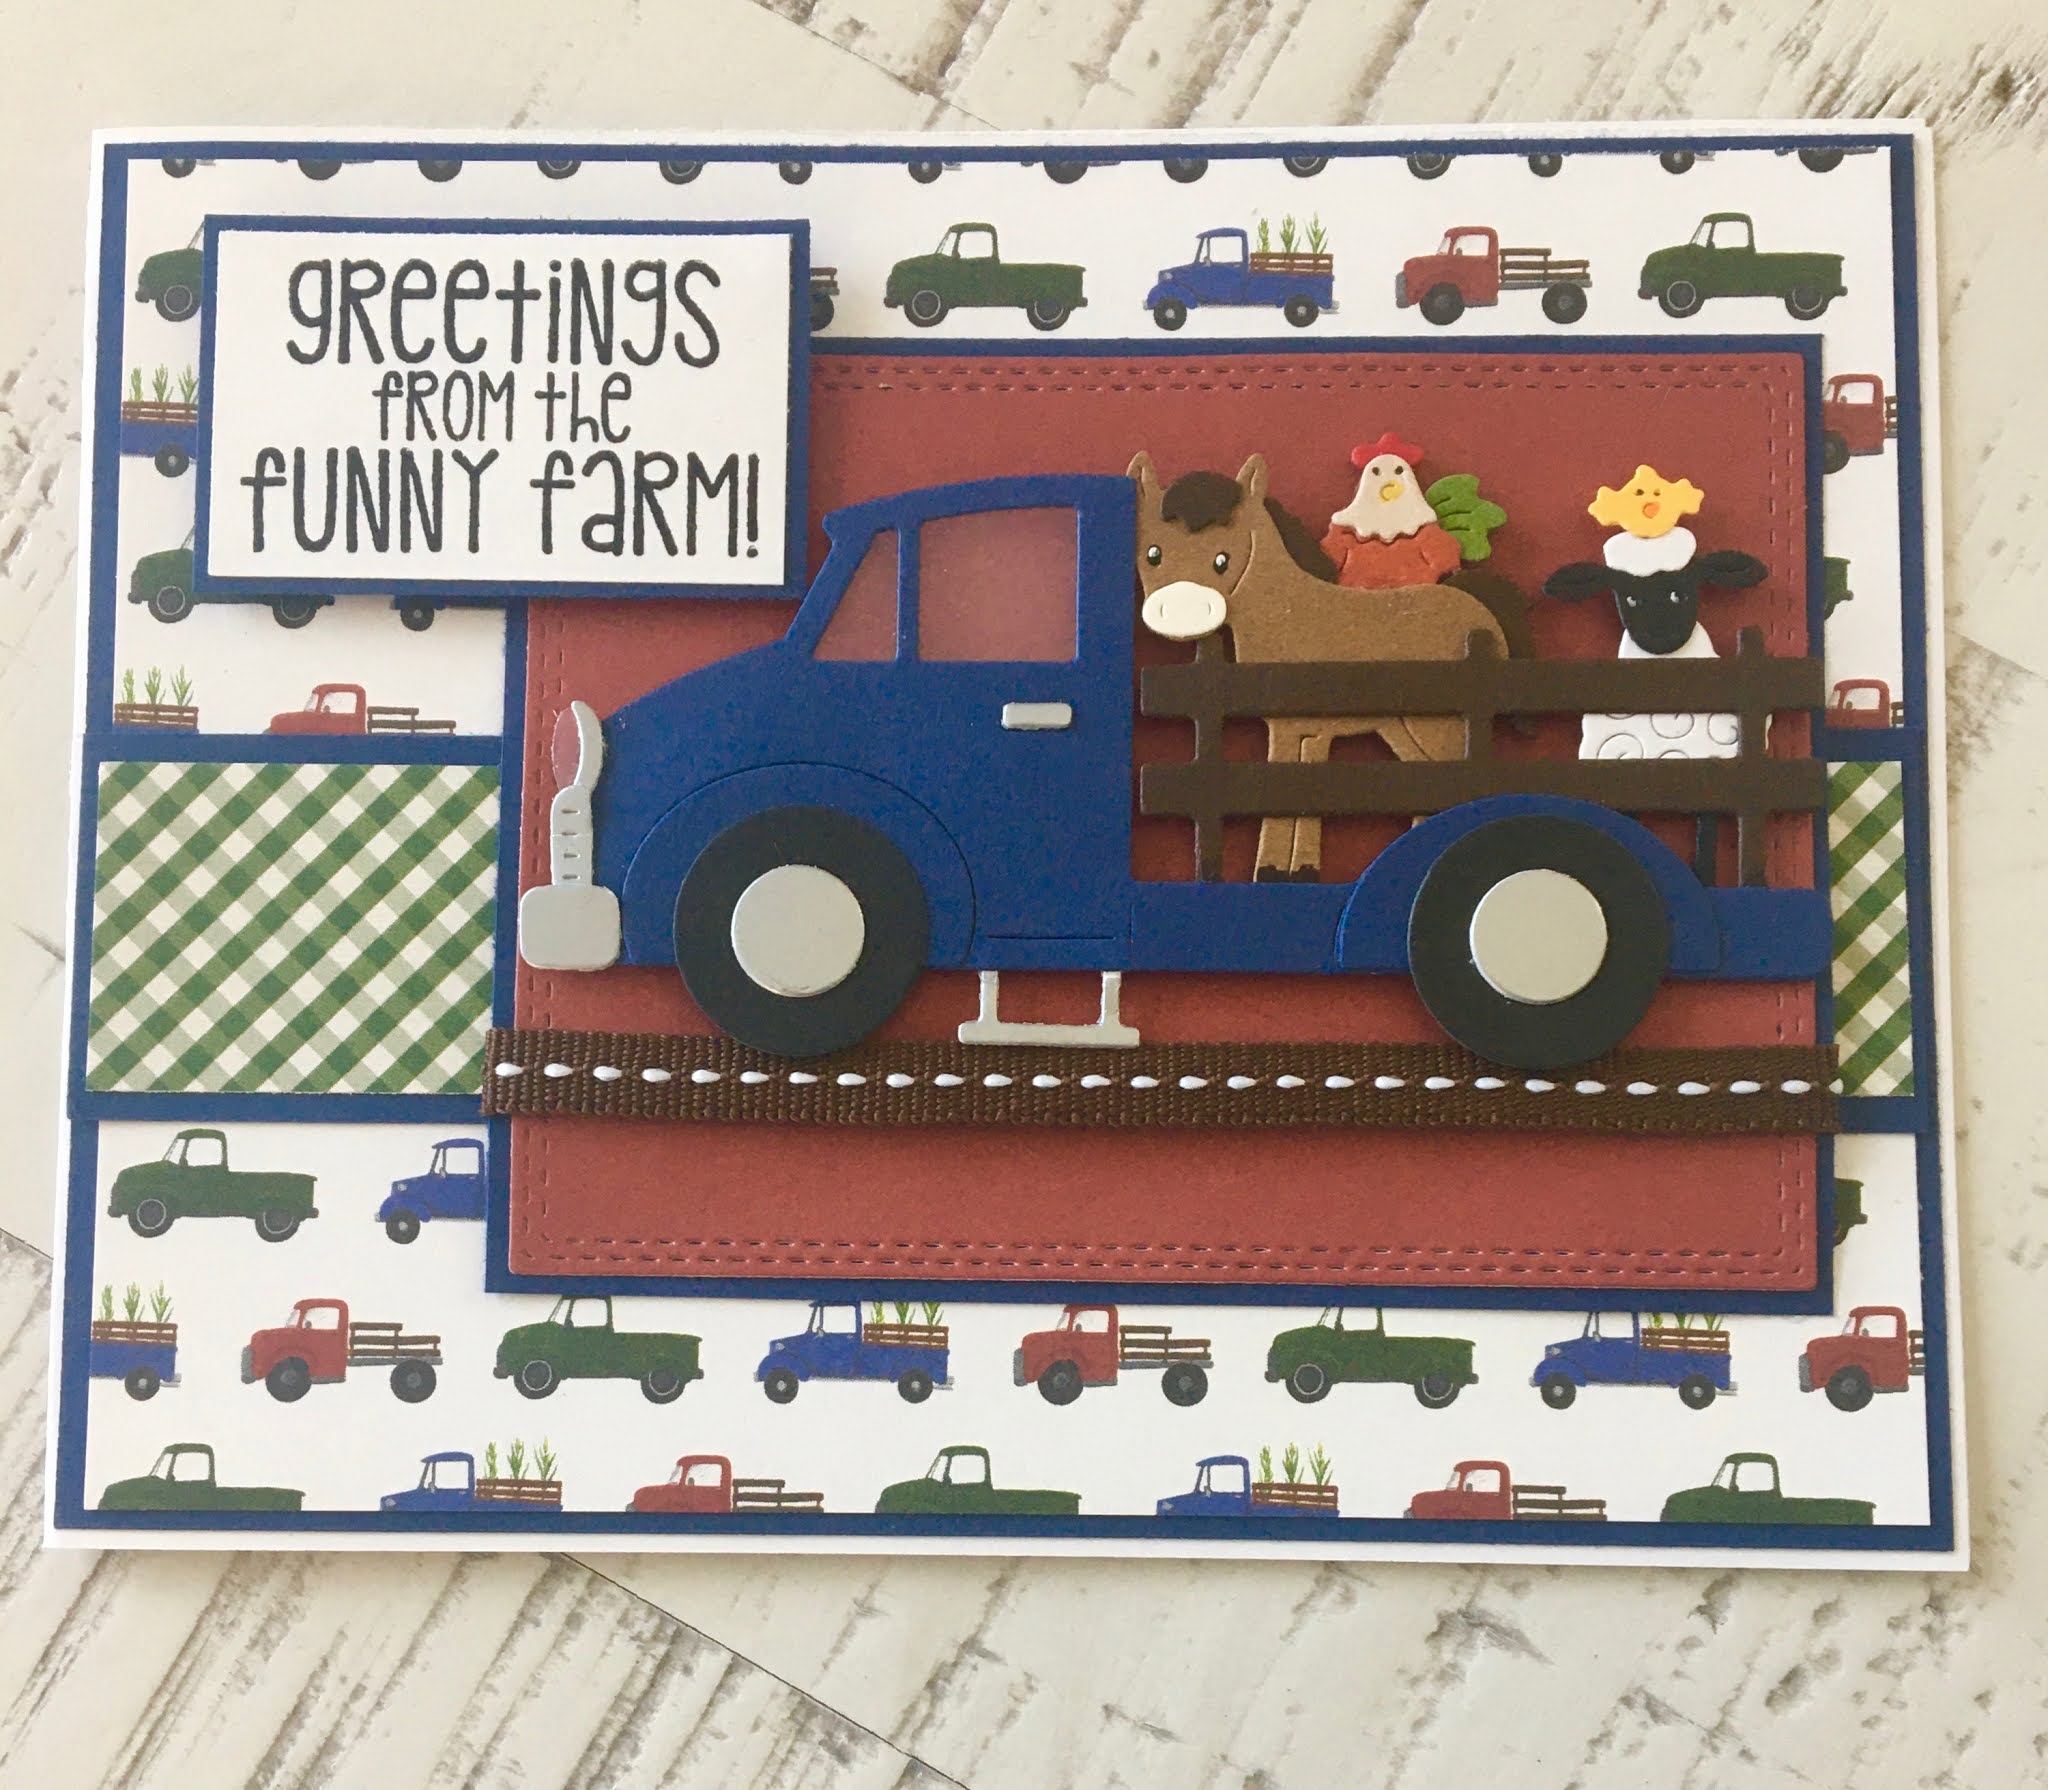
Our design team is continuing to fashion some ideas for you to use from the new collection called COUNTRY FARM! It has the so many incredible dies.  Everything from Tractors to Cowboy Chicks!  Each die is just full of awesome details and can be used for so many different occasions.  Today, I am using the Farm Truck w/Animals.   I really love this little truck it can be filled with all kinds of fun things.


Design Steps:

1.  Using the Farm Truck w/Animals die cut out the truck pieces: navy, silver, dark brown, black and acetate.  For the animals brown, dark brown, tan, rust, green, red, yellow, black, white
2.  Glue the truck together with a fine tip glue.  Glue the animals together and then glue them into the truck
3.  Use a white A2 Card base, use a 4 x 5 1/4 piece of tractor DP and mat it with the navy blue.  Use a 1 x 5 1/4 piece of checked green DP and mat it with navy blue.  Using the second from the largest Double Stitched Rectangle die cut out a piece of red.  Take the red rectangle and mat it onto navy blue
4.  Wrap the red double stitched rectangle with a piece of brown stitched ribbon as shown.  Next pop up the truck as shown
5.  Glue the navy blue matted farm truck DP to the A2 white card base.  Glue the navy blue matted green checked strip to the front as shown
6.  Glue down the double stitched rectangle with the truck to the card front as shown and add the sentiment which has been stamped and matted onto navy card stock.  Your card is complete!

CottageCutz Products


Thanks so much for stopping by.  I hope this fun little card gives you a boost of inspiration to create your own adorable farm card!

Blessing and Take Care
Pam


Wednesday, June 23, 2021

Herd the News!

Hello!  This is Sukie and today I'm sharing a card featuring dies from the new Country Farm release.  These die sets are absolutely adorable and perfect for so many occasions! This card will be perfect to have on hand for a celebratory occasion!

I used the following die sets on my card:  Stacked Farm Animals, Curly Sheep & Lamb, Country Farm Stable and the Old Farm Fence.  I used colored card stock for all of my die cuts and inked them on the edges for some dimension.
The rustic papers with a bit of country charm are from my stash and were perfect for my card.
I created my card base by layering the 2 panels of paper with the wood themed panel on top.
The grass was affixed to the bottom portion of my card with the farm fence tucked in behind.
Next, the adorable cow was placed on top of the grass as the focal point of my card.
I proceeded to build the stack of farm animals by adhering one on top of another.  The little lamb was nestled next to the cow.
A fun sentiment was stamped on a hand cut flag and adhered in the upper corner of my card.
Here are the die sets used on my card, available in the store:

Monday, June 21, 2021

Missing you "pig" time

Hello Scrapping Cottage friends! Thanks for taking the time to stop and visit with us today. It's Mary Marsh here bringing you the Monday edition of the Blog.

IT'S NEW RELEASE TIME! The collection is called COUNTRY FARM! It has the most delightful dies from Tractors to Cowboy Chicks! Each die is just full of awesome details and can be used for so many different occasions. All of the new dies are on sale at 25% off.

Today for your viewing pleasure, I am featuring the new Playful Piggies die and I created a missing you card to send to my precious little granddaughter. She loves pigs and will definitely like this card. I thought we might get to see them this summer but I am not sure at this point. They live in California and I am in Pennsylvania. 

My card started with the layout. I found this sketch online and thought it would work well for the image I am using. The designer paper is 5" square, the teal layering panel is 5 1/8" and the pink cardstock is 5 3/8" square. 

I had this designer paper in my collection. I liked the trees with the farm image piggy. 
I cut teal cardstock for the 3 background strips. They are 1/4" x 5".  I used teal enamel dots on the left side and bottom of the designer paper. The punny sentiment is stamped in teal ink. My granddaughter will laugh at this once her Mom explains it to her. 
  
That's my card for today. I will be back on Saturday with another sample from this new Country Farm release. 

dies I used to create card:


Sunday, June 20, 2021

Happy Father's Day

Hi!

It's Anja here. For today's post I made a Father's Day card. I used one of the dies from the Christmas release. It seemed perfect for the occasion.


For this card I used:

- Cottage Cutz dies (Christmas Pets, Rounded Rectangles Slimline, Oval Set), 

- Distress Inks and Oxides,

- white card base (9,5x22,5 cm),

- white and patterned card stock for die cuts,

- white pen,

- black pen,

- plastic stencil,

- heat gun,

- washi tape,

- tape,

- water spritzer, 

- printer,

- vellum paper,

- adhesive foam pads,

- paper glue. 


First I cut and colored the pets.


Next I started on the background. I used the smooching technique. I dried the paper with the heat gun. 

 
Next I added more interest to the background using the plastic stencil. I used the same Distress Oxide for coloring.


Next I cut an oval out of patterned paper and placed it on the background. I used rounded rectangle slimline die over it and adhered it with the washi tape to prevent moving. I cut it with my cutting machine.
 

I printed the sentiment on the vellum paper and teared the paper on both sides. I adhered the paper to the background using tape on the back side. 


I placed and adhered the background to the card base and added the pets using adhesive foam pads. And my card was done.


And that's all from me for today. Have a nice week and see you again next Sunday. 

Anja Z.


Cottage Cutz dies I used: