Monday, December 21, 2020

Joy Snowman


Hello Scrapping Cottage friends! Thanks for taking the time to stop and visit with us today. It's Mary Marsh here bringing you the Monday edition of the Blog. Hope you are on track with all your Christmas preps. It's only 4 days until the big day.

Today, I have for your viewing pleasure a card featuring the Joy Snowman die. It's part of the Christmas Part 1 release. 

I created this card using the colors from the Splitcoaststampers color challenge #820. I thought these colors would be perfect for a card featuring a snowman. 

I had this layout saved on one of my Pinterest boards and I knew the 3 panels work well to display this image.

Then I chose my background paper. It's from a "snowflake splendor" collection. Perfect to cover the balmy blue and highland heather colors.

The "joy snowman" is cut in the challenge colors. The image panels are embossed with a falling snow embossing folder. 

To finish off my card I added some ribbon in the balmy blue shade and a few snowflakes cut from the designer paper. For the snowflakes I used this older Snowflakes Set die. 

And, that's it for me for this post. See you on Saturday. Merry Christmas everyone.

dies I used to create card:


Sunday, December 20, 2020

Merry Christmas

Hi!

It's Anja here today with another Christmas card. This time I made a gingerbread house and added this cute little snowman to the scene.

For this card I used: 

- Cottage Cutz dies (Gingerbread Cottage, Christmas Camper),

- dye inks,

- white card base (15x15 cm),

- white card stock for die cuts and background (13x13 cm),

- black pen,

- black pigment ink,

- sentiment stamp,

- acrylic block,

- scissors,

- paper glue. 

First I cut and colored all the little pieces.

Next I trimmed the paper for the background and colored the sky with light blue shade. I also cut two pieces for the snowy ground. I colored the pieces around the edges with blue ink.

I used the sentiment stamp and stamped it on the smallest cut piece.

When all the pieces were ready I assembled the card together.


That's all from me for today. I wish you all happy and peaceful Christmas holidays. I hope you'll be able to spend it with your loved ones. 

Also have a nice Sunday and see you again next week. 

Anja Z.


Cottage Cutz dies I used for this card:


Saturday, December 19, 2020

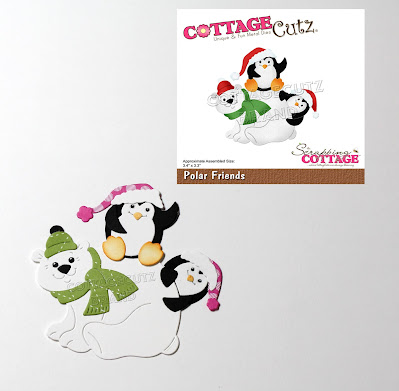
Polar Friends

Hello Scrapping Cottage friends! Thanks for taking the time to stop and visit with us today. It's Mary Marsh here bringing you the Saturday edition of the Blog.

Our Christmas dies are still available in the online store.  We have Christmas Part 1 (22 new designs), Christmas Part 2 (21 new designs) and Christmas Part 3 (11 new designs).

Today, for your viewing pleasure I have a card featuring the new Polar Friends die. It's one of those whimsical dies from the Christmas Part 3 collection that makes for a really cute Christmas card. I kept it more on the simple side. If you have this die and are looking for an idea, this one would be easy to recreate multiples of. Let's get started on some details of how I created my card.

Design Steps:
My card this week started with the color challenge #822 on Splitcoaststampers. The colors are bright and I thought the polar friends would look great sporting these colors. 
magenta madness, granny apple green basic black

I decided to emboss my background with an evergreen embossing folder. I used a designer paper in the granny apple green color. I liked the ombre appeal of the paper and it made for a quick background design. 

Next, I cut my images in the challenge colors. I used designer paper for their hats and the bears scarf. It just added to the fun loving appeal of this card. 

I am ready to start card assembly. I attached the embossed panel to the white card base with double sided tape. Cut a snowy slope for the polar friends to frolic around on. They are a perky little bunch after all! The slope is attached with dimensional adhesive.

White card base: 5 1/2" x 4 1/4"
Embossed panel: 5 3/8" x 4 1/8"  

 The images are also attached with dimensional adhesive. I wanted them to be lifted slightly from the embossed background. 

To complete my card, I stamped a playful sentiment and added some green glitter enamel dots. I scattered a few snowflake sequins in the sky and my card is complete. 

Well, that's it for me for this week. I will be back on Monday with another Christmas card. See you then!

die I used to create card:


Friday, December 18, 2020

Snow Buddies

Happy Friday!  It's one week until Christmas!  Do you have all your holiday cards finished?  I am almost done with mine, just a few more to go.  My card for you this week uses a die from the Christmas Part 3 release.  Although it makes an adorable Christmas card, it also makes for a wonderful friendship or birthday card.  I've made a friendship card this week.

 This card went together quickly at least in part because I used a pre-printed card base.

This pre-printed card is leftover from a kit that I got this summer.  I also cut a white panel 4 1/4 x 3 inches.

I cut a hill from the white panel and used a product called Cosmic Shimmer Glitter Kiss to give the hill a frosty edge.  I stamped the sentiments in the lower left and set the hill aside to dry.  The ink I used is oil based and takes while to dry as does the Shimmer Glitter Kiss.

All my penguin pieces are cut from white (except the hats) and colored with Copic markers and Stampin' Blends.  I assembled them before putting them on the card.

After what I thought was enough drying time, I glued the hill to the card front.  I say "thought" because as you can see, my sentiment smeared!

Recovering from accidents like this can be challenging.  Here I decided to heat emboss the sentiment in white and cut out a strip for the portion above "snow Buddy."  I cut the sides at an angle on purpose to give it a more casual feel.  I popped up the penguins using foam dots.

 This card seemed to ask for a little more so I added a few snowflake sequins!

Dies used:


 Thanks for visiting today!  I hope you have a fun and creative weekend.

Thursday, December 17, 2020

Holy Nativity

Good Morning Scrapping Cottage Friends,

Only a few more days until we can celebrate my favorite holiday!  I am all finished making my cards but I thought there is always some surprises last minute. So that is why I thought I would make a few more just in case.   And if I don't use them this year I have a head start for next year!

I am using one of the most beautifully detailed dies today and it is the true meaning of Christmas. The die is The Holy Nativity die.  This is a fancy fold card called Tent Topper.  There is a great tutorial for this card on Splitcoaststamper.  


Design Steps:
1.  White card base 4 1/4 x 8 folded in half.  Copper card stock 4 1/8 x 4, Navy DP 4 x 3 3/4
2.  Glue the Navy DP to the copper card stock then add your white square knotted ribbon.  Glue to the white card base
3.  Use your Holy Nativity die and cut it out using a piece of copper card stock.  Using the same navy DP line the back of the Nativity scene with the DP as shown
4.  Next lay your white card base on you cutting tool our just use a ruler to line up where you are going to place the topper.  Making sure it is just slightly smaller then 5 1/2 so you can use an A2 envelope.  Glue the top in place and your card is complete

I hope you are just about done with your cards!  Now I am on to shopping for family and friends!

Blessings
Pam


Wednesday, December 16, 2020

Joy

Hello!  This is Sukie and today I have another Christmas card to share.  For this card, I went for a clean and simple (CAS) design which is a challenge since it's all about the details for me.

I cut out the Joy Snowman from card stock using the packaging as a guide for the colors.  I also selected a light blue patterned paper for the base of my card along with some basic white card stock.
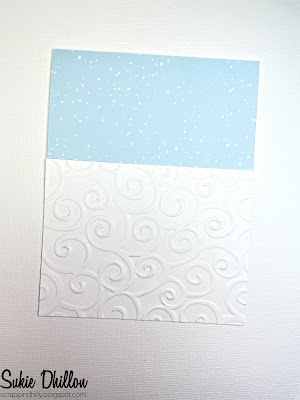
The white card stock was embossed with the Cuttlebug D'vine Swirls embossing folder.
Next, the embossed panel was affixed to the lower half of my card base creating a striking contrast between the 2 portions of my card.
I visually looked for the center point of my card and adhered the cute snowman on the upper portion of my card.
The letter "Y" was placed on the right side of the snowman nestled closely to the snowman.
The letter "J" was adhered on the left side of the snowman, completing the "Joy" sentiment.
This card came together quickly and can be mass produced for those last minute Christmas cards.
Here is the die set used on my card, available in the store: