Sunday, August 09, 2020

Seahorse & Sea Turtle

Hi!

It's Anja here. I have two cards for you today. I made a cute set with a Seahorse and a Turtle. 

 For this project I used:

- Cottage Cutz dies (Seahorse, Sea Turtle, Circle Set),

- Dye Inks,

- 2 white card bases (15x15 cm),

- white card stock for die cuts,

- water color paper (2 14,2x14,2 cm),

- acrylic paint sprays (blue shades),

- sentiment stamps,

- acrylic block,

- black pigment ink,

- white pigment ink,

- black pen,

- white pen,

- Wink of Stella glitter pen,

- heat gun,

- adhesive foam pads,

- paper glue. 


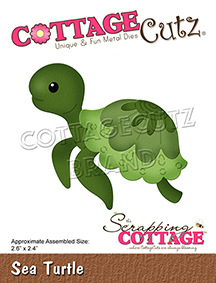
First I cut and colored the turtle. I used white pigment ink and a brush to emphasize some parts of the turtle. I also added a bit of glitter to it.

Next I cut and colored the seahorse.

Then I cut two paper stencils.

I put the stencil over the watercolor paper and sprayed it with acrylic spray paints. I used three shades of blue.

Next I removed the stencils and added a few drops of the lightest blue shade to add over the paper. I dried the paper with the heat gun.

After that I added some color to the edges of the background paper. I also stamped the sentiment.

When I had all the pieces ready I assembled the cards together. I added the turtle and the seahorse using adhesive foam pads for dimension. And my cards were done.


This is all from me for today. Have a nice Sunday and see you again next week.

Anja Z.


Cottage Cutz dies I used for this project:


Friday, August 07, 2020

Aloha Friday

Aloha!  It's Jeanne to day with a fun vintage Hawaiian card featuring dies from the new Beach and Tropical Release.  This release is perfect for summer and right now it's 25% off for a limited time!
The card is actually quite easy to make but does involve some ink blending.  I wanted to make sure that there was a good variety in my browns and I tend to use the same colors all the time.  So before I undertook the coloring, I organized my Distress Oxide inks to see exactly what I had.  Previously they were all thrown in a drawer!

So....I cut all the pieces in white from the Aloha & Ukulele and the Tropical Fruit dies. Then I used blending brushes and colored them using these Distress Oxide inks:
It may seem like a lot but you'll notice there is overlap in the colors I used on the objects.  It really didn't take long and I love the color depth I got!

Next I cut a slim line card (folded size is 3 1/2 x8 1/2 inches) and a panel from wood look paper 3 1/2 x 8 1/2 inches.
I took a scrap piece of white cardstock and stenciled a sky background.
Using the middle size of the Stitched Wide Circle Frames, I cut three from the sky and three from green cardstock.
I inserted the middle part of the sky into the center of the frames.  I now have some "sky" patterned frames which I am storing with my dies for future use!

I cut the word Aloha from dark brown cardstock.  I toyed with the idea of using a bright color but I really didn't want the greeting to compete with the colors of my objects.
I arranged the word and the frames on my panel....
and then cut off the overhang.
I then added all my objects. I used the watermelon slice and turned it into a pineapple slice simply by changing the colors!  This card was fun to create and went quickly once I knew what colors I wanted to use.

Dies:
http://www.scrappingcottage.com/cottagecutzalohaandukulele.aspx
http://www.scrappingcottage.com/cottagecutztropicalfruit.aspx
http://www.scrappingcottage.com/cottagecutzstitchedwidecircleframesetbasics.aspx

Mahalo for stopping by!  I hope you have a fun and creative weekend!


Thursday, August 06, 2020

Tropical Toucan

Hello Scrapping Cottage Friends

It is Pam on the blog today!

I am bringing you another BRAND NEW RELEASE!  And it is all about the tropics and the wonderful lazy days of summer!! This selection of dies is on sale in the store for a big 25% off.  Check them out HERE!

I love all the bright colors you use with these dies.  Today, I am featuring the Toucan.  I used bright colors and a black background to make them pop.

Background Photo by Bart Zimny on Unsplash

Design Steps:
1.  Using the Toucan die cut out all of the pieces using: black, orange, red, yellow, 2 shades of purple and green card stock.  Shade all of the pieces using TH inks and a small applicator
2.  I cut out a branch using brown card stock and the Garden Bear die.  I also cut out additional leaves using Sloth die and 2 shades of green card stock.  Using the Pierced Circle second from the largest cut out a piece of orange chevron DP.  Use a white A2 card base and a piece of black card stock cut 4 x 5 1/4.  Also use a piece of black polka dot DP cut slightly smaller then the black card stock
3.  Assemble the Toucan with a fine tip glue
4.  Glue the polka dot DP to the solid black card stock.  Then glue down the orange chevron circle to the polka dot DP as shown slightly higher then center
5.  Arrange the branch and leaves and then glue down add the leaves at the top right of the circle.  And last glue down the toucan

6.  I added ribbon to the card and this is a trick I use to get the ribbon to lay flat and tight around the card.  I cut a piece of ribbon about 8 to 10 inches and tie my square knot.  Then I hold it up by the square knot and cut the ribbon in half directly below the knot.  I then tape it to the back of the card as shown.  Your card is complete
Cottage Cutz Products


Thanks so much for stopping by!  We really appreciate you and don't forget to check out this adorable new release!
Blessing 

Pam


Wednesday, August 05, 2020

Sending You Sunny Smiles

Hello!  This is Sukie and today I'm sharing this card for my design team day.  There is a brand new release of Beach & Tropical dies which compliment the Pirates & Sea Creatures from the last die release.  Both of the die sets are currently on sale and also showcased on my card!
I cut out the pieces from the Treasure Chest Island, inked up all of my die cuts and put everything together.  I also cut out a tiny flower from the Tropical Bouquet die set.  The oval base and frame are from the Oval  and Pierced Wide Oval Frame sets.
I found this fun paper in my stash and trimmed it to fit my card base, it reminded me of a sandy beach.  I inked the edges for extra dimension.  I also stamped a sentiment on some coordinating card stock.
The oval frame was layered over the oval base and the die cut piecing was affixed to the framed set.
Next, I adhered the tropical scene on my card base.  The sentiment tag was added at the bottom of my card.
The finishing accent on this card was the gorgeous flower which was used to embellish the sentiment tag. All of the little details are amazing on this little flower!
Here are the dies that I used on my card, available in the store:

Monday, August 03, 2020

Under The Sea

Hi!

It's Anja here. For today's post I have a mermaid card for you. I made another under the sea scene using this cute new dies.
 

For this card I used:
- Cottage Cutz dies (Mermaid, Tropical Fish),
- Distress Inks and Oxides,
- craft card base (10x21 cm),
- water color paper for background (9,5x20,5 cm),
- white card stock for die cuts,
- heat gun,
- water spritzer,
- black pen,
- white pen,
- Glossy Accents,
- Wink of Stella glitter brush,
- paper glue.

First I cut and colored the mermaid and the fish. I used Distress Oxides for the background. I used a smooching technique for it. I put a mix of blue Distress Oxides shades on my glass matt and mixed it with water. Then I tapped watercolor paper on it to get the result I wanted. I dried the paper with the heat gun. Then I placed all the cuts on it. I used Wink of Stella glitter brush to add some interest to the mermaid's tail and the pearl. I also added drops of Glossy Accents glue to the card to add some air bubbles to the sea. And my card was done.


Thank you for visiting. Have a nice day and see you again on Sunday.

Anja Z.


Cottage Cutz dies I used for this card: