Friday, July 17, 2020

It's Yarrr Birthday, Matey!

Happy Friday!  It's Jeanne on the blog today with a birthday card for all those pirate lovers in your life!  It uses the Ahoy Matey die from the new Pirates and Sea Creatures release.  I adore this release because I have several Jimmy Buffett fans in my life who love pirates, parrots and the ocean!
I first cut all the pieces from various colors of cardstock.  I ended up with extra parrot pieces which I saved.
Parrots come in such a wide variety of colors I know I will be assembling more using these extra pieces in the future.  In addition to the Buffett fans, I have a few friends who own parrots and this little one looks adorable as a non-pirate parrot without his hat!
Next I used a pirate embossing folder to emboss a black panel 4 1/4 x 5 1/2 inches.
Using the largest of the Stitched Circle dies, I cut a circle from white cardstock.  I cut a panel 2 1/4 by 5 1/2 inches from red and a panel 2 x 5 1/2 inches from a red stripe paper. I fishtailed the bottom of the two narrow strips creating banners.
I stamped my sentiment to the upper left of the circle and lightly sponged a soft blue background in the center.
I added the fishtailed banners and the circle to my panel angling sentiment on the circle.
I used foam dots to pop up the parrot.  I felt the card still needed a little something and decided that most pirates have a stash of treasure, so what about some gold?  I used the coins from the St. Patrick's Day Cupcake die and a few gold sequins.  The yellow "Ahoy" looked a bit washed out so I cut another one from the same blue green that is in the bird and glued it on top.  Now my sentiment stands out and has a nice yellow shadow underneath!

I hope you enjoyed my card today!

Dies:
http://www.scrappingcottage.com/cottagecutzahoymatey.aspx
http://www.scrappingcottage.com/cottagecutzstpatricksdaycupcake.aspx
http://www.scrappingcottage.com/cottagecutzstitchedcirclesetbasics.aspx

Thanks for stopping by.  I hope you have a fun and creative weekend!


Thursday, July 16, 2020

Tropical Fishy!

Hello Scrapping Cottage Friends!

It is Pam on the blog with you today!

We have a brand new release of dies in the online store.  This selection of dies features Pirates and Sea Creatures! There are 14 awesome designs in the collection and you are going to want each and everyone of them!!

Now onto todays card.  It has been really hot in Arizona. So the water in this picture makes me want to jump into our pool!!  I have been making a ton of hello cards lately because so many of my friends are still unable to travel.  I sure miss seeing them!  I am praying that this virus will soon just go away!

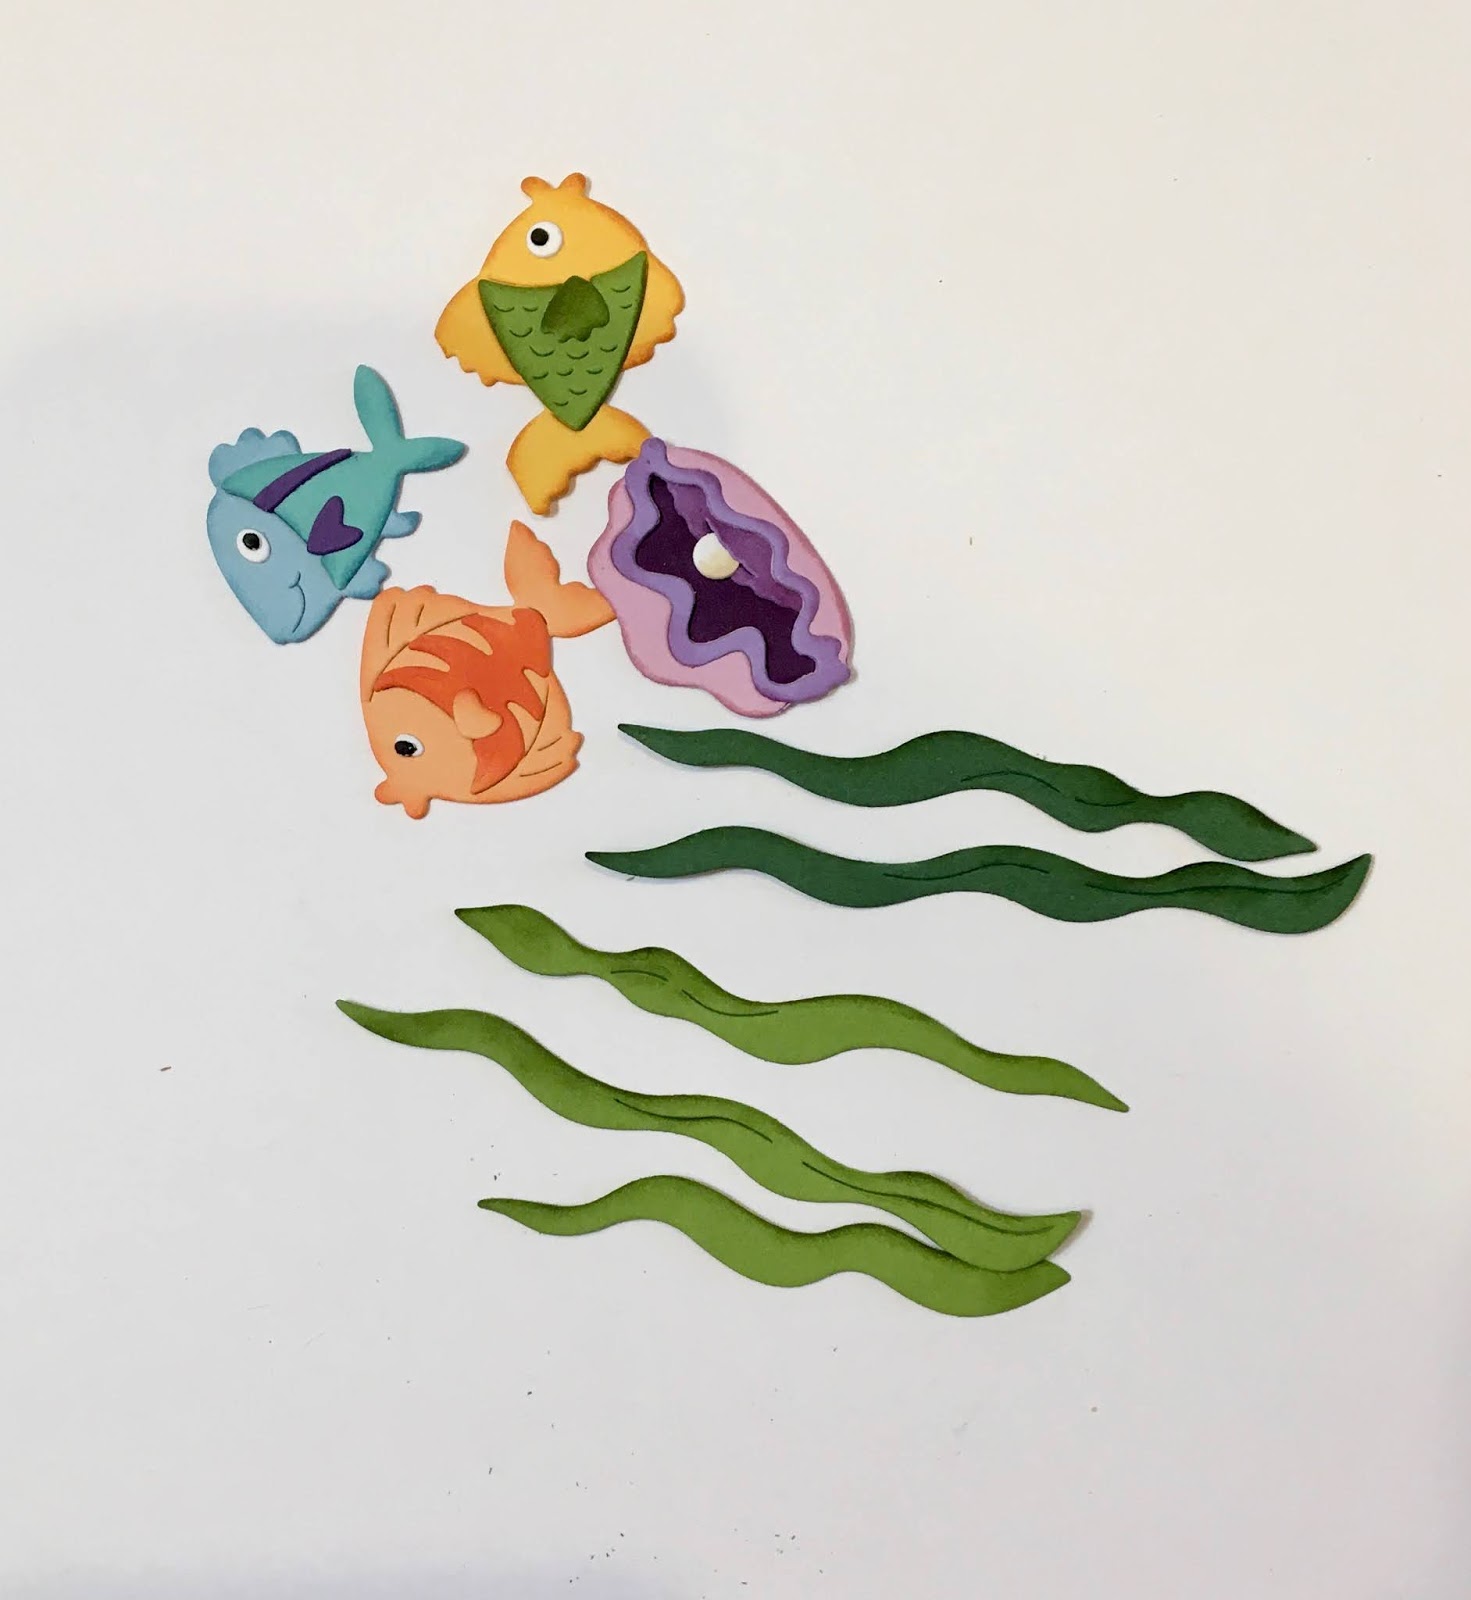
I am highlighting the new Tropical Fish die.  I love using bright colors and the tropical fish are perfect for these vivid colors.

 Background Photo by Sime Basioli on Unsplash

Design Steps:
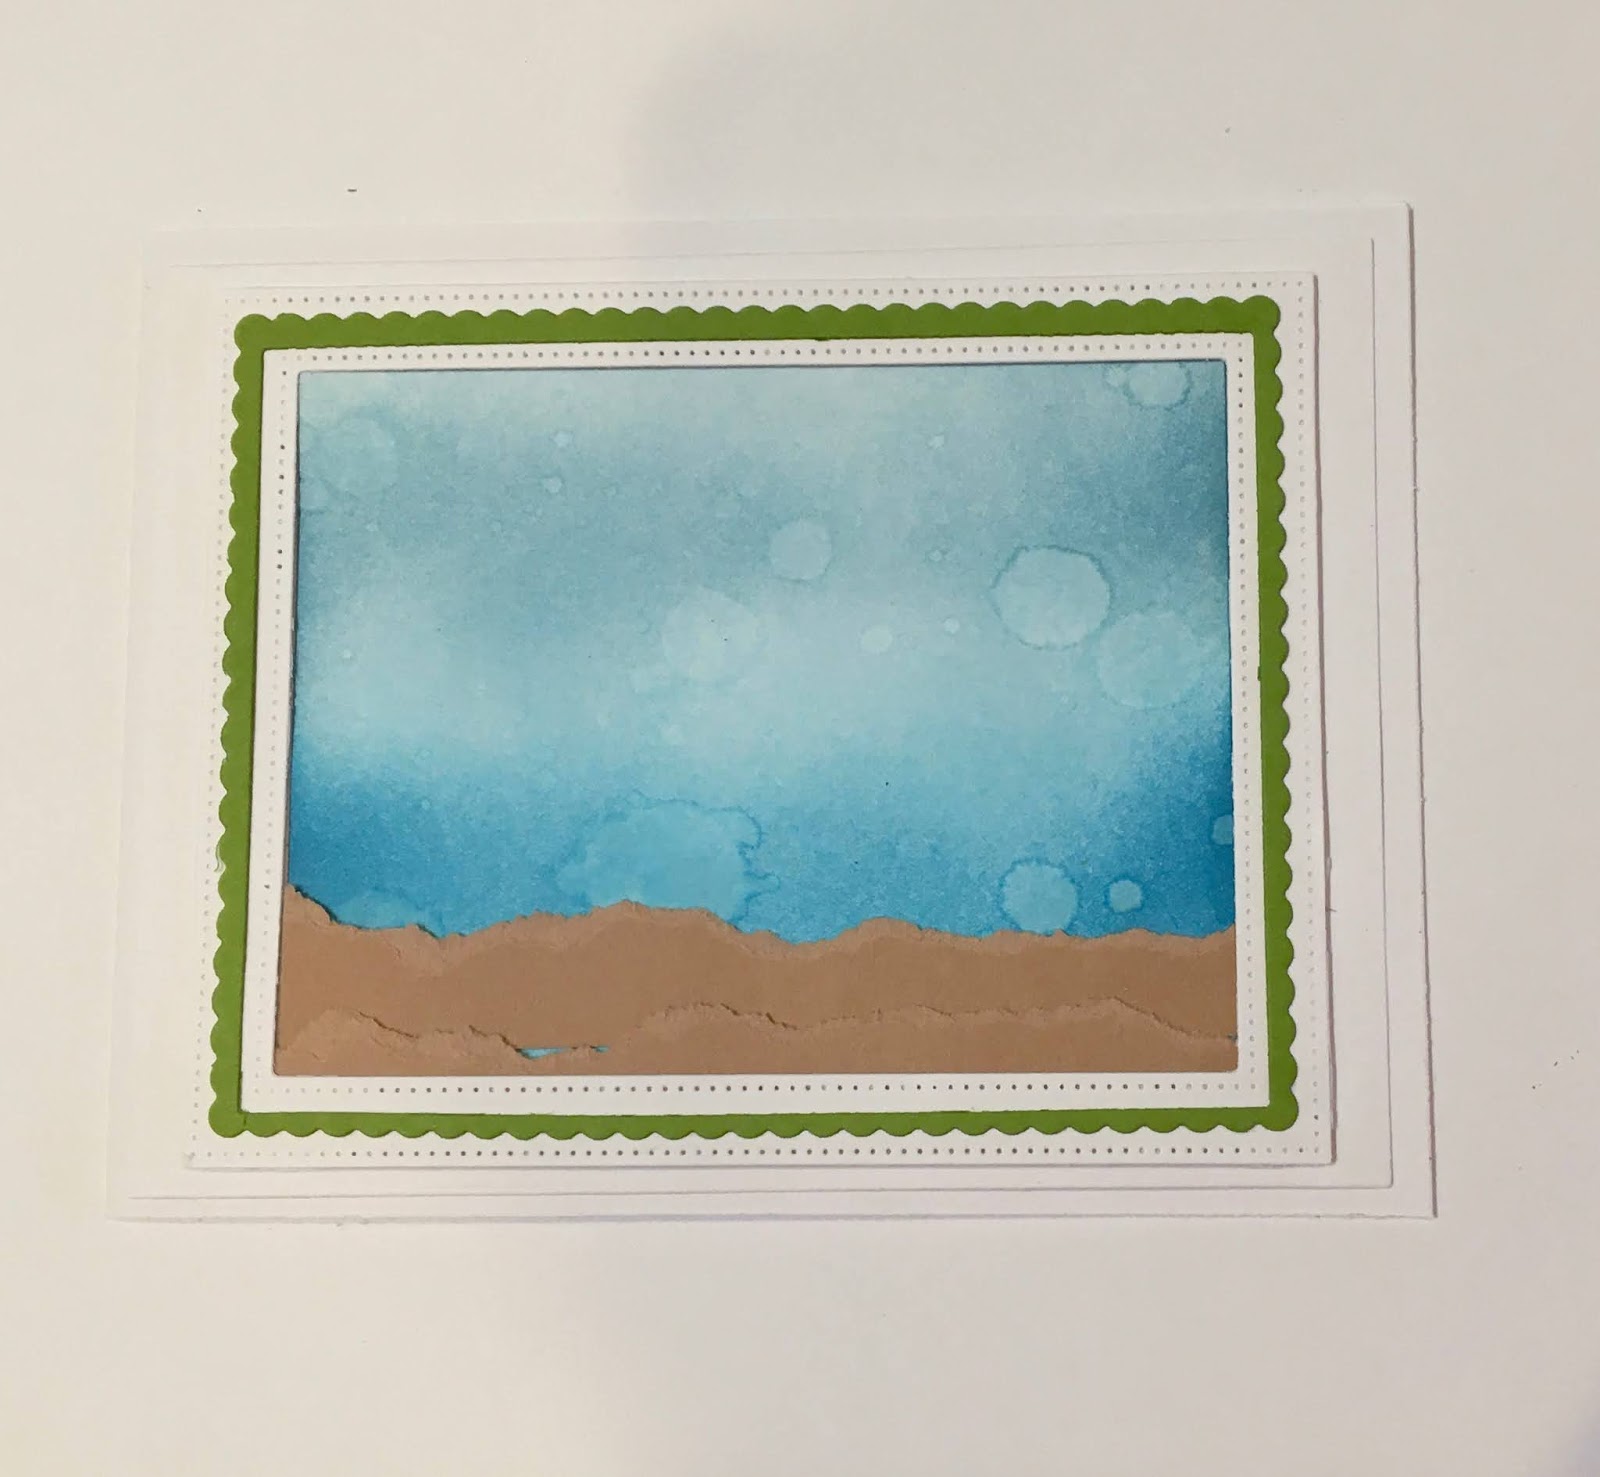
1.  Use and A2 white card base, a piece of white card stock 4 x 5 1/4, white frame cut with the largest of the Stitched Wide Rectangle Frame dies, a piece of green card stock cut first with the largest of the Scalloped Rectangle dies and then the center cut out with the largest of the Pierced Rectangle dies.  This will give you a piece of green scalloped trim
2.  On the piece of white card stock use 3 different TH blues inks to create the ocean.  Next spray with water to create the bubbles.  Use a piece of 2 1/2 x 4 inch brown card stock torn in half to create the sand.  I glued one piece to the blue inked card stock and the other to the back of the frame. Glue the green trim to the front of the frame

3.  Glue the blue inked piece directly to the card base.  Place dimension tape on the back of the frame and then adhere on top of the blue inked piece
4.  Using the Tropical Fish die cut out all of the pieces.  I used blue, teal, purple, light green, dark green, white, light purple, dark pink, orange, dark orange and yellow
5.  Shade the pieces using a variety of inks and then assemble
6.  Arrange onto card base and glue down some of the pieces and use pop dots on others.  All of the fish have pop dots behind them.  Stamp the sentiment and add glossy accents to the pearl.  Your card is complete!
CottageCutz Productions
   

Thanks for making my day by stopping by!  I hope you have time to be creative!
Blessings
Pam

Wednesday, July 15, 2020

Birthday Fishes

Hello!  This is Sukie and today I'm sharing a fun card for my design team day.  I couldn't resist creating another under water card with the new Pirate die release.
I couldn't help but use a variety of dies for this under the sea card. The Seahorse and Tropical Fish die set are from the new release. I only cut out the seaweed from the Tropical Fish die set and intertwined it in the net from the Paddles and Rope Ladder die set. The Ship's Wheel was cut out as an embellishment for my card.
The background of my card was created with a combination of Oxide Inks which was heavily splattered with water.  I also cut out the largest circle from the Pierced Wide Circle Frame Set for a monochromatic color theme on my card.
To build my card, the net with the seaweed was nestled inside the circle frame.  The paddle was angled across the top of the circle along with the seahorse.  I love how the seahorse pops against the card base and the other die cuts.
I then added all of the starfish to the net and a couple of them to the paddle.  The ship's wheel was added as a fun embellishment.
Of course, I had to incorporate the school of fish randomly on the background of my card.  The embossed sentiment finished off my card.
Here are the die set used on my card, available in the store:


Monday, July 13, 2020

Pirate Monkey!

Hello Scrapping Cottage Friends,

It is Pam on the blog today!

I am so glad you have stopped by.  This new release called Pirates and Sea Creatures is so much fun.  The cards I am making are so whimsical and just plain fun to create! Today,  I am highlighting the Pirate Monkey and Treasure Chest Island.  The monkey and island are just so detailed and amazing!

Just some quick info about the card.  I used an A2 blue card base.  Cut a circle using the Pierced Circle Set in a 4 x 5 1/4 piece of white card stock.  Place a piece of white card stock behind the circle and brush in 3 different blue inks to create the ocean.  Next I shaded and assembled all of the pieces and then arranged and glued them to the card.

CottageCutz Products


Thanks so much for popping by!

Blessings
Pam


Sunday, July 12, 2020

Happy Birthday

Hi!

It's Anja here. My new dies are still on its way, so I'm still combining dies from previous releases. This tame I made a birthday card with a cute puppy sitting on a sofa chair.


For this card I used:
- Cottage Cutz dies (Puppy & Kitty on Chair, Doghouse w/Pup & Hydrant, Happy Birthday Cupcake),
- Distress Inks,
- white card base (10,5x15 cm),
- white card stock for die cuts,
- background stamp (bricks),
- black pen,
- white pen,
- paper glue.

First I cut and colored the puppy and the sofa chair.


Next I did the same with the sentiment. I cut off the cupcake using the scissors.


I did the background with a brick themed stamp.


And when all the pieces were ready I adhered the card together.


Thank you for stopping by.

See you again next week.

Anja Z.


Cottage Cutz dies I used:


Saturday, July 11, 2020

Oceans of Love

Hello Scrapping Cottage friends! Thanks for taking the time to stop and visit with us today. It's Mary Marsh here bringing you the Saturday edition of the Blog.

We have a brand new release of dies in the online store. This one is all about the sea with Pirates and undersea creatures. There are 14 new whimsical designs and each one is cuter than the next. These cards would be ideal for so many occasions. The DT has been sampling these new dies for a variety of occasions. So check back through the Blog if you need some inspiration.

For my card today, I am featuring the new Jellyfish & Octopus dies and I created a whimsical birthday card for a little boy who is turning 6. So let's get started with some details on how I created my card.

Design Steps:
Since I knew I was created a sea themed  card, I started by selecting my designer paper. I have this sea themed collection and this particular piece just looked like wave movement to me. I thought it would work well for an underwater scene.

Mint Macaron Card Base: 4 3/4" x 5 3/4"
Designer Paper Layer: 4 1/2" x 5 1/2"
Next, I cut my jelly fish in mint macaron and sponged his tentacles in the same shade of ink for a color gradient. The octopus is cut from a fig designer paper. I liked the texture it gave the image.
For my sentiment I decided to use a combo of a die cut + a stamped sentiment. The Sending phrase is from an older CottageCutz die- Sending Hugs.  I cut it in a fig cardstock

Now that all my card elements are cut, I am ready to start card assembly. I attached the jelly fish and octopus with dimensional adhesive to lift off the designer paper and give a bit of depth. Stamped the sentiment in a fig ink 3x using my MISTI tool.

 and attached the Sending Phrase with Ranger multi-medium matte.  

I thought I still needed something on the bottom right corner, so I added some sea greens, star fish and another small fish. These are from the Mermaid die. Attached the image panel to the mint card base and my card is complete. 

That's it for me for this post. See you next Saturday! 

dies I used to create card: