Friday, October 11, 2019

Believe

Happy Friday morning Cottage Cutz fans!  It's Jeanne sharing today and I have a Christmas card for the dog lovers in your life.  The little pup who lives in this dog house must have made the nice list because Santa left a new bone in his food bowl!
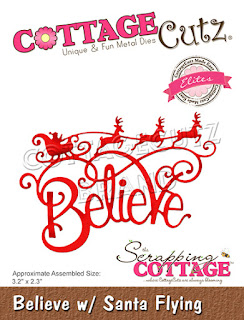
To start the card I cut all the pieces from the Christmas Pup w/Doghouse die using white cardstock.  I also cut the star, dog bone bow and ornaments from gold foil cardstock.  I used the same gold, backed it with an adhesive sheet and cut the Believe w/ Flying Santa. (I somehow forgot to take a picture of that!)
Using sponge daubers and ink I colored the pieces.  I used two shades of green on the tree and two shades of brown on the doghouse.
I assembled the pieces on a silicone mat.  I do this so that if I have a little glue on the back of my pieces it won't stick to the surface underneath.
For the card design I used this sketch from Splitcoaststampers.  I keep a book of sketches in my craft  room so that I have some go to layouts if I need them.
https://www.splitcoaststampers.com/forums/card-sketches-f41/sketch-challenge-744-4-10-19-a-t628691.html
I used a card base of Mossy Meadow and cut a 5.25 x 4 inch panel from the dark red grid paper and a 4 x 1.75 inch strip from the plaid.  The dark red panel is 3.25 x 4.25 inches.
I wanted to create a backdrop for my dog house and tree. I cut a piece of 3 x 4 inch white cardstock and used a Post-It note to create a stencil.  I free cut a curve at the top sticky part. 
Using a sponge dauber and navy ink I was able to create a sky.
Assembling the card was super fast at this point.  It always helps to use plaid and/or grid paper.  You know easily when things are straight and placement is quick! 
Since I knew that the sentiment would overlap some of my patterned paper I moved my plaid panel up from where it is in the sketch.  I didn't think the gold would stand out much on that pattern.
I carefully cut the flying Santa and reindeer apart from the word and adhered them to the card.  The tree is glued directly to the card and I used foam dots to pop up the dog house and bowl.

Dies:
http://www.scrappingcottage.com/cottagecutzchristmaspupwdoghouse.aspx
http://www.scrappingcottage.com/cottagecutzbelievewsantaflyingelite.aspx

The Christmas Release Part 2 is now available at the online store and the design team will be showcasing those dies in the near future.  Check out all the great Christmas dies from both releases!

 Thanks for stopping by - have a creative weekend!


Thursday, October 10, 2019

Bringing Home the Christmas Tree!

Hello to all of You!

It is Pam sharing with you on the blog today.

Guess what!!!  Part 2 of the new Christmas release is out and ready for you to take a peek.  Just go to our online store to check it out.  You will not be disappointed.  It is fantastic and I can't wait to start to play with all the new dies.  Be looking for the Design Team inspiration coming soon.

For today,  I am using one of the dies from the Part 1 new Christmas release.  It features two adorable penguins!


Design Steps:
 1.  Using the Penguin's Christmas Tree die cut out all of the pieces using green, red, yellow, black and white card stock
 2.  Shade and assemble the pieces.  I shaded with a sponge and different color inks to match the items being shaded
 3.  For the base use white card stock size A2.  Cut a piece of Red card stock 5 1/4 x 4, a piece of green checked DP 5 x 3 3/4. Using the largest Nested Stitched Eyelet Rectangle die cut a piece of whtie card stock and run it through the dotted embossing folder
4.  Glue the green checked DP to the red card stock and then add the white rectangle.  Add the red ribbon by taping it to the back of the red card stock.  Last pop up the penguin die to the white rectangle.  Next glue to the white card base and add you sentiment.  To finish add a little sparkle to the hats with clear glitter and shine to the star with Glossy Accents.
CottageCutz Products

Thanks so much for taking time to stop by and visiting with us.  We really do appreciate it!  And please don't forget to check out the Part 1 and 2 Christmas release.
Blessing
Pam

Wednesday, October 09, 2019

From Our House to Yours

Hello!  This is Sukie and today I'm sharing this winter card.  My card was created with one of the new sets from the Christmas die release. The Santa Over Christmas Town die is so versatile for creating winter themed cards.
I cut out all of the pieces in white card stock to create a winter wonderland scene.  The snow border was fussy cut.  The background was created with some Oxide Inks and white paint splatters for a snowy look.
I accented the die cuts with some Stickles to add sparkly details to the the plain white pieces. The snow border was stamped with a sentiment from the Scrappy Moms (retired) A Holiday to Remember stamp set.
To create my winter wonderland scene, I adhered the snow border at the base of my card.  Santa's sleigh and the reindeer were anchored above.
I filled in the edges of my card with the trees and placed the house in between the trees.
The snowflakes were the finishing accents on my card.  I cut one of the snowflakes in half and adhered a half to each side of my card.
Here is the die set used on my card, available in the shop:

Tuesday, October 08, 2019

Polar Bears

Hi, Janja is here to share a new Christmas card with you.
I just can't resist to these cute polar bears.


CottageCutz dies: Polar Bears w/ Birch Trees, Stitched Square Set
card blank: 5.3 x 5.3" (13,5 x 13,5 cm), folded
white cardstock : 4.7 x 4.7" (12 x 12 cm)
patterned paper: 4.5 x 4.5" (11,5 x 11,5 cm)
white cardstock
colored ink pads
glue, double-sided adhesive tape, self-adhesive pads

Cut all the pieces out of white cardstock. Color them with colored ink pads.


Prepare a square of white cardstock. Die-cut a square into a white cardstock to get the frame. Use the second largest die of the set.
Emboss the frame with an embossing folder. I used a snowfall embossing folder.


Paste birch trees to the back of the frame and attach polar bears with self-adhesive pads.


Trim a patterned paper for a background.
Paste the background onto the back of the frame. Attach everything to the card front to finish.


Finally, I would like to invite you to visit the online store where both parts of Christmas dies are available.

Have a nice day.
Janja


Monday, October 07, 2019

Polar Bear Hugs & Kisses


Hello Scrapping Cottage friends! Thanks for taking the time to stop and visit with us today. It's Mary Marsh here bringing you the Monday edition of the Blog. 

We have the new release of Christmas Part 2 in the online store and they are all in stock and available for delivery. There are 34 new designs in this release. 

This release has something for everyone. So if you prefer a more religious tone to your cards- we have you covered. If you like a more whimsical design featuring Santa, reindeer, gnomes, moose or even a hot chocolate theme you will find some really cute dies. The DT will begin showing card samples using these dies shortly.

I actually do a combo of religious and whimsical for my Christmas cards. Today, for your viewing pleasure, I am going whimsical with the new Polar Bear w/Birch Trees die. It's from the Christmas Part 1 release. 

I started my card as I so often do with a sketch and my card colors in mind. This one would work perfectly to show some designer paper, a bit of embossing and ribbon. The card colors are from this weeks color challenge on Splitcoaststampers. The colors are berry burst, lemon-lime twist and balmy blue. They were made for the bear hats and the background sky. 
berry burst, lemon-lime twist, balmy blue

I cut the bear hats and scarves in the challenge colors. The birch trees are cut in a light gray cardstock. 
For the rectangle elements I dry embossed the designer paper with a birch tree folder.
The card background is dry embossed with a snowfall folder.
I placed my die cut birch trees on top of the dry embossed trees. I thought the background just added interest. 
I made this into a winter birthday card. My hubby's birthday is December 28th and I will give this to him. 

That's it for me for this post. I hope I have given you a bit of inspiration for a way to use this die. I will be back on Saturday with another card from these new Christmas dies.

die I used to create card:


Sunday, October 06, 2019

Christmas Bears

Hi!

It's Anja here. I have an adorable card for you today. This new polar bear die is the cutest and I this it will be one of my mostly used this holiday season.


For this card I used:
- Cottage Cutz dies (Polar Bear w/Birch Trees, Circle Set),
- Distress Inks,
- white card base (15x10,5 cm),
- white card stock for die cuts and background (14,5x10 cm),
- black pen,
- silver stars and glitter,
- laminating foil,
- laminator,
- black pigment ink,
- sentiment stamp,
- acrylic block,
- adhesive foam pads,
- double sided adhesive tape,
- paper glue.

First I cut and colored the bear and birch trees.


Next I used the laminator. I sprinkled stars and glitter between two sheets of laminating foil and put it through the laminator. I saw this technique on Jennifer's blog and it really gives you a nice effect.


Then I colored the sky directly on the card base.


I cut a piece of paper from white card stock for the background. Then I cut a circle out of it.


I used blue ink around the edges and glued birch trees on the back of the circle.


Then I stamped the sentiment on the front.


And when I had all the pieces I assembled the card together. I used double sided adhesive tape to glue the foil. And then I used adhesive foam pads to glue the background on the card base. And my card was done.


This is all from me for today. You have another Christmas release waiting for you in the store :)

Have a nice Sunday and see you again in a week.

Anja Z.


Cottage Cutz dies I used for this card: