Friday, July 12, 2019

You Gnome Me

Happy Friday!!! It's Jeanne today with another card using the Magical Garden dies.  This one features the cute little gnome an a tree stump.
The card came together very quickly, in large part because I used the sketch from this week's sketch challenge at Splitcoaststampers.
The first thing I did was pick the papers so I knew what colors I'd use for the gnome.  The panel is A2 size and I used the largest tag from the Mail Tag dies and the third smallest rectangle from the Stitched Rectangle set.  I had this cute sentiment which I thought worked perfectly for this little guy if I had him hold a rose instead of his lantern.
Once I had the panel, tag and sentiment cut out, I die cut the gnome from both white and vanilla card stock.  Normally I would just use the vanilla for everything but I needed a white beard so I used the white as well.
I ended up coloring him in a combination of regular dye inks, Distress Oxide Ink (the tree stump) and Copic markers (the small pieces - belt, rose, stem, etc.).  I used just a touch of the DO on his nose and cheeks for a rosy glow.
To get him to hold the rose I simply rotated his hand and snipped off part of the underneath part of the arm/hand.  When he was assembled I glued him to the tag.
I then assembled the card.  The tag is popped up using foam and I added the baker's twine to the top of the tag. 
Super quick and fun card to make!

Don't forget to stop by the online store today where there is a NEW RELEASE of Birthday Dies!!!! They are really cute and on sale for a limited time.  Be sure to visit the blog in the upcoming weeks for great inspiration with the new dies!

Dies used:
http://www.scrappingcottage.com/cottagecutzgnomeontreestump.aspx

http://www.scrappingcottage.com/cottagecutzstitchedrectanglesetbasics.aspx


Thanks for stopping by today.  I hope you have a fun and creative weekend!


Thursday, July 11, 2019

We've Moved!

Hi Scrapping Cottage Friends!

It is Pam creating with you on the blog today!

We have friends that are getting ready to move.  So I am making them this cute card in a set in 5.  It will be a fun little going away present.
I used the whimsical Cottage with a Petal Roof for this charming card.  In this release there are two tiny sweet cottages and plenty of fun little gnomes!

Designer Steps:
1.  Using the Cottage w/Petal Roof die cut all the pieces out in white card stock
2.  Color all the pieces with your favorite markers.  I used my Copic markers
3.  Glue the pieces together using a glue with a fine tip
4.  I like to arrange the pieces on my desk to see how I am going to place them on my card
5.  Cut out a rectangle using the Pierced Rectangle set the second from the largest.  I left the rectangle die in place and inked the sky and grass.  This technique gives you a crisp white border
6.  Arrange your little cottage and mushrooms onto the rectangle.  I popped up the cottage
7.  Use an A2 white card base cut a piece of purple card stock 4 3/4 x 3 1/2 and a piece of purple chevron DP just slightly smaller.  Glue them together and then adhere to the center of the white card base

8.  The pierced rectangle with the cottage on it needs to be layered with a piece of purple card stock just slightly bigger then the rectangle and then popped to the center of the DP on the white card base as shown below.  Add your sentiment and your card is complete


CottageCutz


Thanks for stopping by and be watching our site for the new Birthday Release!  These dies will make your birthday cards so unique and special!
Blessings
Pam


Wednesday, July 10, 2019

Have a Fairy Nice Day!

Hello!  This is Sukie and today I'm sharing a card created with the new Magical Garden dies.  The fairies and fairy gardens in this release are absolutely adorable and are perfect for creating a princess themed card.
I die cut the pieces from the new Sweet Fairy and Mushroom Garden die sets.  Some chalk on the cheeks and Glossy Accents to the fairy's eyes gave her a more realistic appearance.  All of the die cuts were shaded with Oxide Inks.
I created my card by using some fun techniques to create the background.  I used 2 different Oxide Ink colors and covered each half of my card with the ink.  I didn't spend too much time on blending the 2 colors knowing the next couple of steps in my process would take card of that.
Next I added droplets of water all over the ink which lightened the colors and gave my card base a more blended appearance.
I splattered a bit of white paint on the background of my card to resemble pixie dust.  A sentiment from the Scrappy Moms (retired) Happily Ever After stamp set was heat embossed in the corner of my card.
I added the Mushroom Garden elements along the bottom edge of my card.  I anchored the fairy to have her floating above the garden.  I couldn't resist adding a bit of bling as a finishing accent.
Here are the die used on my card, available in the shop:

Sunday, July 07, 2019

Sleepy Gnome

Hi!

It's Anja here. Hope you're doing well and that vacation is coming for you soon. I'll have to wait till August for two weeks off.

I have a simple card for you today. Using a sleepy gnome die.


For this card I used:
- Cottage Cutz die (Sleepy Gnome w/Mushrooms),
- Distress Inks (Wild Honey, Mustard Seed, Spiced Marmalade, Barn Door, Fired Brick, Antique Linen, Pumice Stone, Stormy Sky, Faded Jeans, Peeled Paint, Brushed Corduroy, Black Soot, Tattered Rose) and Oxides (Broken China),
- white card base (10,515 cm),
- white card stock for die cuts,
- water spritzer,
- silver acrylic paint,
- heat gun,
- brush,
- paper glue.

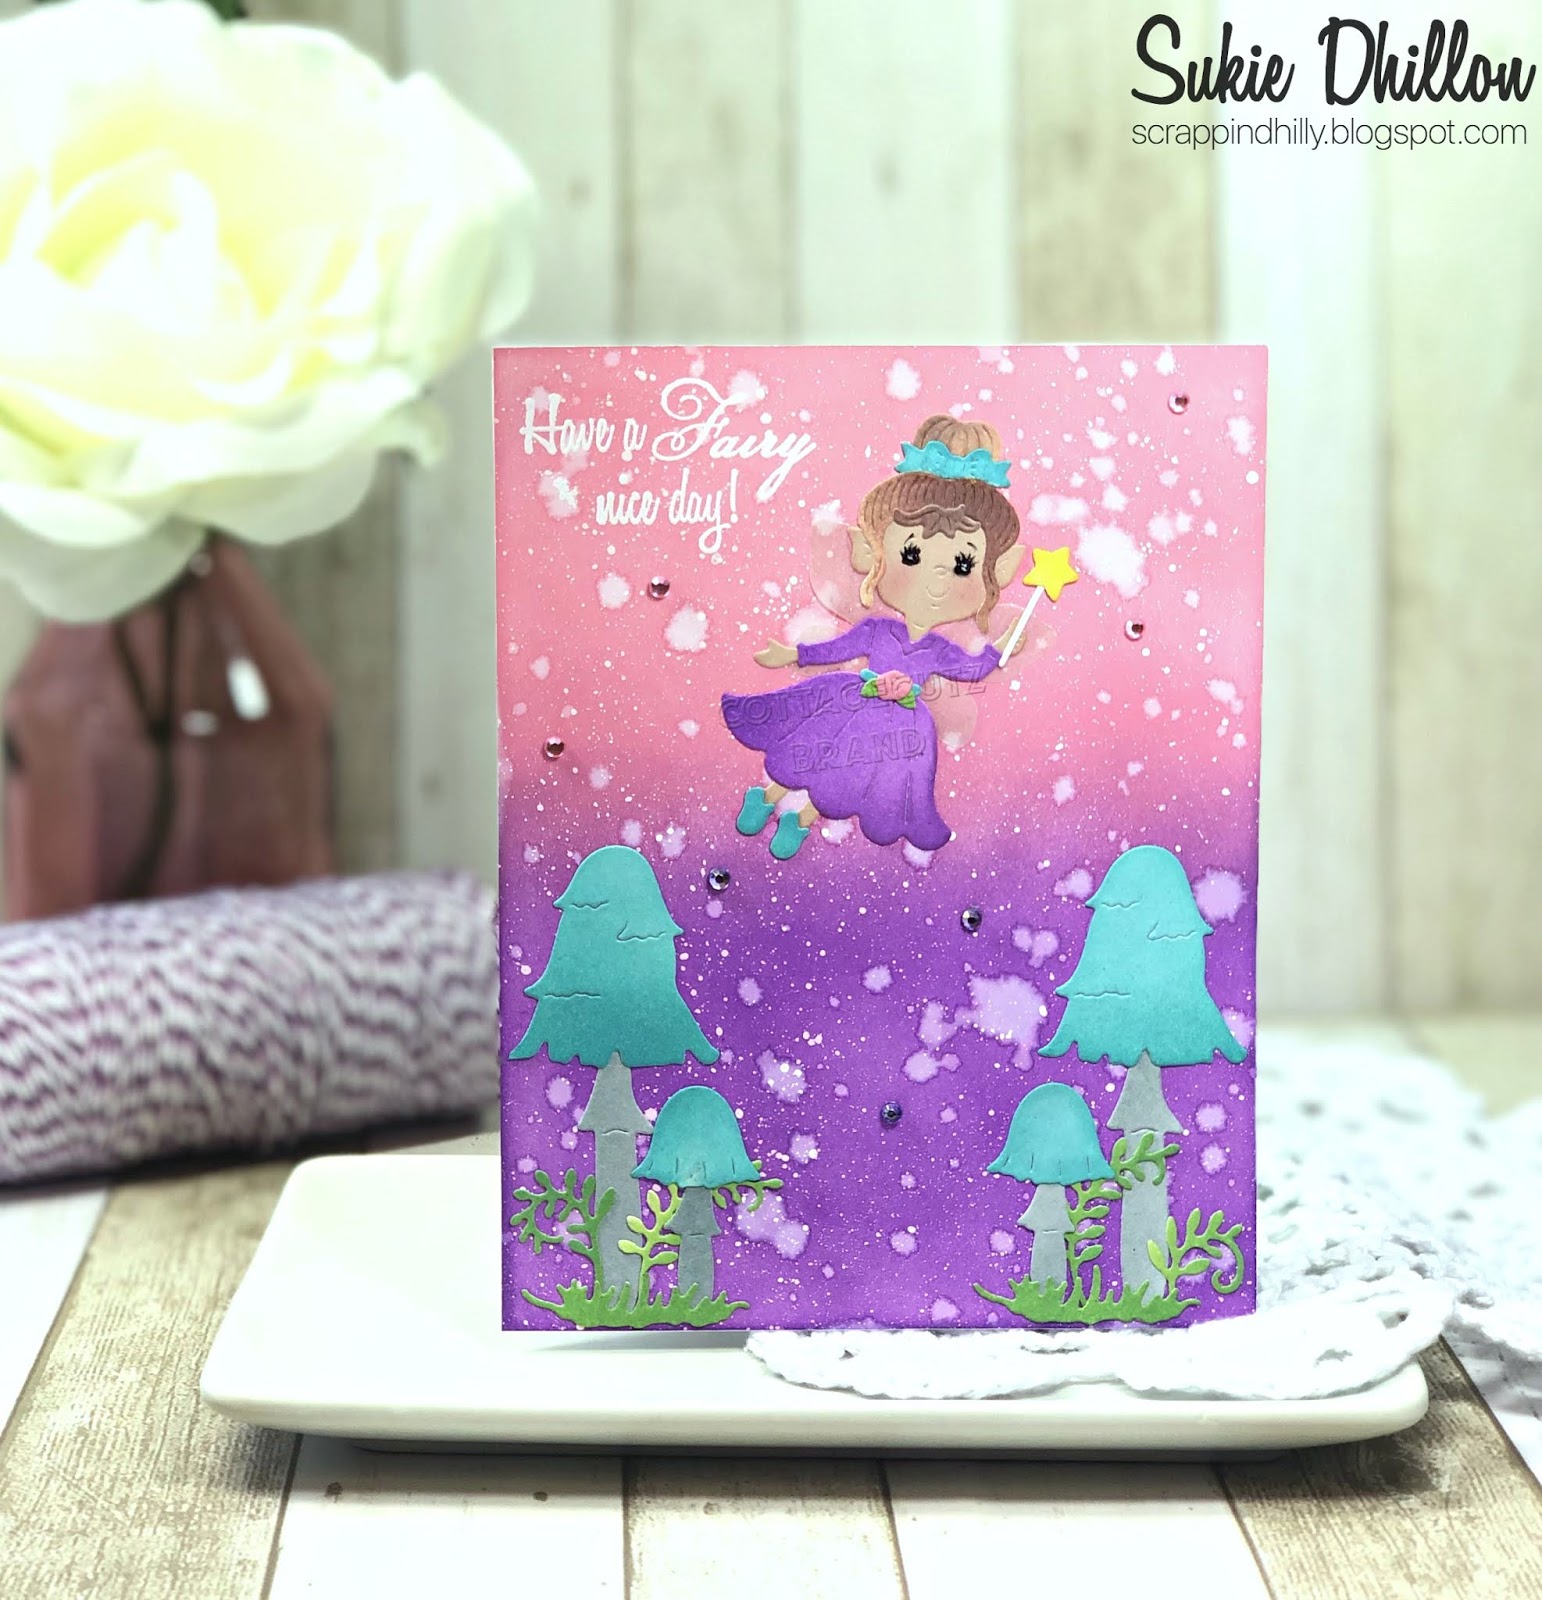
First I cut and colored the gnome.


Next I made the background. I colored directly on the card base, using Distress Oxide.


After that I spritzed some water drops over it and dried it with the heat gun.


Newt I spritzed some silver paint over it and again dried it with the heat gun.


And in the end I just adhered the gnome and my card was done.


Have a nice Sunday and see you again next week.

Anja Z.


Cottage Cutz die I used for this project:


Saturday, July 06, 2019

Gnome Sending Birhtday Wishes

Hello Scrapping Cottage friends! Thanks for taking the time to stop and visit with us today. It's Mary Marsh here bringing you the Saturday edition of the Blog. 

The new Magical Garden dies are the latest release from CottageCutz.  There are 14 new designs and they are currently on sale at 25% off. If you love fairies, fairy gardens, gnomes and flowers, you will love these dies.  Today, I am featuring the new Gnome on Tree Stump die. 

The Gnomies in this release are so cute, and I thought he would make a great birthday card. I wanted it to lean more toward the masculine side because that's my intended recipient.  But, with the colors I used it could be a card for a kiddo or a gal. My card idea took so many turns from what I intended but in the end I was satisfied how it turned out. Let's get started with some details on how I created my card. 

Step 1: I decided to cut the gnome first. I used bright cardstock because even though this is a guy card, it doesn't have to sport dull colors. My intent was to use a white background as the image panel but that was one of several changes. 
So instead of a white background for the image panel, I went with seafoam green designer paper. The plain white background was just to stark for my liking.  I layered the designer paper on seafoam green cardstock and my card base is rich razzleberry. 
 
Rich Razzleberry Card Base: 4 1/2" x 5 3/4"
Seafoam Green Layering Panel: 4 1/4" x 5 1/2"
Designer Paper Panel: 4 1/8" x 5 3/8"

I cut my wish sentiment using the Stitched Alphabet die. The heart balloon is part of the Fairytale Birthday die. The streamers are from the Birthday Birdies die. This die is on sale at 70% off. 
Step 2: I am ready to start card assembly. I adhered the designer paper to the seafoam green layering panel with double sided tape.
I decided to stamp a sentiment in addition to the Wish Phrase on my card. This was another change. I used my MISTI for placement and just in case I needed to ink twice. Which I did on all 3 stamps. I pulled the sentiments from 3 different stamp sets. Used rich razzleberry ink for stamping. 
 I placed the gnome on my image panel using dimensional adhesive. I didn't want him to far down and also I wanted his feet to be on top of the letter S.
Attached the Wish phrase with double sided tape. 
Added the heart balloon and birthday streamers using Ranger multi-matte adhesive. I decided not to use the green metallic streamer. I didn't think the green matched with the background. This was another change. 
To complete my card, I added the image panel to the card base. Well, that's it for me for this week. I hope I have given you another idea on a way to use Gnome on Tree Stump die. See you next Saturday! 

As a reminder there is a big 4th of July sale going on in the online store with savings up to 70%. Check it out here
dies I used to create card: