Saturday, August 24, 2019

Baby Animal Cupcakes Birthday

Hello Scrapping Cottage friends! Thanks for taking the time to stop and visit with us today. It's Mary Marsh here bringing you the Saturday edition of the Blog. 

The new release of Birthday dies have been restocked in the online store. So if you didn't get the ones you wanted previously, all 25 designs are in stock. This release is filled with cute little whimsical animals, birthday cakes, cupcakes and birthday phrases. Everything you need to create some outstanding birthday cards.

Today, I am featuring the Baby Animal Cupcakes die and created a birthday card for a little girl. So let's get started with some details on my card.

Step 1: I had this sketch pinned on Pinterest and thought the circle layout would work well to display my 3 cupcake images. I would be able to use ribbon and add a sentiment.

I chose this pretty pink designer paper for the card background. Little girls and pink -how can you go wrong. I paired that with matching pink (blushing bride) cardstock and my card base is a bright bold pink (melon mambo).

melon mambo card base: 4 1/2" x 5 3/4"
blushing bride layering panel: 4 1/4" x 5 1/2"
designer paper panel: 4 1/8" x 5 3/8"
stitched circles: 5th largest die ( 2 1/4")
I cut the baby animal cupcakes in shades of cardstock just following the colors of the packaging. I used melon mambo, pretty in pink, powder pink, granny apple green, gorgeous grape and ivory.
Next, I cut the Make A Wish sentiment and the candle. I decided not to use the balloon because it seemed a bit to busy with that element.
Step 2: Now that all the card elements are cut, I am ready to start card assembly. I attached the designer paper to the pink layering with double sided tape. I placed my circles with the same adhesive and then added my ribbon.
Added my cupcake images to the circles also using double sided tape.
 The sentiment was added with Ranger multi medium matte. I like this adhesive because it dries clear.
To complete my card, I attached the image panel to a melon mambo card base. I thought the right lower side of the card needed something small added just to balance the card. I used 2 metallic enamel dots in granny apple green. I added a 3rd one where the 2 lower circles intersected for the flower element of the sketch.
Well, that's it for me for this week. See you next Saturday!

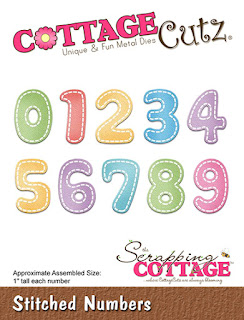
Dies I used to create card:


Friday, August 23, 2019

Back to School Bus

Happy Friday everyone!  It's Jeanne posting today with a card that celebrates that most wonderful time of the year - back to school! This card is perfect to commemorate the first day of school.  I used the sentiment "ABC, 123" but you can also swap that out for "1st Day".  Since I don't know any wee ones who were having a "never-been-to-school-before" first day, I chose the more general sentiment.
 I used the Party Animal Bus from the new birthday release and cut out the pieces in various shades of browns and grays - a great way to use up scraps.  I used a dark yellow and a silver for the bus.
Using a fine tip multi-liner pen, I completed the eyes and noses on the critters and glued them together.
I cut the numbers and letters from primary color card stock using the Stitched Letters and Stitched Numbers dies.
This card is a little larger than usual.  It's an A6 - 4.5 x 6 inches.  I stared with a piece of black cut to 9 x 6 and then scored it in the middle for my top-fold card base.  Using wood look paper, I cut four strips .5 x 6 inches (the paper was 6 x 6 inch paper).
I glued two strips to the sides and snipped off the ends (so I didn't have to measure!)
Then I glued on the top and bottom strips, forming my school slate.
The bus went on next with all the animals.
Finally I added the ABC, 123, the bow and enamel dots in all four corners as nails or rivets.  I used foam dots to adhere the fenders over the wheels and wheel wells.

Dies:
http://www.scrappingcottage.com/cottagecutzpartyanimalbus.aspx

http://www.scrappingcottage.com/cottagecutzstitchednumbers.aspx
http://www.scrappingcottage.com/cottagecutzstitchedalphabet.aspx

Thanks for stopping by today and have a fun, creative weekend!

Don't forget to stop by the online store where there is a sale going on for a limited time on select Stamp & Die designs.


Thursday, August 22, 2019

Little Boy's Birthday

Good Morning Scrapping Cottage Friends!

It is Pam on the blog creating with you today!

Both of my nieces had little boys and they will be turning 3.  I can't believe how quickly time flies.  It seems like those sweet boys were just born yesterday!  So anyway I am making a fun little card for both of my active little great nephews.  Also before I get on with today's card.  We have a huge sale on our stamp and die sets.  Check out my link below.

Designer Steps:

 1.  I started off with an A2 gray card base.  Then I ran a piece of vanilla card stock 5 1/4 x 4 through an embossing folder that had gray ink on the impression lines.  I then added gray ink onto the edges of the vanilla card stock.  Stamped the balloon and Happy Birthday in navy ink.  Glued it to the card base
 2.  Using the Birthday Puppy Die cut the piece of the pup in dark gray and light gray
 3.  Shade the pieces using a black ink.  Color the nose and collar with black marker then assemble
 4.  Use the Birthday Puppy die and cut out the hat and cupcake in navy, red and yellow
 5.  Shade the pieces and then assemble
 6.  Use dimension tape and pop the pup and cupcake to the card.  Add the sequins and your card is finished
CottageCutz Products

Before I close make sure you check out the 70% off sale! Yes, I said 70% off the stamp and die sets in our store.  It is a fantastic buy.  Maybe it is time to stock up for those surprise Christmas and Birthday Gifts!
Well that is it for today!  I hope you can take sometime out of your busy schedule and get crafty!
Blessings
Pam


Wednesday, August 21, 2019

May Your Day Bloom with Happiness

Hello!  This is Sukie and today I have a card to share featuring the Magical Garden dies.  This whimsical scene was created with the Flower Pot House die set.
This die set has so many detailed pieces that come together to create the adorable Flower Pot House.  I also cut out the Picket Fence Border to coordinate with my other die cuts.  Everything was shaded with some Distress Inks.
The picket fence was trimmed on the edges so it would fit along the base of my card.  I created a sign by stamping a sentiment from the Scrappy Moms (retired) Flower Power stamp set on some card stock.  After punching a couple of holes on the top corners, I tied some Totally Natural Trendy Twine to finish off my sign.
I created the soft background by inking my card base in a couple of different colors.  The picket fence was added to the bottom portion of the card base.  A couple of flowers were tucked into the fence posts.
The Flower Pot House was anchored perfectly between the picket fence pieces to create a whimsical scene.
The sign was adhered at an angle above the pot.  A flower shaped brad was perfect for holding up the sign.
Here are the dies used on my card, available in shop:

Tuesday, August 20, 2019

Party Pony - interlocking gatefold card

Hi, Janja is here with you.
I have another birthday card for you today. I found the idea for this card in an animated fantasy movie - My Little Pony.


- CottageCutz dies: Party Pony, Birthday Cupcake w/Roses, Happy, Birthday
- white card base: 5.90" x 5.90" (15 x 15 cm), folded
- patterned paper: 5.6 x 5.6" (14,2 x 14,2 cm)
- colored cardstock
- colored ink pads
- white gel pen
- double-sided adhesive tape, glue

Cut a pony out of colored cardstock 5 times.


Sponge a sheet of white cardstock with colored pads and cut out the Happy Birthday sentiment.


Prepare the card base.


Cut the frame using square dies. Once from white cardstock and once from patterned paper. Outer size is 4.25 "x 4.25" (11,5 x 11,5 cm).
We will also use both interior squares.


Trim patterned paper twice. Cut out the cupcake.


Attach the patterned paper and both frames to the card base as shown.


Now all we have to do is paste the ponies, the sentiment and the cupcake.


To close the card easier, I later cut off with a corner puncher lower left corner of the center square.


Have a nice day. 
Janja