Thursday, May 09, 2019

Birthday Wishes!

Good Morning Crafty Friends!

It is Pam creating with you today on the blog!

I have a ton of birthdays in the summer months so I am getting started.  The Fairytale Birthday die has a number of cute items that are perfect for all different kinds of birthday cards.  The Magical Fairytale dies are still on sale at a big 25% off! Check it out here!
Design Steps:

 1.  Using the Fairytale Birthday die cut out 3 cupcakes using light green, blue, pink and light yellow. Also cut out 3 white squares using the Double Stitched Square die the 4th from the largest
 2.  Assemble the cupcakes and apply Glossy Accents to the icing then add clear glitter
 3.  After the icing is dry add yellow stickles to the flames
 4.  Pop up the cupcakes to the squares
 5.  Use an A2 white card base, a slightly smaller piece of light blue, and  a slightly smaller piece of DP.  Glue the blue to the white card base then glue down the DP.  Cut a strip of light blue card stock 5 1/4 x 3/4 glue it to the center of the card
6.  Use Versa Mark and white embossing powder to create the sentiment.  Pop up the squares to the card front and sentiment as shown


CottageCutz Products

Thanks so much for stopping by!  I really appreciate it and love your comments!
Blessings
Pam

Wednesday, May 08, 2019

I Love You Like Unicorns Love Rainbows. . .

Hello!  This is Sukie and today I have a card to share created with the Magical Fantasy die release.  I'm so in love with the Unicorn Floral die, it has so many detailed die cuts.
After I cut out each of the pieces I shaded them with my Distress Oxide Inks.  I varied the shading to achieve a range of colors on the pieces.
To create the background of my card, I heat embossed a sentiment on some white card stock and used a die cut Circle to mask off a portion of my card.  The background was then inked around the circle which really made the sentiment pop.  Once I achieved the right amount of color, the die cut circle was removed from the background and discarded.
The unicorn was placed inside the circle and the circle border was used as a guide for placement of the greenery.  All of the flowers and greenery were adhered to surround the unicorn.
The open spaces were filled in with the smaller flowers and stars.  I added a couple of enamel dots on each side of the sentiment as a finishing accent.
Here are the dies I used on my cards available in the shop:


Tuesday, May 07, 2019

Somewhere over the rainbow

Hi, Janja is here with you.
I found an inspiration for today's card in a lullaby for babies. I made a baby boy card with sweet unicorns.


- CottageCutz dies: Rainbow With Clouds, Sweet Unicorns, Fairytale Castle (cloud), Clouds & Sun, Rectangle Set, Stitched Rectangle Set
- white card base: 4.25 x 5.5" (10,8 x 14 cm), folded
- patterned paper: 4 x 5.2" (10,2 x 13,2 cm)
- white and colored cardstock
- gray ink pad
- glue, double-sided adhesive tape, self-adhesive foam pads

From colored cardstock die-cut both unicorn. Add the shading on the edges with ink pad and brush. Put all the pieces together with a glue.


Die-cut the rainbow and clouds.


Trim selected patterned papers and a white cardstock.
With two differently large dies, first die-cut the rectangle into the patterned paper. Place it on a white cardstock and die-cut a smaller rectangle.
Paste the clouds into the background and attach the frame.


Now we have everything ready to finish the card.


Have a nice day. 
Janja


Sunday, May 05, 2019

Love You Mom


Hi!

It's Anja here. Unicorns are still on my minds and another unicorn card was done on my craft table. This one can be used for Mother's Day.


For this card I used:
- Cottage Cutz dies (Sweet Unicorns, Love You Mom Phrase, Nested Wacky Stitched Square Set),
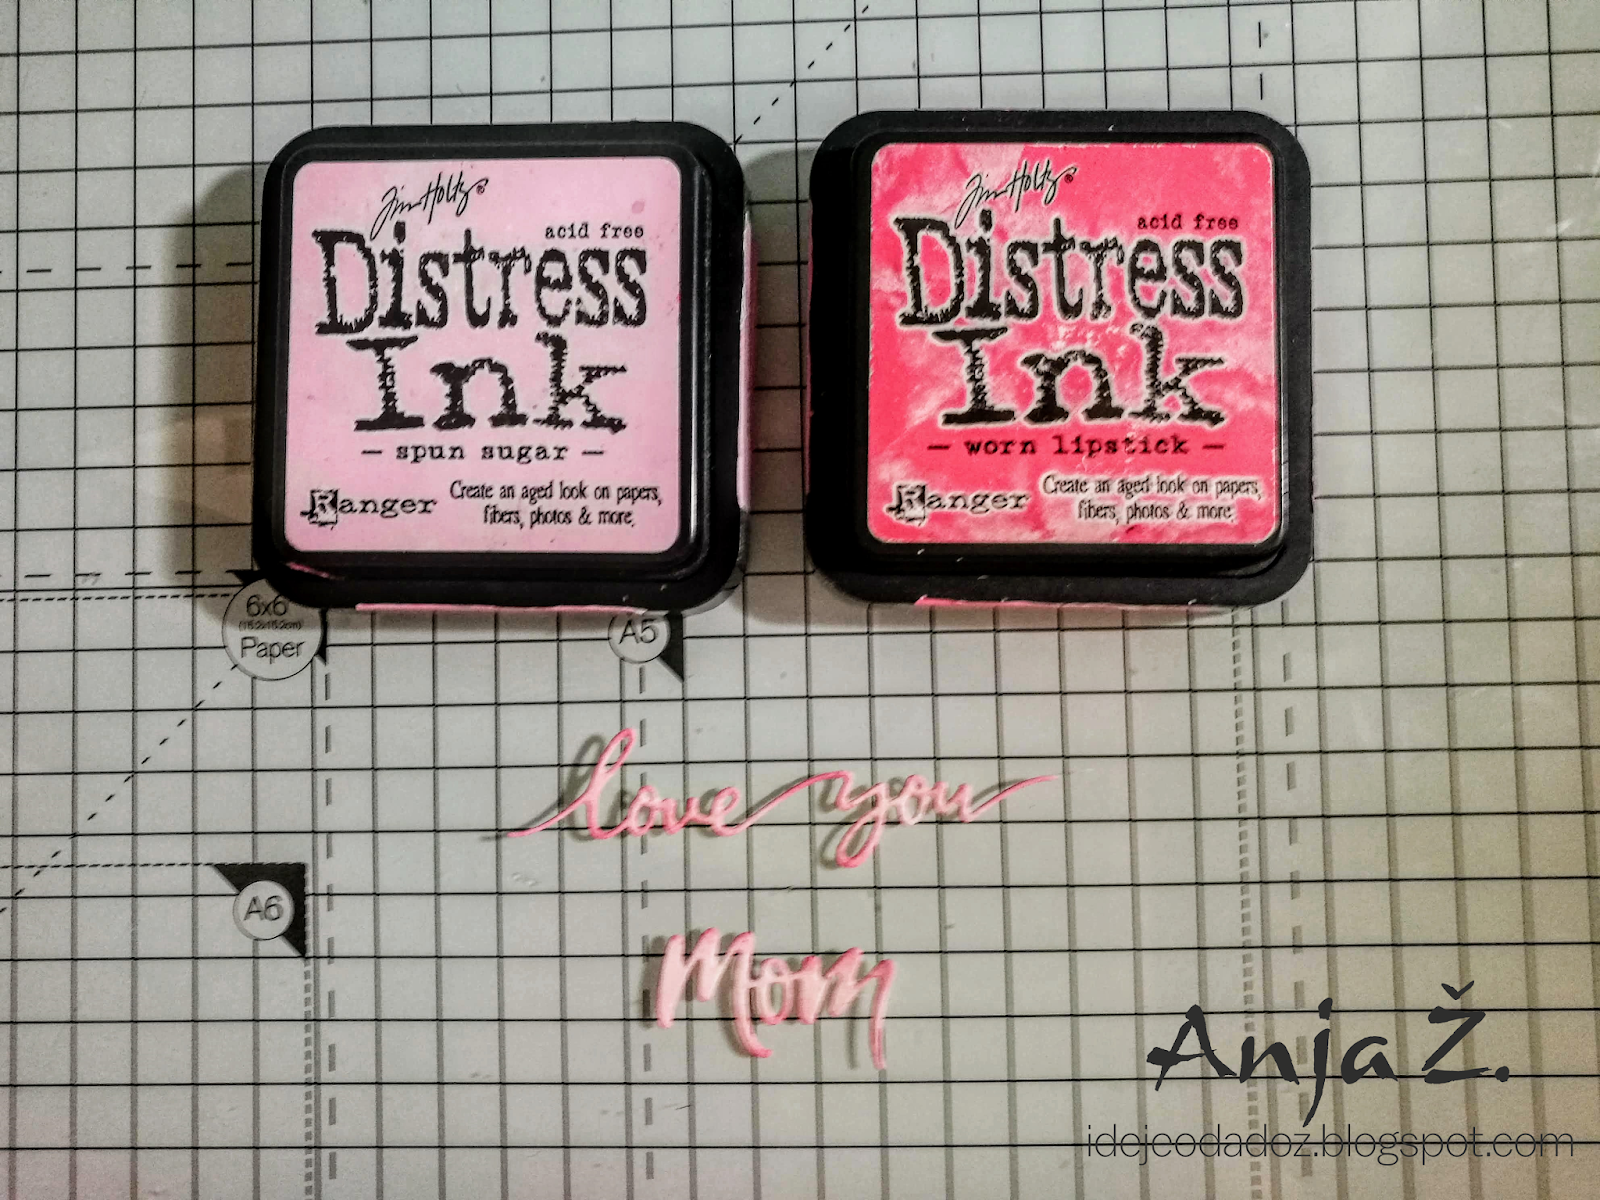
- Distress Inks (Hickory Smoke, Spun Sugar, Worn Lipstick, Pumice Stone, 
- white card base (15x15 cm),
- patterned paper for background (14x14 cm),
- white card stock for die cuts,
- gold pigment ink,
- VersaMark embossing ink,
- glitter embossing powder,
- heat gun,
- paper glue,
- adhesive foam pads.

First I cut the unicorns and embossed the wings and hair with glitter.


Next I colored both unicorns. I used gold ink for the horns.


Then I cut the paper for background. I used pink Distress Ink to color the edges.


Next I cut and colored the sentiment.


And when I had everything cut and colored I arranged it and glued it on card base. I used adhesive foam pads to glue the unicorns. And my card was done.


Before I go I want to invite you to the online store. Yesterday was National Scrapbook Day and there are still some sales going on. Don't miss all the great prices.

Have a nice Sunday and see you again next week.

Anja Z.


Cottage Cutz dies I used:


Saturday, May 04, 2019

You're My Happily Ever After

Hello Scrapping Cottage friends! Thanks for taking the time to stop and visit with us today. It's Mary Marsh here bringing you the Saturday edition of the Blog.

We have a new release of dies in our online store. If you haven't seen the Magical Fantasy release yet, you have to drop by the store and check it out. These new dies are all so cute and whimsical. There are 27 new designs and I am in love with everyone of them. 

The new dies are currently 25% off and in honor of National Scrapbook Day there is also a 60% off sale on select CottageCutz dies. 

Today, I am featuring the Knight + Princess Dress-Up dies. Check out the names of the princesses - Elsa, Snow White and Belle. When I saw these dies I immediately thought of wedding, anniversary or even a Valentine card. So this will be the card I will give my hubby for our anniversary. Let's get started with some details on how I created this clean and simple card.

Step 1: I decided to cut the knight and princess first so I could figure out the size on the layers. I went with the colors on the packaging for both images. Belle's dress matches the Knight's shield, banner and helmet decoration.
I colored her face and arms with Prismacolor pencils.
I then decided on my card colors. I bought this paper pack from Hobby Lobby that has cardstock that has a watercolored look to it. I chose one of the blue sheets. I wanted a green slope on the card front so I cut one from another sheet that had a green at the bottom. Layered it on white cardstock then my card base is the heather shade I used on the Knight & Princess.

Heather card base: 4 1/4" x 5 1/2"
white layer panel:  4" x 5 1/4"
image panel: 3 7/8" x 5 1/8"
With the help of my MISTI, I stamped my sentiment at the top of my designer paper panel in a grape ink. I got a good image the first time but I didn't think it was dark enough so I stamped it again. That's the beauty of the MISTI. I thought the sentiment was perfect for an anniversary card.
Step 2:  Now that the card elements are ready, I can start card assembly. Attached the grassy slope to the image panel with double sided tape. Then the image panel to the white layer.
My Knight and Princess Belle were attached with dimensional adhesive.
To complete my card, I added a few hearts and attached the card to the heather base. Well, that's it for me for this week. I hope I have given you some inspiration for a way to use both the Knight and the Princess Dress -Up dies.
See you next Saturday!

dies I used to create card: