Monday, November 19, 2018

Country Candle Easel Card

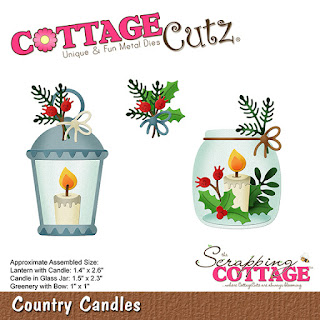
Hi, Lois here with my Monday card.  Before I start, I want to remind you that some of the CottageCutz dies are on sale -- some up to 70% off.  If you're still making fall cards, our new Autumn designs are still on sale at 25% off.  Check them out here.

It's hard to believe that Thanksgiving is this week -- and with that comes Christmas right around the corner.  I'm still making Christmas cards, and that's what I have for you today -- using one of the dies from the CottageCutz Christmas release as well as a couple of older dies.

As you may know, I love making fun fold cards -- today's is an easel card.


To start my card, I cut all the die pieces from white cardstock.


I lightly sponged the glass candle holder pieces with Ranger Distress Tumbled Glass ink.  The rest of the pieces were colored using Copic markers.  When they were all colored, I assembled my candle holder.


I then cut the cardstock and patterned paper for my card.

Red - 4 1/4" x 8 1/2", 4 1/4" square
Patterned paper - 3 1/2" x 3 1/2"
White - die cut the largest Pierced Wide Square Frame


The large red piece of cardstock was scored at 2 1/8" and 4 1/4".


After folding on the score lines, I placed some Scor-Tape on the first 2 1/8" x 4 1/4" panel.  This is where the square panel will be attached.


I then adhered the patterned paper to the square red panel and attached it to the folded base.


I placed foam tape on the back of the frame and the candle holder . . .


. . . and attached them to the card front.


At this point I decided I wanted to add another element to the card, so I cut some additional pieces from the die, colored and constructed a small sprig of foliage, and attached it to the upper left-hand corner of the frame.


With an easel card, you need something to act as a "bumper" to hold the easel erect.  I often use a sentiment to do that.  I cut "celebrate" five times from red cardstock.


After gluing the die-cut pieces together, I placed the sentiment on the under panel on which I had placed a 4" square of patterned paper.


The word "celebrate" is high enough to hold the card open for display.


CottageCutz used on my card are:

http://www.scrappingcottage.com/cottagecutzcountrycandles.aspx

http://www.scrappingcottage.com/cottagecutzpiercedwidesquareframesetbasics.aspx

http://www.scrappingcottage.com/cottagecutzexpressionspluscelebratephrase.aspx


Sunday, November 18, 2018

Rise & Shine

Hi!

It's Anja here. I have a simple card for you today. I used one of the new dies and one of the older ones. They go together so well.


For this card I used:
- Cottage Cutz dies (Barn & Windmill, Rise & Shine Phrase),
- Distress Inks (Pumice Stone, Scattered Straw, Walnut Stain, Peeled Paint, Black Soot, Barn Door, Fired Brick, Aged Mahogany),
- craft card base (12,5x18 cm),
- red card stock for background (11,5x16,5 cm),
- watercolor paper for background (10,5x16 cm),
- white card stock for die cuts,
- gold pigment ink,
- paper glue.

First I cut the barn and colored it.


Then I cut the sentiment and colored it with gold ink.


Then I made the background.


And when I had all the pieces I glued everything together. And this is my finished card.


Have a great Sunday and see you again next week.

Anja Z.


Cottage Cutz dies I used:


Saturday, November 17, 2018

Merry Christmas w/the Deer Family

Hello Scrapping Cottage friends! Thanks for taking the time to stop and visit with us today. It's Mary Marsh here bringing you the Saturday edition of the Blog. 

You can still pick up the Autumn 2018 dies with 10 new designs at 25% off in the online store. There are some dies in this release that could be used for some cute outdoor scene cards that aren't fall related. And, if you need some card ideas for the dies look back on the blog because the DT has posted some beautiful cards for inspiration. 

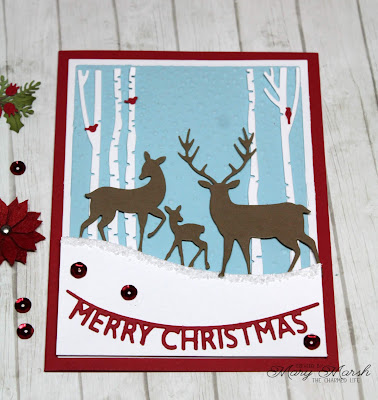
My card this week is featuring the Merry Christmas w/Deer Family die. It is part of our Christmas Part 2 release. I like making Christmas cards that feature an outdoor type scene. This one is relatively simple and would be easy to make multiples of. So let's get started with some details on how I created my card.

Step 1: I knew I was going to create a snowy scene with the deer, so I picked my card colors accordingly. I also wanted to get some red in there for a more traditional Christmas card.
Red card base: 4 1.4" x 5 1/2"
White layering panel: 3 7/8" x 5 1/8"
Blue embossed panel: 3 5/8" x 4 7/8"
I used a snow fall embossing folder on the blue layer. I was looking for a quick way to get the snow fall look on my card. You could use a stencil and embossing paste, or even a snowflake stamp.
Step 2:  I cut the birch trees from white cardstock. The deer are cut in a medium brown and the Merry Christmas phrase in red.
I decided I wanted a snowbank for the deer to stand on. So I cut one from white cardstock and added glue to the top edge and sprinkled on some chunky glitter.
Step 3:  Now that all the card elements are cut, I am ready to start card assembly. I attached the birch trees to the embossed panel first. I rolled up glue dots to give a slight lift off the background.
The snowbank is attached with dimensional adhesive. I attached the deer in the same way.
T decided not to hang the Merry Christmas banner across the trees. I attached it with Ranger multi matte medium. I like this adhesive because it dries clear.
To finish up my card I secured the image panel to the red card base. Scattered a few sequins on the snowbank for a more finished look there. To get a little color in the birch trees, I cut 3 small birds in red cardstock. The birds are from the Woodland Friends die. They are the perfect size and added just the subtle touch I was looking for.

Well that's it for me for this post. I hope I have given you an idea for using this new die.  See you next Saturday!

dies I used to create card:

http://www.scrappingcottage.com/cottagecutzmerrychristmaswdeerfamily.aspx

http://www.scrappingcottage.com/cottagecutzwoodlandfriends.aspx


Friday, November 16, 2018

Autumn Memories

Happy Friday Cottage Cutz fans!  Its Jeanne today with my last card before Thanksgiving!  This card uses the Country Candles dies along with a few from the Autumn release. The Autumn release dies are on sale for a limited time so be sure to stop by the online store!
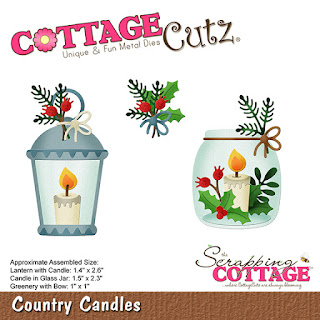
I started by die cutting the lantern from a "galvanized tin" cardstock, the candle, flames and bow from vanilla, and the glass from velum.  I used leaves that I had left over from last week's card!  I had already used a sponge to color the edges of the leaves.
Next, I colored the vanilla pieces with Copic markers.
 I carefully adhered the velum window to the back of the lantern using Multi Medium Matte.
I cut a gold panel the size of an A2 card - 5 1/2 x 4 1/4 inches, and a 5 1/4 x 4 inch panel from brown Co'ordinations cardstock.  This cardstock was popular several years ago and has a different color interior which shows when embossed and/or sanded.  Today, I embossed the panel and used a sanding block to reveal the interior color and enhance the embossing.
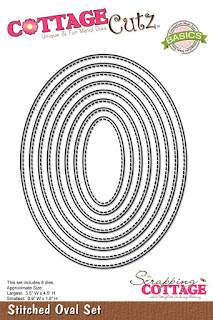
 I stamped the sentiment in Mossy Meadow ink and used the third smallest stitched oval to cut it out.
The lantern is popped off the embossed panel using foam dots and I used linen thread behind it.
I glued the sentiment below and slightly to the right of the lantern and then glued on my leaves. The embossed panel is glued to the gold one and both are adhered to an A2 card base.

I hope you enjoyed my card today.  My next post will be after Thanksgiving and I wanted to get in one last autumn themed post!

Dies used:
http://www.scrappingcottage.com/cottagecutzcountrycandles.aspx
http://www.scrappingcottage.com/cottagecutzpumpkinsandvines.aspx
http://www.scrappingcottage.com/cottagecutzpumpkinpieandlatte.aspx
http://www.scrappingcottage.com/cottagecutzstitchedovalsetbasics.aspx

Thanks for stopping by today.  I hope you have a happy and weekend (and find some time for creativity!)

Thursday, November 15, 2018

Country Candles

Good Morning Friends!

Hi it is Pam creating with you on the blog today!

I just wanted to let you know that we have some of our dies on sale for 70% off!!  Plus the new release Autumn and Halloween dies are on sale for 25% off.  Get your Christmas shopping done early!!  Today I am using the Country Candles die.  I love this die it has so many wonderful uses and details.
Design Steps:
 1.  Using the Country Candles die cut all of the pieces out of white card stock

2.  Use your favorite markers to color the pieces.  I used the copic markers above
 3.  After all of the pieces are colored assemble the lantern, candle and bundles of greenery

4.  Use and A2 white card stock base, cut a slightly smaller piece of red and then cut a piece of DP just slightly smaller then the red.  Use the Pierced Wide Rectangle Frame die the second from the largest and cut out a red frame.  Cut out a piece of white card stock to go behind the frame
 5.  On the small white piece of card stock sponge on a yellow ink to create the candle glow then position and glue the candle to the glow
 6.  Glue the lantern on top of the candle and glow
7.  Glue the red card stock to the front of the card and then add the DP to the red.  Glue down the white piece with the candle on it to the center of the card.  Place dimension tape to the back of the red frame and pop it over the candle.  Add the greenery and the Joy which I cut out of red card stock using the Joy Expressions die and your card is complete
CottageCutz Products


As always we really appreciate you stopping by today!  Don't forget the fantastic sales in your store!

Blessings
Pam