Monday, November 26, 2018

Vine with Ornaments

Hi!

This is Anja. This time I'm doing a Monday post. I'm still trying put the new Christmas dies. Today I made some ornaments. I love everything wood related and that's why I choose this wooden ornaments and combined it with a vine from last year's wedding release.


For this card I used:
- Cottage Cutz dies (Wooden Ornaments, Fancy Doves with Vine),
- Distress Inks (Fired Brick, Stormy Sky, Peeled Paint, Antique Linen, Tea Dye, Brushed Corduroy, Vintage Photo, Mustard Seed),
- craft card base (15x15 cm),
- light craft card stock for background (13x13 cm),
- brown card stock for background (13,5x13,5 cm),
- white card stock for die cuts,
- scissors,
- white acrylic paint,
- tooth brush,
- four split pins,
- hole punch,
- paper glue,
- heat gun.

First I cut and colored the ornaments.


Then I did the same with the vine.


Next it was the background. I cut and distress the edges of the paper. I spritzed white paint all over it and dried it with the heat gun.


The I cut another paper for the background.


I glued bth papers together and then made holes in all four corners. I put gold split pins in it.


And then I just glued everything together. And below is my finished card.


Before I go I just want to invite you to the store to check Black Friday Sale.

I wish you all a stress free week and see you again on Sunday.

Anja Z.


Cottage Cutz dies I used:


Saturday, November 24, 2018

Christmas Joy

Hello Scrapping Cottage friends! Thanks for taking the time to stop and visit with us today. It's Mary Marsh here bringing you the Saturday edition of the Blog. 

Hope all of our American friends had a great Thanksgiving. Then there was all the Black Friday sales and now today it's small business Saturday. Speaking of sales have you checked out the big sales we are having over in the online store. There are savings of up to 80%. Just in time to purchase dies for your Christmas card making. 

And we also have a brand new Black Friday release bundle. There are 16 new Pet designs in this release. You can purchase the entire bundle at an incredible price of  $99.95. It's a 60% savings over purchasing the dies separately. The DT will begin showing samples next week.

For my card today, it's all about Christmas. I am using the Holiday Mantel and Handmade Tree w/Presents dies. You can get these on sale at an amazing 40% off. So let's get started on some details on how I created this card.
Step 1:  I started off my card this week with my layout. I used the Splitcoaststampers sketch #721. I thought it was a good layout to showcase the dies I am using.
I then chose my card colors using the traditional Christmas colors of red and green. The background patterned paper carries through the Christmas theme nicely.
cherry card base: 4 1/4" x 5 1/2"
Patterned paper layer: 4 1/8" x 5 3/8"
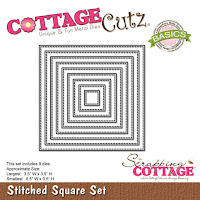
Small image squares: used the 4th largest stitched & square set dies.
Step 2:  Started my die cutting using the small tree, stockings and garland dies from the Holiday Mantel set.

I used the tall present from the Handmade Tree w/Presents die.
I used the Stitched Alphabet die to cut my Joy phrase in cherry cardstock. This die is also currently on sale at 50% off.
 Step 3:  Now that all the pieces are cut, I can start the card assembly. I stamped the Merry Christmas sentiment on the square with the present. I "hung" the garland on the square with the stockings. The Stitched Joy phrase was placed at an angle for added interest.
To complete my card, I added some red and green sequins. And, that's a wrap for me this week. I hope I have given you some inspiration on a way to use these Christmas dies. Remember, they are currently 40% off in the online store. See you next Saturday!
dies I used to create card:
 
http://www.scrappingcottage.com/cottagecutzhandmadetreewpresents.aspx
 
http://www.scrappingcottage.com/search.aspx?find=stitched+alphabet
 
http://www.scrappingcottage.com/cottagecutzsquaresetbasics.aspx
 
http://www.scrappingcottage.com/cottagecutzstitchedsquaresetbasics.aspx


Friday, November 23, 2018

Christmas Cookies!

Happy Black Friday Cottage Cutz fans!  It's Jeanne sharing today.  I hope you all had a wonderful Thanksgiving. Now it's time to get ready for Christmas.  The Scrapping Cottage has a Black Friday sale going on right now with great deals.  You'll want to shop early for the best selection!

Now on to today's post.  Even after my Thanksgiving cooking/baking I'm still in the mood for more.  It must be that time of year.  So I made a card featuring the Handmade Cookies dies.
To start I cut all the pieces from Kraft card stock and white glossy card stock.  I used glossy stock to simulate white icing.
Then I used Multi Medium Matte to glue the icing to the cookies.
I used the largest Double Stitched Rectangle die to cut a white rectangle and adhered that to a piece of red card stock.
I have a guide that allows me to cut a mat in various sizes larger than a rectangle or square panel (I'm afraid I have forgotten what it is called).  In this case I cut the red 1/16th inch larger than the stitched panel.  I then mounted that to an A2 size piece of patterned paper mounted to an A2 card base.
I placed the cookies on the card but did not glue them down.  I used this to position my sentiment and used my stamping platform to stamp it in red.
I glued most of the cookies to the card base, but used foam dots to pop up the tree and the angel.
Finally I added a few sequins for sparkle.  This card goes together quickly and would be perfect to make for multiple cards.

Dies:
http://www.scrappingcottage.com/cottagecutzhandmadecookies1.aspx
http://www.scrappingcottage.com/cottagecutzhandmadecookies2.aspx
http://www.scrappingcottage.com/cottagecutzdouble-stitchedrectanglesetbasics.aspx
Thanks for stopping by today!  I hope you have a fun and creative weekend.  And don't forget to check out the Black Friday sale at the Scrapping Cottage!


Thursday, November 22, 2018

Ice Skates and Mittens

Good Morning Scrapping Cottage Friends!

HAPPY THANKSGIVING TO EVERYONE!  I HOPE YOU ALL HAVE A WONDERFUL DAY WITH FRIENDS AND FAMILY.  DON'T FORGET TO COUNT YOUR BLESSINGS!

It is Pam crafting with you today!

Guess what???  We have already started our Black Friday Sale!  So hop on over to our store and check out the fantastic savings!  Don't forget to shop early for the best selections on our fabulous products.

Now onto today's card.  I have used one of our new dies called Ice Skates and Mittens.
Design Steps:

 1.  Use an A2 Kraft card stock base, cut a slightly smaller piece of red card stock, cut a piece of checked DP 4 x 5 1/4 and then using the largest Double Stitched Rectangle die cut a piece of Snowflake DP

2.  Glue the red and black checked paper to the kraft card base
3.  Pop the Double Stitched Rectangle to the card front and set aside
4.  Cut out all of the pieces in white using the Ice Skate and Mittens die
5.  Color the pieces with your favorite markers.  I used my Copics
 6.  After you have colored the mittens assemble them
7.  Pop dot the mittens to the front of the card as shown


 8.  Use TH Distress ink to add some shading to the skates
 9.  Use your markers to color in the soles and heels of the skates
10.  Use darning thread to lace up the skates.  Add Stickles to the blades for some sparkle.  Pop dot the skates to the front of the card as shown and then add the sentiment and glittering snowflakes
CottageCutz Products


Our Black Friday Sale is going on now!!! Please stop by now for the best selections!

Blessings

Pam