Wednesday, November 21, 2018

Baked with Love Layout

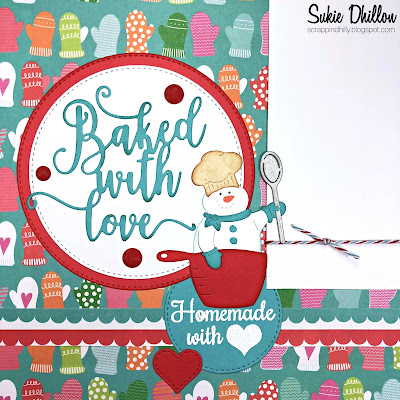
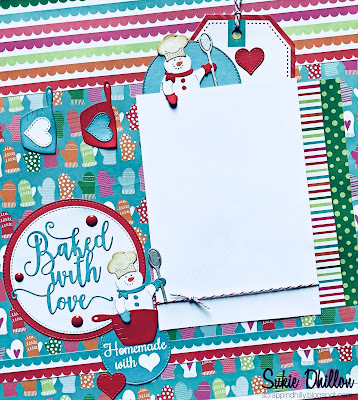
Hello!  This is Sukie to share a layout page for my guest designer post.  When I saw the adorable Measuring Cup Snowman die, I was immediately inspired to create a layout page to memorialize our holiday goodie baking event.
I found the perfect papers in my stash with the oven mitt background. The rich colors are so beautiful.  I cut out a few of the measuring cups and an additional snowman for extra embellishments on my page.  All of the die cuts were inked on the edges for a bit of dimension.
The Stitched Circle Set was used for the different sized die cut circles. The hearts are from the Stitched Heart Set.
I tucked in a journaling tag behind the photo mat accented with a die cut heart.  The sweet snowman was placed on the die cut circle and adhered next to the tag with some Glue Dots Adhesive Tape.  A bit of Peppermint Icicle Trendy Twine was the perfect accent on my photo mat and tag.
A line of measuring cups hanging along the edge of the paper provides a fun element on my layout.  The hearts were adhered to the measuring cups with some Memory Book Glue Dots.
The whimsical title was placed on the double die cut circle so it would pop on my page.  I simply added the the measuring cup snowman next to the title for a cohesive look.
I placed the title on my layout page and tucked in heat embossed sentiment from the Scrappy Moms (retired) "Filled with Love" stamp set.  A few enamel dots and die cut heart were the finishing accents on my layout page.
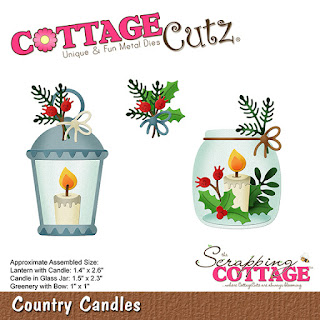
Here are the the dies I used to create my layout page available over at Cottage Cutz:
The Black Friday sale has already started over at Cottage Cutz with some amazing prices, head on over to check it out!

Tuesday, November 20, 2018

Autumn Cards

Hi, Janja is here.
For today's post, I prepared two autumn cards.


Supplies:
- kraft card base: 5.3 x 5.3 " (13,5 x 13,5 cm), folded
- white card base: 4.25 x 5.35 " (10,7 x 13,9 cm), folded
- patterned paper: 5 x 5 " (12,7 x 12,7 cm)
- beige card: 4 x 5.2" (10 x 13,2 cm)
- color cards
- colored pads
- embossing folder: brick
- fun foam
- sequins
- glue, double-sided adhesive tape, self-adhesive foam pads

For the first card, cut out a basket and vegetables from color cards. Use colored pads for more depth along the edges.


Cut out the sentiment and use only the lower part.


Use the card in a beige color and an embossing folder for the background. The bottom part of the background is not embossed.


Complete the card.


Cut out and assemble a fox and a hedgehog for another card.


Prepare and combine all the elements we need for a shaker card: card base, transparent foil, fun foam, frame and two pieces of patterned paper.


Add some sequins into the opening and complete the card.


I wish you a happy Thanksgiving day.


Monday, November 19, 2018

Country Candle Easel Card

Hi, Lois here with my Monday card.  Before I start, I want to remind you that some of the CottageCutz dies are on sale -- some up to 70% off.  If you're still making fall cards, our new Autumn designs are still on sale at 25% off.  Check them out here.

It's hard to believe that Thanksgiving is this week -- and with that comes Christmas right around the corner.  I'm still making Christmas cards, and that's what I have for you today -- using one of the dies from the CottageCutz Christmas release as well as a couple of older dies.

As you may know, I love making fun fold cards -- today's is an easel card.


To start my card, I cut all the die pieces from white cardstock.


I lightly sponged the glass candle holder pieces with Ranger Distress Tumbled Glass ink.  The rest of the pieces were colored using Copic markers.  When they were all colored, I assembled my candle holder.


I then cut the cardstock and patterned paper for my card.

Red - 4 1/4" x 8 1/2", 4 1/4" square
Patterned paper - 3 1/2" x 3 1/2"
White - die cut the largest Pierced Wide Square Frame


The large red piece of cardstock was scored at 2 1/8" and 4 1/4".


After folding on the score lines, I placed some Scor-Tape on the first 2 1/8" x 4 1/4" panel.  This is where the square panel will be attached.


I then adhered the patterned paper to the square red panel and attached it to the folded base.


I placed foam tape on the back of the frame and the candle holder . . .


. . . and attached them to the card front.


At this point I decided I wanted to add another element to the card, so I cut some additional pieces from the die, colored and constructed a small sprig of foliage, and attached it to the upper left-hand corner of the frame.


With an easel card, you need something to act as a "bumper" to hold the easel erect.  I often use a sentiment to do that.  I cut "celebrate" five times from red cardstock.


After gluing the die-cut pieces together, I placed the sentiment on the under panel on which I had placed a 4" square of patterned paper.


The word "celebrate" is high enough to hold the card open for display.


CottageCutz used on my card are:

http://www.scrappingcottage.com/cottagecutzcountrycandles.aspx

http://www.scrappingcottage.com/cottagecutzpiercedwidesquareframesetbasics.aspx

http://www.scrappingcottage.com/cottagecutzexpressionspluscelebratephrase.aspx


Sunday, November 18, 2018

Rise & Shine

Hi!

It's Anja here. I have a simple card for you today. I used one of the new dies and one of the older ones. They go together so well.


For this card I used:
- Cottage Cutz dies (Barn & Windmill, Rise & Shine Phrase),
- Distress Inks (Pumice Stone, Scattered Straw, Walnut Stain, Peeled Paint, Black Soot, Barn Door, Fired Brick, Aged Mahogany),
- craft card base (12,5x18 cm),
- red card stock for background (11,5x16,5 cm),
- watercolor paper for background (10,5x16 cm),
- white card stock for die cuts,
- gold pigment ink,
- paper glue.

First I cut the barn and colored it.


Then I cut the sentiment and colored it with gold ink.


Then I made the background.


And when I had all the pieces I glued everything together. And this is my finished card.


Have a great Sunday and see you again next week.

Anja Z.


Cottage Cutz dies I used: