Wednesday, April 04, 2018

Love You a Latte

Hey everyone, Sherry here from CPR - Craft Pray Repeat. As crafters I don't think we do many different sized cards, we kind of get use to one size and stick with it. So today I decided to mix it up a little and do a 4 bar card /gift card. I have really enjoyed the fancy pocket plus die and the quick and easy way you can turn any card into a gift card. Click the photo below to watch the video.


Inside of Card


The amazing dies that I used to make this card are linked in the description box of the video and will be listed below.


Remember to practice your CPR - Craft Pray Repeat. Thanks for visiting me today and happy crafting.
God Bless,
Sherry


Monday, April 02, 2018

Decorated Recipe Cards

Hi, Lois here today with something a little different.  CottageCutz has a fun series of breakfast item dies called Rise and Shine.   Instead of making a card using some of these die-cuts, I have created some decorated recipe cards.


Some time ago I bought a little kit for making a personalized recipe box.  Unfortunately, I never did anything with the kit; and it was still sitting in one of my craft cabinets.  When I saw the Rise and Shine dies, I thought I might be able to use them with part of the kit.  I pulled out three of the blank recipe cards and started there.


Looking through my recipes, I decided which ones could be used for this project.  I narrowed the choices down to Pumpkin Bread, Raised Donuts, and a Chocolate Cake.  I wrote the instructions out on the cards.


I then cut out the images from three of the Rise and Shine dies -- Homemade Bread, Coffee and Donuts, and Kitchen Chef.


Using various Copic markers, I colored the die-cuts and constructed the pieces.  I added a bit of clear glaze to the chocolate icing on the donuts.


All that was left was to adhere the various die-cut images onto the recipe cards.  


This was a really fun project.  At some point I may finish it!

CottageCutz dies used for these cards are:

http://www.scrappingcottage.com/cottagecutzhomemadebread.aspx

http://www.scrappingcottage.com/cottagecutzcoffeeanddonuts.aspx

http://www.scrappingcottage.com/cottagecutzkitchenchef.aspx


Sunday, April 01, 2018

Happy Easter Everybunny

Hi everyone!

It's Anja here on Easter Sunday. Hope everyone is doing well and having nice time with your family and friends.

I have another Easter card for you today. This time with cute bunnies on a sunny Sunday. It's a simple one, with Oxides colored die cuts and background.


This is what I used:
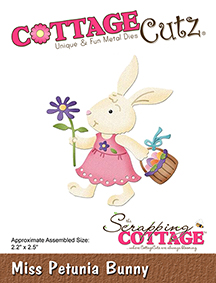
- Cottage Cutz dies (Mr. Peter Rabbit, Miss Petunia Bunny, Chickies w/ Egg Plant),
- Distress Inks (Vintage Photo, Pumice Stone) and Oxides (Seedless Preserves, Blueprint Sketch, Lucky Clover, Worn Lipstick, Fossilized Amber, Peeled Paint, Wild Honey, Spiced Marmalade, Aged Mahogany, Mermaid Lagoon, Broken China),
- silver pigment ink,
- white card base (10x21 cm),
- watercolor paper for background (10x21 cm),
- craft and white card stock for die cuts,
- water spritzer,
- clouds shaped stencil,
- heat gun,
- black and orange pen,
- printer,
- paper glue.

First I die cut the bunnies and the chickies. I used craft card stock for the bunnies, that's why they look rather dark. I colored mostly with Oxides. I used black pen for the eyes.


I used white card stock for the chickies and the egg. I also colored with Oxides.


I used watercolor paper for the background. First I used lighter blue for the whole paper and then darker blue with the stencil.


I spritzed water on top and heat it with the heat gun.


First I glued the background and then all the animals. I thought something was missing and decided to add a sentiment. This time I printed it on white paper and glued it on the card.


So this is my last Easter card for this year. Spring is in full bloom, so I think I'll have a lot of inspiration looking through my window.

Have a happy Easter and see you again next week..
Anja Z.

P.S. Be sure to check the sale in the online store. You have time til 9 pm to get some Ester dies for a nice discount.

Cottage Cutz dies I used:


Saturday, March 31, 2018

Stitched Flowers for Mom

Hello Scrapping Cottage friends! Thanks for taking the time to stop and visit with us today. It's Mary Marsh here bringing you the Saturday edition of the Blog. Before I start with today's card, I wanted to give you a heads up on a flash sale going on over in the online store. You can save up to 50% on selected dies. Hurry though the sale ends Sunday, April 1 at 9:00 pm.

Today, I am showing a card that is featuring dies from the Stitched collection and the good news is they are on sale for 25% off until tomorrow night. I used the Stitched Flowers and Stitched Alphabet dies to create a card for Mom. Mother's Day is coming soon. So lets get started with the details on how I created this project.

Step 1: Since this is a floral card for Mom, I wanted the flowers to be in bright Spring colors. So I used yellow, pink and purple for my flowers and a wasabi green for my stems.
Once the stitched flowers and leaves were cut, I arranged them on my patterned paper. The paper is from a collection that matches the wasabi green cardstock.  I wanted the flowers curved a bit for depth so I used a bone folder to curl up the edges. I attached flowers with dimensional adhesive.
Patterned Paper Panel: 5 3/8" x 4 1/8"
Step 2: Cut my Mom Phrase from the Stitched Alphabet die with purple cardstock.

I tried placing the letters across the bouquet but the colors just blended in too much with the flowers. And, because I curled the flowers I could see I was going to have difficulty attaching it here. The next option was to place it at the bottom of the patterned paper. I like the look of it placed there.
Step 3: To complete my card I attached the image panel to a wasabi cardstock base. It is a match for the patterned paper and I thought it looked better than using vanilla.
Wasabi Card Base: 5 1/2" x 4 1/4"
Well, that's it for me for this week. I hope you have a blessed Easter celebration. I am having my family for dinner. See you next Saturday!

Dies used to create card:
http://www.scrappingcottage.com/cottagecutzstitchedalphabet.aspx

http://www.scrappingcottage.com/cottagecutzstitchedflowers.aspx


Friday, March 30, 2018

Smile - It's Spring!

Good morning Cottage Cutz fans!  It's Jeanne today with a card today that I hope brings a smile to your face.  Before I start my card, I want to let you know that there is an Easter sale going on right now in the online store. You can get savings up to 50% on selected dies. Hurry though the sale ends Sunday, April 1 @9:00 pm.

Now on to the card! I chose the colors using this week's color challenge at Splitcoast Stampers and I will be posting it in that challenge.

My first step was to cut my pieces.  I used the Stitched Flowers die and cut one set of Daffodil Delight, two sets of Old Olive and two sets of Pink Pirouette.  I also use the Stitched Honey Bees to make a bee and cut the Smile Phrase in Old Olive.  I wasn't certain how many flowers I would need, but I knew I had plenty now!

Next, I started with an A2 top fold card base in white and adhered a piece of striped paper cut to 5 1/2 x 2 3/4 inches along the bottom.  Next I cut a piece of white cardstock 5 1/2 x 4 1/4 inches.  From this I cut an angled panel.
I measured 1 3/4" up from the bottom and 5" from the left side and marked each with a pencil.  Using my paper trimmer I cut between the pencil marks.
Then I marked 2 1/8" to the left of my bottom mark and 2 1/4" up the right side of the panel.  Again I used my paper trimmer to cut between the marks.  I erased any leftover pencil.
The result is an angled panel that I adhered over the striped panel on the front.  (And to be honest, any angle would do - you just don't want the panel to be straight.  This way the flowers make a nice curve on the card.)
I assembled the flowers and the bee.  I made seven, but after laying out everything on the card I decided to use only three.  Now I have leftovers for another card!
I placed the foliage on either side of the panel's point and used a foam dot to pop up the main flower and glued the other flowers directly to the card front on either side.  I placed a few of the individual leaves among the flowers.
Finally, I added some shimmer pen to the bee's wings.  I thought the card could use just a little bit of sparkle!

Dies used:
http://www.scrappingcottage.com/cottagecutzstitchedflowers.aspx

http://www.scrappingcottage.com/cottagecutzstitchedhoneybees.aspx
http://www.scrappingcottage.com/cottagecutzexpressionsplussmilephrase.aspx

Don't forget to visit the online store for the Easter sale. You can get savings up to 50% on selected dies. Hurry though the sale ends Sunday, April 1 @9:00 pm.

Thanks for stopping by - I hope you have a great weekend and a Happy Easter!