Saturday, April 07, 2018

Thinking of Plants

Hi, Lois here today, filling in for Mary, who will post on Monday.  I am so happy to show off part of a brand-new release from CottageCutz -- Botanical 2018.  There are 12 dies in this release, chock full of succulents, flowers, and llamas!  They should be in the CottageCutz store shortly.  The die I am featuring today is called Shelf w/Plants.


To start my card, I cut the pieces from a small scrap of white cardstock.


I colored the die-cut pieces while they were sitting on my sticky board.  This made it much easier because the pieces didn't move -- too much!  After I colored them (using the packaging for inspiration), I assembled the various images.  I used three different green markers for each set of leaves, which gave them a bit of dimension when they were assembled.


I then cut the cardstock for my base:

Cream cardstock - 8 1/2" x 5 1/2", scored at 4 1/4"
Patterned paper - 4" x 5 1/4"

I cut the oval using the largest of the Nested Wacky Stitched Ovals . . .


. . . and assembled my card base, adhering the patterned paper -- but not the oval..


I applied foam pop dots behind each of the assembled die-cut images and adhered them to the oval. 


I stamped the sentiment below the shelf, adhered foam pop dots behind the oval, and added the oval to the card base; and my card was finished.


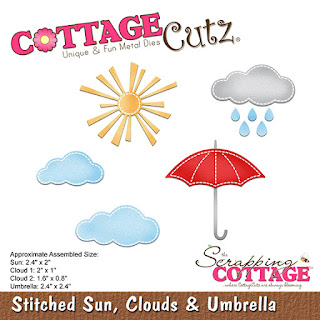
CottageCutz dies used on my card are:


http://www.scrappingcottage.com/cottagecutznestedwackystitchedovalset.aspx


Friday, April 06, 2018

Sending Smiles Across the Miles

Good morning Cottage Cutz fans!  It's Jeanne today with a card that will surely brighten the day of someone far away.  This card features the Spring Hot Air Balloon and the Stitched Sun, Clouds and Umbrella dies.
I started with an A2 red card base and a blue panel cut to 4 x 5 1/4 inches.  I used a paper printed to look like watercolor.  Normally I like to watercolor my own backgrounds but this is nice if you're pressed for time.
Next I cut all the pieces - some from colored card stock and others from white.  I used the background of the balloon but not the front piece to keep it from looking Easter-ish.  The rectangle for the sentiment is cut from the second smallest Nested Wacky Stitched Rectangle set.
I colored the rabbit, basket fringe and tassel pieces with Copic markers and used a sponge dauber with Crumb Cake ink to add some shadow to the basket.  I then assembled the pieces.
I glued the sun in the upper right corner, letting some of the rays hang off.  I used paper snips to clip off the over hang.
I glued the sky panel to the front of the card and arranged the clouds and sentiment panel.
Finally I used foam tape to pop the rabbit and basket off the card front.
I hope you enjoyed today's card.  It would surely bring a smile to a loved one's face!

Dies used:
http://www.scrappingcottage.com/cottagecutzspringhotairballoon.aspx
http://www.scrappingcottage.com/cottagecutzstitchedsuncloudsandumbrella.aspx
http://www.scrappingcottage.com/cottagecutznestedwackystitchedrectangleset.aspx


Thanks for stopping by today!  I hope you have a fun weekend and have time do some crafty things!


Thursday, April 05, 2018

Spring is Here!


Good Morning Friends

It is Pam getting crafty with you today!

It has been such beautiful weather here in South Carolina that I have been able to clean out my flower beds.  We had a cold winter and even snow.  So some of the more tropical plants didn't make a come back this spring.  I am going to have to pick some new plants to replace the ones that didn't make it.  So with plants on my mind that was my inspiration for my card this week!
 Design Steps:
1.  Cut out the water can in silver metallic paper using the Spring Watering Can die.  Next cut out all of the flowers and leaves in white using the same die.  I cut out 2 each of the flowers and 3 of the leaf stems.
2.  Color the flowers and leaves using copic makers. Add shading to the watering can using copics
3.  Tape the leaves and flowers to the back of the watering can
4.  Cut the hello using the Hello Spring die.  I cut one in yellow and one in gray.  Glue the gray one in the back of the yellow one slightly off center.  Also cut a frame using the Pierced Wide Rectangle Frames dies the second from the largest in vanilla card stock
5.  Use a vanilla A2 card base a yellow piece cut to 4 x 5 1/4 and a piece of DP 3 3/4  x 5.  Make sure to add the ribbon before you glue the panel to the front of the card. Add the vanilla frame to the card just slightly to the left of center
6.  Add the watering can onto the frame as shown
7.  Place the hello to the upper right side of the card and it is complete
Cottage Cutz Products
I hope you check out these cute dies in our store today!  
This card would make a great Mother's day card too!
Blessings
Pam

Wednesday, April 04, 2018

Love You a Latte

Hey everyone, Sherry here from CPR - Craft Pray Repeat. As crafters I don't think we do many different sized cards, we kind of get use to one size and stick with it. So today I decided to mix it up a little and do a 4 bar card /gift card. I have really enjoyed the fancy pocket plus die and the quick and easy way you can turn any card into a gift card. Click the photo below to watch the video.


Inside of Card


The amazing dies that I used to make this card are linked in the description box of the video and will be listed below.


Remember to practice your CPR - Craft Pray Repeat. Thanks for visiting me today and happy crafting.
God Bless,
Sherry


Monday, April 02, 2018

Decorated Recipe Cards

Hi, Lois here today with something a little different.  CottageCutz has a fun series of breakfast item dies called Rise and Shine.   Instead of making a card using some of these die-cuts, I have created some decorated recipe cards.


Some time ago I bought a little kit for making a personalized recipe box.  Unfortunately, I never did anything with the kit; and it was still sitting in one of my craft cabinets.  When I saw the Rise and Shine dies, I thought I might be able to use them with part of the kit.  I pulled out three of the blank recipe cards and started there.


Looking through my recipes, I decided which ones could be used for this project.  I narrowed the choices down to Pumpkin Bread, Raised Donuts, and a Chocolate Cake.  I wrote the instructions out on the cards.


I then cut out the images from three of the Rise and Shine dies -- Homemade Bread, Coffee and Donuts, and Kitchen Chef.


Using various Copic markers, I colored the die-cuts and constructed the pieces.  I added a bit of clear glaze to the chocolate icing on the donuts.


All that was left was to adhere the various die-cut images onto the recipe cards.  


This was a really fun project.  At some point I may finish it!

CottageCutz dies used for these cards are:

http://www.scrappingcottage.com/cottagecutzhomemadebread.aspx

http://www.scrappingcottage.com/cottagecutzcoffeeanddonuts.aspx

http://www.scrappingcottage.com/cottagecutzkitchenchef.aspx