Tuesday, December 26, 2017

Silent Night is one of my favorite hymns.  I created this easy and fun art journal page using the Winter Deer Family  and Snowflakes die cuts.
I colored in the deer and snowflakes with watecolor and then letting dry.  Next I added white pen to add more dimension to the deer.
Then I added a little glitter glue for shimmer and mica flakes for more interest.
This is a simple page that looks beautiful in it's simplicity.
I hope this inspires you to add some pages to your art journa.


Monday, December 25, 2017

Happy Bee-Day!

Hi, Lois here today wishing you a very Merry Christmas.  I hope you are enjoying your day with family and friends.  I'm happy you took a little time out of this special day to check out my card, which is made with several CottageCutz dies.  The stamp/die combos that were released last spring will be ON SALE right after Christmas, so I thought it would be appropriate to use one of them today.  Be sure to check out the CottageCutz store for the sale.

The focal image of my relatively simple birthday card is Bumblebee Chloe.


To start my card, I stamped Chloe onto some white cardstock . . .


. . . and colored her with Copic markers.  I used a clear Wink of Stella brush on both her wings and the wings of the little bee buzzing around the daisy.


I then die-cut her out using the coordinating framelit die.


I cut out the card base and circle elements as follows:

Card base - heavyweight black 5 1/2" x 8 1/2"
Patterned paper - 5 1/4" x 4"
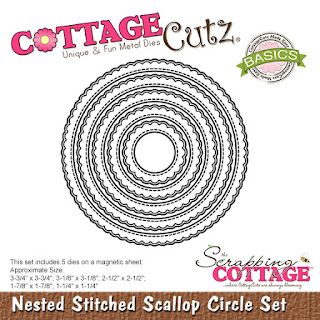
Black circle - largest Stitched Scallop circle
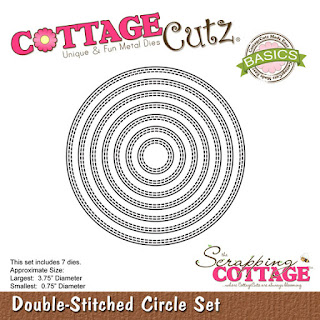
White circle - 2nd largest Double-stitched circle


Using Versafine Onyx Black ink, I stamped the sentiment on the patterned paper and heat embossed it with clear embossing powder.


I then scored the black card base at 4 1/4" and constructed my card, adding a strip of black and white ribbon behind the layered circles.


I adhered three large foam pop dots to the back of my die-cut of Chloe . . .


. . . and placed her in the center of the circle.  And my card was complete.


CottageCutz dies used on my card are;

http://www.scrappingcottage.com/cottagecutzbumblebeechloestampanddie.aspx

http://www.scrappingcottage.com/cottagecutznestedstitchedscallopcircleset.aspx

http://www.scrappingcottage.com/cottagecutzdouble-stitchedcirclesetbasics.aspx


Don't forget to check out the After Christmas Sale on the CottageCutz website starting tomorrow, December 26.

Sunday, December 24, 2017

Christmas Gift Tags

Hi!

It's Anja here just before Christmas. I hope you are doing fine and that you're surrounded with your loved ones for Christmas. I got all my Christmas shopping done and I'm looking forward to see the expressions on everyones's faces when they open the presents.

Yesterday I made a few gift tags with the new dies I got. Mail tag dies are perfect for different tag sizes. I decorated them with golden bells and some holiday greenery.


For this project I used:
- Cottage Cutz dies (Christmas Holly Bells, Mistletoe & Bells, Holly Branch w/Bow, Happy Holidays Greeting, Mail Tag Set),
- Distress Inks (Fired Brick, Peeled Paint, Pine Needles, Forest Moss, Vintage Photo),
- craft paper for tags,
- white card stock for die cuts,
- white pigment ink pad,
- gold pigment ink pad,
- gold ribbon,
- paper glue.

 First I cut the tags. I used white ink to color the edges.


Then I die cut the greenery and the bells. I used Distress Inks and gold pigment ink for coloring.


I cut the greeting from white card stock.


When I had everything cut and colored I arranged it on the tags and glued everything together. I used gold ribbon to go with gold bells.


And this is how they look from up close.


Have a beautiful and peaceful Christmas!
Anja Z.


Saturday, December 23, 2017

Baby Jesus with Animals die


Hello Scrapping Cottage friends! Thanks for taking the time to stop and visit today. It's Mary Marsh here bringing you the Saturday edition of the Blog.
 
Well, it's now just 2 days until Christmas. All my cards are sent and gifts wrapped. I have one last Christmas card to show you that reflects (to me) the reason we celebrate Christmas.
 
Today for your viewing pleasure, I created a card using the Baby Jesus with Animals die.  I really liked this die and I thought a good way to highlight it was to simply sponge a nighttime sky. So let's get started with some details on how I created this card.
 
 
Step 2:  I cut my image from black cardstock. I thought this would accent it nicely against the sponged background. 
I used a berry and blue cardstocks to layer and as the card base. The cardstock matches my ink colors.
 
Berry card base:  4 1/4" x 5 1/2"
Blue layering panel: 4 1/8" x 5 3/8"
Sponged panel: 3 7/8" x 5 1/8"
Step 3: I completed the card by stamping my sentiment on the sponged background panel. The panels are attached with double sided tape. That's it for me for this week. I will see you on Saturday, January 6.
 
I would like to extend a Merry Christmas and the happiest of holidays to all of the ScrappingCottage Blog readers. If you are going to be doing some after Christmas shopping make sure you drop by the online store. There is a big after Christmas sale coming.
 
Dies I used to create card:
http://www.scrappingcottage.com/cottagecutzbabyjesuswithanimalselites.aspx


Friday, December 22, 2017

A Sweet Little Fox

Happy Friday!  I hope everyone is ready for Christmas!  I'm almost there - but not quite.  For today's post I decided to switch things up a bit.  It's a little late for Christmas cards, so I thought I'd share a Valentine's card.  This card could also be altered for a birthday by simply changing the paper and sentiment.
I started with a piece of red card stock 8 1/2 x 5 1/2 inches that I scored and folded in half.  Then I cut a piece of patterned paper to 4 x 5 1/4.  I used the second largest stitched heart die to cut a heart from white card stock.
I cut the fox from Cajun Craze, the word "Love" from red and all other pieces from vanilla card stock.
I colored the bird, heart and fox nose and eyes using Copic markers.  I used B24, E99, Y18, R27 and black.  After gluing the tail tip and chest to the fox, I used a sponge dauber and Cajun Craze ink to shade him (or her).
I then assembled all the pieces for the final card.

This card goes together quickly and makes for a fun clean and simple card.

Be sure to visit the website next week for a big after Christmas sale!

Have a Merry Christmas!