Sunday, December 24, 2017

Christmas Gift Tags

Hi!

It's Anja here just before Christmas. I hope you are doing fine and that you're surrounded with your loved ones for Christmas. I got all my Christmas shopping done and I'm looking forward to see the expressions on everyones's faces when they open the presents.

Yesterday I made a few gift tags with the new dies I got. Mail tag dies are perfect for different tag sizes. I decorated them with golden bells and some holiday greenery.


For this project I used:
- Cottage Cutz dies (Christmas Holly Bells, Mistletoe & Bells, Holly Branch w/Bow, Happy Holidays Greeting, Mail Tag Set),
- Distress Inks (Fired Brick, Peeled Paint, Pine Needles, Forest Moss, Vintage Photo),
- craft paper for tags,
- white card stock for die cuts,
- white pigment ink pad,
- gold pigment ink pad,
- gold ribbon,
- paper glue.

 First I cut the tags. I used white ink to color the edges.


Then I die cut the greenery and the bells. I used Distress Inks and gold pigment ink for coloring.


I cut the greeting from white card stock.


When I had everything cut and colored I arranged it on the tags and glued everything together. I used gold ribbon to go with gold bells.


And this is how they look from up close.


Have a beautiful and peaceful Christmas!
Anja Z.


Saturday, December 23, 2017

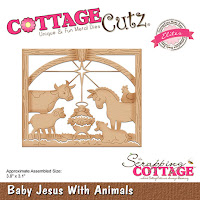
Baby Jesus with Animals die


Hello Scrapping Cottage friends! Thanks for taking the time to stop and visit today. It's Mary Marsh here bringing you the Saturday edition of the Blog.
 
Well, it's now just 2 days until Christmas. All my cards are sent and gifts wrapped. I have one last Christmas card to show you that reflects (to me) the reason we celebrate Christmas.
 
Today for your viewing pleasure, I created a card using the Baby Jesus with Animals die.  I really liked this die and I thought a good way to highlight it was to simply sponge a nighttime sky. So let's get started with some details on how I created this card.
 
 
Step 2:  I cut my image from black cardstock. I thought this would accent it nicely against the sponged background. 
I used a berry and blue cardstocks to layer and as the card base. The cardstock matches my ink colors.
 
Berry card base:  4 1/4" x 5 1/2"
Blue layering panel: 4 1/8" x 5 3/8"
Sponged panel: 3 7/8" x 5 1/8"
Step 3: I completed the card by stamping my sentiment on the sponged background panel. The panels are attached with double sided tape. That's it for me for this week. I will see you on Saturday, January 6.
 
I would like to extend a Merry Christmas and the happiest of holidays to all of the ScrappingCottage Blog readers. If you are going to be doing some after Christmas shopping make sure you drop by the online store. There is a big after Christmas sale coming.
 
Dies I used to create card:
http://www.scrappingcottage.com/cottagecutzbabyjesuswithanimalselites.aspx


Friday, December 22, 2017

A Sweet Little Fox

Happy Friday!  I hope everyone is ready for Christmas!  I'm almost there - but not quite.  For today's post I decided to switch things up a bit.  It's a little late for Christmas cards, so I thought I'd share a Valentine's card.  This card could also be altered for a birthday by simply changing the paper and sentiment.
I started with a piece of red card stock 8 1/2 x 5 1/2 inches that I scored and folded in half.  Then I cut a piece of patterned paper to 4 x 5 1/4.  I used the second largest stitched heart die to cut a heart from white card stock.
I cut the fox from Cajun Craze, the word "Love" from red and all other pieces from vanilla card stock.
I colored the bird, heart and fox nose and eyes using Copic markers.  I used B24, E99, Y18, R27 and black.  After gluing the tail tip and chest to the fox, I used a sponge dauber and Cajun Craze ink to shade him (or her).
I then assembled all the pieces for the final card.

This card goes together quickly and makes for a fun clean and simple card.

Be sure to visit the website next week for a big after Christmas sale!

Have a Merry Christmas!


Thursday, December 21, 2017

Snowman Shaker!


Hello Scrapping Cottage Fans!

It is Pam sharing with you today!  This is my last post before Christmas so I wanted to wish you all a very blessed Christmas and a Happy New Year! Let's hope 2018 will bring good health and happiness to all!

Now it is time to share my card!

I can't get enough of this adorable Sweet Snowman die so I made this last Christmas card into a fun shaker card! And actually it could be used for a winter birthday card too!

Designer Steps:

 1.  Use an A2 white card base and cut a slightly smaller piece of purple card stock then set aside.
 Next cut a piece of fun foam and designer snowflake paper 4 x 5 1/4.  Run both the foam and DP through the die cutting machine with the 3rd to the largest Cross Stitched Circle dies in the upper center of the paper and foam.  This will create the opening for the shaker card
2.  In between the foam and the DP sandwich a piece of acetate
3.  Next cut out a Stitched Scallop Circle 3rd from the largest in white.  Then lay the same Crossed Stitched Circle die you used to cut the opening onto the scalloped circle and cut.  This will make a nice frame for the opening


4.  Place a small pile of turquoise sequins and snowflake sequins onto the purple paper directly under the acetate opening
5.  Place glue on the back of the foam all around the opening and the entire back then lay it centered over the opening on the purple card stock.  Attach the white scalloped from to the front to frame the opening of the shaker
6.  Using the Sweet Snowman die cut out all of the pieces using, purple, turquoise and white card stock
 7.  Assemble the snowman I colored the branch arms and carrot nose with copic markers
 8.  Pop dot the snowman to the front of the card, add the ribbon, cotton ball on the hat and sentiment
9.  And finally attach the purple card stock to the white card base and your card is complete

Cottage Cutz Products


Don't forget to visit our store for any last minute shopping!!
MERRY CHRISTMAS!!

Blessings
Pam

Wednesday, December 20, 2017

Art Journal - Home for the Holidays

Art journaling is quickly becoming one of my favorite places to create smaller works of art.  Die cuts can add interest and whimsy to these small creations.
I used the Cottage Cutz Vintage Holiday Car and colored in the image with watercolors.
By adding layers of watercolor, I added shading to the car.  For small die cuts, it is easier to leave them in the die cut scrap when coloring them in.
Next, I added glitter glue to the die cut to give a little shimmer.
Then I used Tattered Angels Glimmer Mist in assorted colors to create the background.
Wishing you a creative day, dear friends.

Sheila