Wednesday, November 15, 2017

Mixed Media Tags

Hello everyone! It's Janet here for my Wednesday post. I'm so happy to show you what I've been up to lately. Christmas is going to be here soon and I am working on Christmas cards and tags at a feverish pace. Did you know there are only 5 Mondays left before Christmas! Yikes! There's a lot to do!


Lately I have been so inspired by card makers who are using mixed-media elements in their projects. Although an entire card was overwhelming, I felt I could tackle some tags using the new Christmas Tags die cut set. Somehow it's not as daunting when you are working on a smaller canvas.


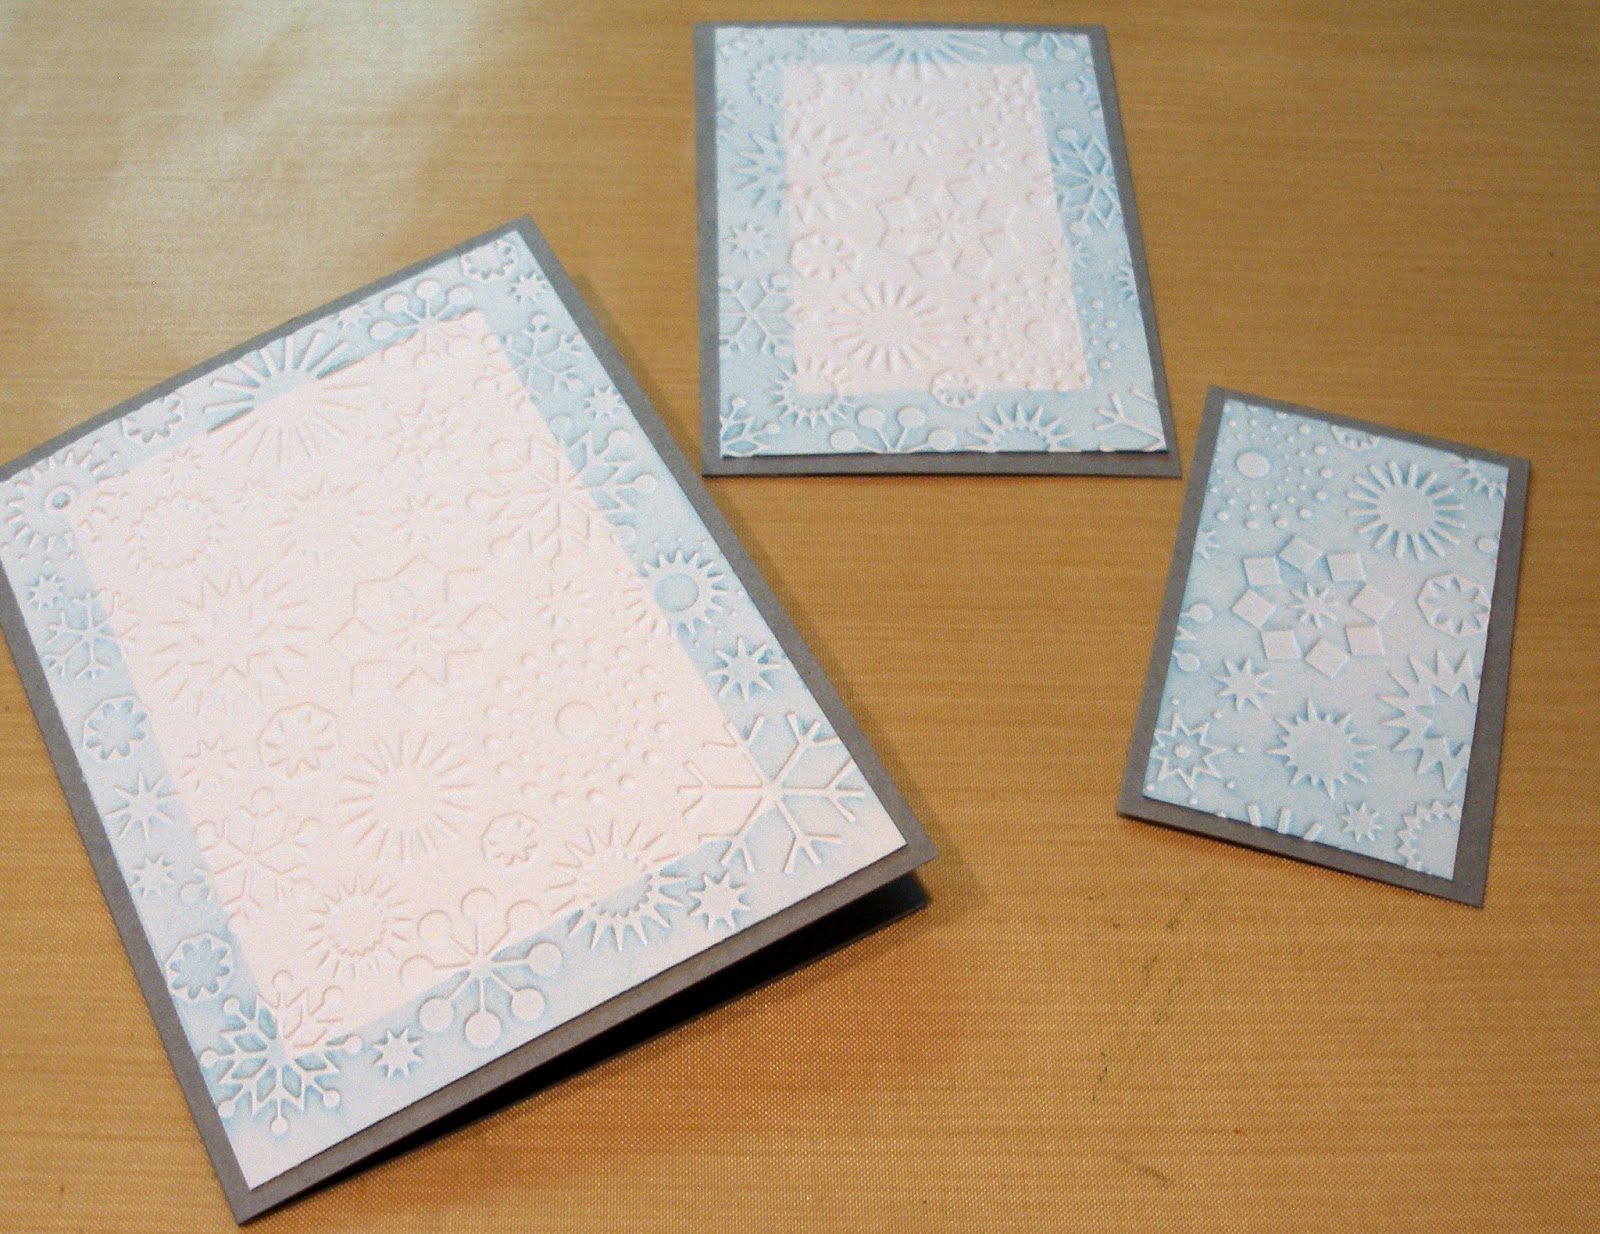
I experimented with a number of different mediums on these tags and they turned out rather glamorous and diva-like. Some of the products I used were Distress Oxide inks, glimmer sprays, water, sequins, gold paste, perlen pens, gems, brads and Christmas mini-ornaments. I also used all kinds of ribbons from the traditional to furry and a few things in between! Most of these items were already in my stash, I just had to pull them out and put them to use!


This set also has a lot of little shapes you can use on these tags and they're sized just right for them. Instead of using the pieces, I used the negative space in the die cut as a template for the gold paste. Now I'm thinking about all the other applications for using negative space as templates for paste, spray or inks. It was a little tricky but it's the first time I've used a paste and ultimately I was pleased with the results. I definitely learned a few things by doing this project and I am warming up to the mixed-media style. I'm going to try something a little larger now that I have a little experience under my belt.


I invite you to watch my tutorial on these tags and learn along with me. I hope you'll be inspired to try something out of your comfort zone. It's satisfying to stretch your wings a little and try something new! These tags were the perfect size and scope for experimentation. Love it!


Enjoy the rest of your week!

Hugs,
Janet

Products used for this project:


Monday, November 13, 2017

Happy Holidays

Hi, Scrapping Cottage fans!  Lois here with a new-to-me technique.   I saw  a tutorial for a variation on the Triple Stamping Technique last week and wanted to give it a try.  I'm not sure what it's called, but it was rather interesting.  For lack of another name, I'll call it Triple Embossing.  (My apologies to whomever developed this technique for using what might not be the correct nomenclature.)  Here's my card:


To start my card, I cut several layers of cardstock:

Gray - 5 1/2" x 8 1/2" (scored at 4 1/4"), 3 1/4" x 4 1/2", 2 1/4" x 3 1/2"
White - 4" x 5 1/4", 3" x 4 1/4", 2" x 3 1/4"

Using repositionable tape, layer the white pieces of cardstock, centering each piece on top of the next larger one.  This stack of cardstock will be placed in an embossing folder.


I ran the embossing folder though my Cuttlebug, being careful not to move the various pieces.


I removed the embossed pieces of cardstock from the embossing folder; and, while the pieces were still adhered to each other, I lightly sponged ink across the top of them.   This brought out the pattern of the embossing quite nicely.


I then separated the panels and adhered them to the coordinating pieces of gray cardstock.


I didn't want to take away from the embossed/inked pattern on the panels, so I decided to add just a sentiment.  I cut the sentiment "Happy Holidays" from one of the new Christmas CottageCutz dies, Happy Holidays Greeting.


I layered the panels together (lining up the embossed areas), glued the die cuts to the center of my card, and I was finished.  You can see how the various snowflakes transverse the panels.  One of them (the large one on the far right) actually is on all three panels.


I really like the result achieved on my card and will definitely use this technique again.    The CottageCutz die used on this card is:

http://www.scrappingcottage.com/cottagecutzhappyholidaysgreetingelites.aspx


Sunday, November 12, 2017

Snowglobe tags


Hi!

It's Anja here with my latest project. This time I used Snowglobe die and made a bunch of small gift tags. Holidays will be here soon and I will have to get my gifts wrapped. A small handmade tag can give a nice touch.


For this project I used:
- Cottage Cutz dies and stamp (Snowglobe w/Fawn, Snowglobe Friends, Snow Friends),
- Distress Oxides (Broken China, Faded Jeans, Fired Brick),
- Distress Inks (Fired Brick, Pine Needles, Black Soot, Peeled Paint, Forest Moss, Faded Jeans, Chipped Sapphire, Pumice Stone, Seedless Preserves, Weathered Wood, Stormy Sky),
- white card stock for die cuts,
- gold pigment ink,
- black, yellow, brown pen,
- watercolor pencils,
- water brush,
- watercolor paper for stamping,
- Onyx Black Versafine ink,
- gold and red ribbon,
- hole punch,
- stamping platform,
- washi tape,
- paper glue.

First I stamped all the images on watercolor paper. I colored it with my watercolor pencils and water brush. Then I die cut every piece with coordinating dies.


When I had all the stamped images I die cut the snowglobes and colored them with Distress Oxides. I made holes on top for the ribbon.


It thought it would be fun to use snowglobe die for some round tags. I die cut all the pieces and colored them with Distress Inks. I also made holes on top.


Then I just glued all the pieces to my tags and put ribbon through it.


Have fun!

Anja Z.

Cottage Cutz dies I used:


Saturday, November 11, 2017

Christmas Cocoa Thanks

Hello Scrapping Cottage friends! Thanks for taking the time to stop and visit today. It's Mary Marsh here bringing you the Saturday edition of the Blog.

Well we went from having record warm temperatures here in PA to having record cold temperatures. Tonight our low will be 19°. That's cold!! And when the cold comes can Christmas be far behind?

Today, I am showing another of the new 2017 Christmas dies released by CottageCutz This one the is Cocoa & Sweet Treats die. There are 3 different cup designs plus lollipops, candy apples, a donut, gingerbread man and a Christmas cake in this super cute set. The set also includes other Christmas icons - a tree, snowman and holly.

I know I will need some Thank You type cards after Christmas so that's the idea behind this week's card. Let's get started with some details on my card for today.

Step 1: I started my card by choosing my colors. I like making Christmas cards in non-traditional colors but this year I seem to all about the red & green. When I looked through my Christmas papers I found this piece with a circle background. I liked the whimsical appeal and thought it would work well with the images I planned on using.
Cherry Red Card Base: 4 1/4" x 5 1/2"
Patterned Paper Layer: 4 1/8" x 5 3/8"
 
I cut the die images I was using for my card. The cup was cut in a rich, cherry red cardstock that matches the designer paper.  I wanted to layer the cup inside a circle image and decided on using the largest of the Sweetheart Doily dies. I cut in a vanilla cardstock.
Step 2:  Time to start the assembly of my card. I love using ribbon on Christmas cards and decided to add an olive green strip across the center.
Once I put the Christmas Cocoa cup on the vanilla doily, I decided to add a red circle layer underneath. It made it pop against the background. I stamped the sentiment in a circle on vanilla cardstock in chocolate ink. I just continued the circle theme that is going on in my patterned paper. I used the stitched circle dies - the 3rd & 6th largest.
Added the image circle and the sentiment circle to the background layer.
Step 3:  To finish off my card, I added a gold cord bow and some green sequins. I hope I have given you an idea for a card using this cute new set. Have a great week-end and I will see you next Saturday.
 
Dies I used to create card:
http://www.scrappingcottage.com/cottagecutzcocoaandsweettreats.aspx

http://www.scrappingcottage.com/cottagecutzsweetheartdoilies.aspx
http://www.scrappingcottage.com/cottagecutzstitchedcirclesetbasics.aspx


Friday, November 10, 2017

Autumn Greenery

Happy Friday!  Although I know it's getting closer to Christmas and time to mail those Christmas cards, I wanted to do one more fall card.  I love autumn and Thanksgiving so I just couldn't help myself.
This card goes together quickly and by changing up the background paper it could easily be a Christmas card.  It is A2 size.  I cut a piece of vanilla card stock to 8 1/2 x 5 1/2 and scored it at 4 1/4.  It is a top fold card.
I cut two panels from the patterned paper.  The bottom piece is 5 1/2 x 4 1/4, the strip for the middle is 5 1/2 x 2 3/4.  I adhered the strip to the panel and then glued it to the card base.
Next, I die cut the pine cone from a dark and lighter brown, the greenery from various greens (I feel the variety of color adds depth - there is a light, medium and dark green), the doily from vanilla and the berry branches from white.
I used Copic markers to color the berry branches.

I glued the doily circle slightly off center, arranged all the greenery except the main leaves and pine cone, and glued then in place.  I used a sponge dauber and VERY slightly added a little color to the center of the leaf for some dimension. For the pine cone and main leaf I used foam dots to raise them up.  My last step was to add some red sequins for sparkle.
http://www.scrappingcottage.com/cottagecutznestedstitcheddoilyset.aspx

http://www.scrappingcottage.com/cottagecutzpinespray.aspx

Thanks for stopping by today!  Have a creative weekend!