Saturday, March 04, 2017

Easter Basket + Tutorial


Hello Scrapping Cottage friends! Thanks for taking the time to stop and visit today. It's Mary Marsh here bringing you the Saturday edition of the Blog.

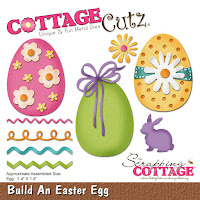
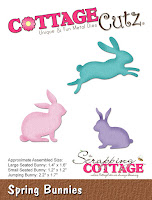
We have some fabulous new Spring dies in the store. Today for your viewing pleasure, I am featuring the Build an Easter Egg and Spring Bunnies dies. I made an Easter Basket with them.

I have seen quite a few baskets made using the Envelope Punch Board and I may try one of those soon. But, I realize that not all of you may have that tool. So my basket is made with dies and a scoring tool. I have loads of pictures for the process but here is a link to a video.

So let's get started on what I did for my project.

Step 1: The basket uses one sheet of 8 1/2" x 11" cut as shown in the following template.

 My first cut was at 4 1/2" x 11". Then cut this piece in half to measure 5 1/2" x 4 1/2". Used these pieces for my basket sides. The next piece used for the basket itself was cut at 4" x 6 1/2".  My last cut was 4" x 4 1/2". I used this piece to cut the basket handle.

Step 2: I used the largest Stitched Oval die for my basket sides. I cut 2 ovals using the 4 1/2" x 5 1.2" cardstock piece.  For the handle, I used the Oval die set -  Choosing the 1st and 3rd largest dies in the set. The cardstock piece is the 4" x 4 1/2" panel.


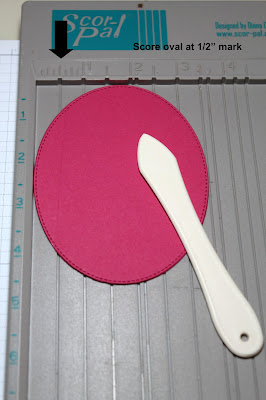
Step 3: I was now ready to complete the scoring on the 4 x 6 1/2" panel.  First score was at 1/2" on both sides of panel in portrait mode. The 2nd score is at 2". This was done on both sides of cardstock. Used a bone folder to crease all score lines. Also make cuts as shown in photo.


Scor-Tape added to top and bottom of panel
Step 4: I also scored the stitched ovals. This just made it easier to fold it under the basket base. Scored this at 1/2".  Used an embossing folder for added texture on the basket sides. I didn't emboss the 1/2" that was scored.
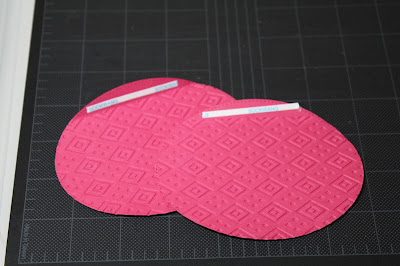
 
Scor-Tape added to oval panels
 
Step 5: Basket Assembly begins. The basket sides get secured to the base.
 
Both sides secured


Step 6: Die cut the elements for decorating the basket. Used lots of bright spring colors. Elements adhered with Ranger Multi-Matte medium and glue dots. Added the handles to basket with glue dots. I simply cut the oval that I made in  Step 2 in half.


Step 7:  Basket completed and time to fill with some goodies for gift giving.
That's it for me for this week. I hope I have inspired you to make a basket of your own for Easter or as a Spring gift. See you next Saturday!


 Dies I used to create card: 
 
http://www.scrappingcottage.com/cottagecutzbuildaneasteregg.aspx
 
http://www.scrappingcottage.com/cottagecutzspringbunnies.aspx
http://www.scrappingcottage.com/cottagecutzovalsetbasics.aspx
 
http://www.scrappingcottage.com/cottagecutzstitchedovalsetbasics.aspx


Friday, March 03, 2017

Sunflowers and Sunshine

Hello friends!!!

Welcome to the CottageCutz blog. this is Anita here, with another inspiration with the spring theme. Spring means sunflowers and sunshine and that is what my card brings in today.

The CottageCutz store has a wide range of spring theme dies and also stamps and die combos. You can view all of them here.

Here is my card with sunshine and sunflowers


So did my card bring a smile on your face!!!
Its very easy to make this card.

Instructions

1. Cut a white card stock a 5 inches by 6 inches and colour with water colour using shades of yellow and orange. Score the card panel on the score board at an interval of 1/8 inch. Adhere this on brown mat layer.

2. Cut four die cuts from double stitched rectangle die to get frames and adhere two frames together to get a thicker die cut. Add a sunflower picture at the back of one of the frames. To another frame , add a white backing paper that you get from cutting the frames. Add some water colour.

3. Adhere the two frames on the card panel as shown.

4. Cut die cuts in white water colour paper from Sunflowers die and colour the flowers and leaves as shown. Use any colouring medium of your choice. Add the dragon fly from Doodle Bugs Die

5. Adhere on the card panel with foam tape. 

6. Add sentiment, twine bow and some sequins to finish the card.

CottageCutz die used


See you again next week with more projects and inspirations from the CottageCutz.
Stay happy and keep crafting.


Wednesday, March 01, 2017

SPRING FLOWER-DAISIES AND 3D EFFECT OF STAMPING


Hello dear friends!!

A warm welcome to the Cottage blog !!! I 'm Anita here with lovely spring daisies from the new stamp and die combo sets from CottageCutz. I'm having so much using them to create my projects. The stamps and dies are of superior quality . you can check out the entire range here

For my card today, I feature the spring flowers -Daisies and I have used this set to create a 3D scene along with die cuts. We can use similar themed dies to create a raised or popped up scene along with the matching stamp. CottageCutz has many foliage dies that combines so well with many flowers stamps and dies.

Here is my card.
  

 To make this card, Cut die cuts from the CottageCutz Foliage die and CottageCutz Spring Greenery
set and colour with Distress inks. Emboss them a little on foam pad and arrange on a card panel 4" x 5.25" with silicon gel. 


Stamp two images from CottageCutz Spring Flowers - Daisies -April and colour with water colour. Cut with coordinating die. Arrange on the card panel with silicon gel as shown to create a raised 3D image.


Stamp the bees and a sentiment. Adhere the card panel on two matte layers.


Cut a  Wide Rectangle Stitched frame diagonally and adhere at the two corners. Mount the finished panel on a card base that measures 5.75" x 4.5".

CottageCutz dies used


CottageCutz has a huge range of stamps and dies to create many wonderful projects. Do check them out here at the store. I am so thankful that you spent some time here.

Tuesday, February 28, 2017

CottageCutz Design Team Call

CottageCutz
Design Team Call
 We are looking for Design Team members who are very active on social media. These sites include: Blogger, Facebook (page or groups), Twitter, YouTube Channel, Pinterest, and Instagram. We have two designer positions open and one opening for a person who enjoys creating videos (Video Artist) showcasing CottageCutz dies in a Tutorial/How-To project.  All positions are a 6-month term commitment with the option to extend. Term will be from March  - August 31, 2017

 We specialize in universal metal dies for papercrafting.  CottageCutz designs are unique, intricate, fun and whimsical.  We have the largest selection of the most beautifully hand drawn designs.  CottageCutz are available in craft stores world-wide. 

We are looking for dependable, energetic, enthusiastic and talented designers who enjoys papercrafting with die-cutting. We are looking for designers to showcase CottageCutz dies in different ways (layouts, cards, altered items, tags, etc.)  shabby chic, vintage, simple, whatever your style may be, we would love to see what you have to bring to our team.  

What we expect:

*Must have a personal active blog

*Good communicator, reliable, dedicated and on time with deadlines.

*Post to the CottageCutz Blog and your personal blog 4 times per month using only CottageCutz dies--No other dies are permitted. Video artist will be required to create 2 videos per month.

*Actively promote CottageCutz product on your personal blog, Facebook or Twitter accounts.

*List all CottageCutz dies and appropriate links back to the store.

*Be able to give instructions to how you used our CottageCutz dies

*Access to camera that is able to take high quality well lit photos.

*Upload to at least 1 online gallery such as Splitcoaststampers

*Pin all projects to Pinterest.

*Create at least one project for each die given - All dies need to be used and featured in a project. 

*Each project that is featured on the CottageCutz blog will be sent to The Scrapping Cottage, Inc. and will become the property of The Scrapping Cottage, Inc. with the understanding that it may be used at CHA tradeshows, consumers shows, advertising, sample boards, etc.  **Please only use CottageCutz dies on your projects.  No other competitor dies are permitted.

*Team spirit and able to follow directions accordingly

*Support DT members by commenting on their posts on the CottageCutz Blog

*Be willing to participate in Blog Hops, Challenges, or other events.

*Have lots of fun with our talented team of designers

 Selected Designers will receive:

*Generous amount in product each month.

*Your name and picture linked to your blog from CottageCutz Blog

*Worldwide exposure of your projects

*CottageCutz Design badge to feature on your blog

*Great product discount

*Bonus given to those who are published in a printed crafting publication. CottageCutz must be listed in the supply list for your project
 
To apply, please do the following:

 1. Please e-mail Joanne at scrappingcottage@cox.net with the subject line: CottageCutz Design Team Call

2. Please attach 3 projects showcasing dies.  These can be projects you have already done or current projects. We would like to see Cards, layouts, altered items, etc

3. If you are applying for the Video Artist position, please provide us with links to a few of your videos.

4.  Links to your personal blog and any online galleries where you upload your projects.

5. Tell us why you think you would be a perfect fit for the CottageCutz design team and what your favorite technique is when using die-cuts and which die-cutting machine you use.  Please indicate which position you are interested in.

6. Please list current and past design teams

 ** We will be accepting applications until February 28th and the team will be announced shortly after.


In the garden (center step card)

Hi, Janja here!

Officially it is still winter, but the beautiful sunny days remind us that it is time for the spring work in the garden. Chloe and Ben are already fully occupied.
Let us see how successful they are at this.


Supplies:
- CottageCutz stamp & die sets: Chloe with Flowerpot, Wreatf & Flowers, Ben with Wheelbarrow of Love, Spring Greenery, Clouds & Sun
- white card base: 10.6 x 5.3" (27 x 13,5 cm)
- patterned paper
- white and colored cardstock
- watercolor paper
- Distress ink: worn lipstick, abandoned coral, faded jeans, mustard seed, spiced marmalade, antique linen, tea dye, vintage photo, ground espresso, twisted citron, mowed lawn
- Memento ink: dandelion

Stamp both bears on watercolor paper and color them.


Cut them both with the matching dies.


Prepare few spring greenery cutouts, cloud and sun.


Cut and fold card base as shown.


Fasten selected patterned paper on the card base.
Start by assembling the card. Apply glue and self-adhesive foam pads.


Completed card.


Thank you for coming over and have a nice day.


Monday, February 27, 2017

Honey of a Day!

Hi, Lois here with another cute CottageCutz stamp and die set to show you today -- Ben w/Beehive.  These bears are just the cutest things!  If you haven't seen Chloe and Ben yet, take a look at the whole set.  My card is relatively clean and simple, although the die cut is popped up on foam dots.


Supplies for this card:

Yellow cardstock 8 1/2" x 5 1/2", folded in half
Black cardstock 4" x 5 1/4"
White cardstock 3 7/8" x 5 1/8", scrap for stamping Ben
Honeycomb stencil
Memento Tuxedo Black ink
Ranger Distress ink - Scattered Straw, Wild Honey
Copic markers
Clear Wink of Stella
Foam pop dots
CottageCutz die -Ben w/Beehive

I stamped the image of Ben and the beehive with black ink onto a scrap of white cardstock, then colored the image with various Copic markers.  I added some clear Wink of Stella to the bees to give them a bit of sparkle.  I then cut him out.


I temporarily adhered the white cardstock to my work surface and taped the stencil on top.  Using an ink blender tool, I sponged the Scattered Straw and Wild Honey ink over the stencil.


I constructed my card by layering the black panel onto the yellow card base and layering the stenciled white panel onto the black.  I stamped the sentiment in black at the top of the panel and popped Ben and his buzzing friends on with foam dots.


I hope you like my card and will check out the rest of the Chloe and Ben stamp/die sets in the Scrapping Cottage store.

The die used on this card is: