It's Saturday today and I'm Anita with my weekly post. I hope you all are enjoying the spring season and the summer fun in your place. In India, it is extremely bright and sunny but I think in many parts of the world, the spring flowers are still blooming.
So lets begin with today's work. In my post today, I will show you a technique of partial die cutting and adding a little twist to the background of a card, with negatives of diecuts as stencils.And we will make a shaker card!!! Sounds difficult !!!!! Of course not !!! It's super easy and fun to play using these and believe me , the results are very pretty.
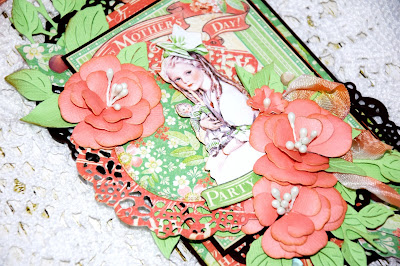
So here is my full card reveal.
Please follow the pictures below to see how to proceed with my card.
If you are still doubtful about flower making, then follow my flower making video tutorial .
The card measures 5 inches x 7 inches
Cut a white card stock measuring 4.75 inches by 6.75 inches.
Draw a line with pencil, 3 inches from the top across the card as shown.
Make a mark on either side of the CottageCutz Swan (Elites) die, a little above the final bottom cutting lines and extend the mark at the back of the die so that you know where to place the die, when you turn it on the paper to cut. Coincide the marks with the pencil line.
Now for cutting , place the die and paper on your cutting plates in such a manner, that the part that is below the pencil line will be extending out of the cutting plate and the part above the pencil line will be on the cutting plate. So the part , that is out of the cutting plate, will not cut through the paper when passed through the die cutting machine. This is how it should look.
Now remove the portion attached to the die cut that is on the top of the line, with a craft knife, giving an empty background space behind the die cut.
Cut a rectangle out of the middle die from the CottageCutz Wide Rectangle Stitched Frame die and further cut it as shown.
Adhere around the cut frame of the partial cut swan with foam tape.
Cut another die cut from the swan die , apply glossy accents and sprinkle Fairy dust shimmer glitter on top . Let it dry and attach to the partial die cut of the swan with foam tape.
Let us make the shaker card now.
Turn the card and attach a piece of transparent acrylic sheet covering the cut portion behind the swan.
Put foam tape all around and add lot of silver sequins in the centre.
Cut a piece of white card stock and colour with Tumbled Glass Distress ink. Further colour with Wink of Stella clear Glitter pen to add a little sparkle .
Attach this to the foam tape on the acrylic sheet.
Make flowers using 3D Flower # 2 and colour the leaves in green using peeled paint distress ink . I have used cutwork leaves and flourish from the CottageCutz Lacey Rose Die.
Arrange on the corner as shown. Finish with pearlised flowers and lace strips.
For the background, Cut out two die cuts from CottageCutz Congratulations die and stick two die cuts together to get a fairly thick expression. Ink with Tumbled glass ink and colour with glitter pen.
Take the negative of the congratulations die cut and use it as stencil to add a print on the background as shown.
Distress with same colour. Add the expression and finish off with sequins.
Attach the final mat card stock on to the front of the card base.
The card is ready.
I hope you liked this post and my card. Do leave your feed back. The CottageCutz challenge #2 is active now and the theme is spring. CottageCutz has most beautiful spring themed dies that you can find here.
Thank you very much for all your great cards and projects you've made for Challenge #1. Two lucky winners will be announced at the end of this post. So, stay tuned.
And here is time to start new challenge.
This time theme is HELLO SPRING.
So, get out your CottageCutz dies and create the project which will be associated to the spring. For example, flowers, greenery, green color are some ideas which are perfect for the spring. And please, use ONLY CottageCutz dies and not any other dies. "Add your link" button is available under the list of used dies. If you are not familiar with this button, please check this post for more explanation. Challenge will be closed on 31th of May!
Ok, let's go to my project. I hope this will inspire you a little bit. If flowers on sticks are familiar to you, this is because Yuliya showed you already how to do it and she made Easter decoration. You need to check it, it is beautiful. I shoot my video some time ago, so I thought there will be no harm if I show you my way too :) And I used the same flowers to decorate also the frame.
So, here is my video, where you will see how to color the wooden photo frame and decorate it with paper daisies and some greenery and also how to put together these daisies and create a bouquet out of them.
Suplies which I used for this project:
CottageCutz dies: listed below
Cardstock: white cardstock for die cuts
Distress Inks: Peeled Paint, Forest Moss, Brushed Corduroy, Gathered Twigs
Others: white acrylic paint, paint brush, water, wooden sticks, glue, Sizzix machine, yellow marker
And now go back to our challenge a little bit more. As I told you before, two lucky winners will be randomly chosen and will get gift certificate for Scrapping Cottage store.
First one will get gift certificate value of 50$...
... and second one in the value of 25$.
You have time till 31th of May to participate.
Both winners will be announced in the same post as new challenge (for June) will begin.
All you need to do is take your CottageCutz dies and start creating!
Please, use only CottageCutz dies!
Have fun and don´t forget to show us all your projects.
"Add your link" button is available under the list of used dies.
It's Donna here sharing another beautiful card using the CottageCutz dies! As Janja said on Tuesday, May is the month for flower's to bloom, you know the old saying "April showers, bring May flowers". On my card, I am playing with distress inks, watercolor paint and watercolor paper. Just a mixture of everything!
Here is how I put my card together....
Card base is an A2 (4 1/4 x 5 1/2)
Double stitched rectangle die first and third (from the largest)
Center inked piece is the center piece from the rectangle
Since I do not have the stitched wide rectangle dies by CottageCutz, I had to make one with the double stitched rectange dies. I die cut my frame using these two dies at the same time. I used some repositional tape so the dies would not slip.
I cut the frame out twice so I could use the frame as a mask to ink up my background. You could also use painters tape to do this.
I used some distress ink on cardstock so I could die cut my leaves. I often ink or use water color paints on a large sheets of paper and that way I can have some for projects later. This is what I did with the flowers. The flowers are die cut out of watercolor paper that I used watercolor paints.
Here are a couple of the flowers I had some leftover watercolor paper that I used to cut the flowers out. I used my rolling tool some my flowers would not be flat.
I cut the vase out with vellum and after I finished cutting all my dies, I assembled my card. I really like how it came out. What do you think? I hope you will hop on over to the store and see what might fit your fancy.
Hello Scrapping Cottage Friends! Thanks for taking the time to stop and visit today. It's Mary Marsh here bringing you the Wednesday edition of the Blog.
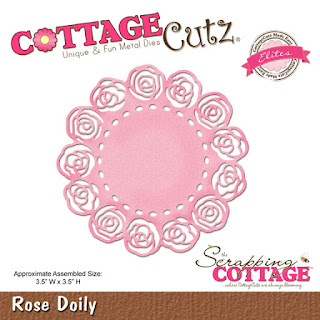
Today for your viewing pleasure, I am featuring another of the April release dies. This time it's the "rose doily" die. It's temporarily sold out but you can preorder it for the next shipment. I paired it up with the teapot & teacup die to create a many occasions type card.
This week I had an idea of what I wanted to create. When that happens with me, I look through my patterned paper stash first to see what paper I might want to use. Then from there I choose my cardstock and any other matching embellishments I might have.
I found this patterned paper that I have had for a few years and I knew I had some matching ribbon. Then my idea really started to take shape. So without further ado lets get started with some details on just exactly what I did here this week.
Cardstock and Patterned Paper Measurements:
peach card base measures 4 1/4" x 11" and scored at 5 1/2"
patterned paper measure 4 1/8" x 5 3/8"
green embossed panel: 2" x 4 1/8"
When I was thinking about my layout, I decided to take a piece of green cardstock that matches the patterned paper and emboss it. Just for some added texture and interest on my card.
I then started the initial assembly process by attaching the peach ribbon to my patterned paper and then to the card base. At this point I also attached the embossed panel. And from there moved onto my doily. I thought a white doily would look best and that would allow me to cut my teapot and cups in a color. I just love this new rose doily die. It's a 3 1/2" size and that makes it so perfect for an A2 card.
I cut my teapot and teacup die in the peach cardstock. This is one of the petite dies but there is such detail on both the pot and the cups. I decided to use a small leaf stamp that I had and stamp the pot and cups with green ink. Again, I just do some things for added interest. I tried cutting in a patterned paper but it was just too busy with my background paper.
I attached the doily with some dimensional adhesive for some card depth. I stamped my sentiment and added it onto a flag and attached to my card. I created this card for my friend as a thinking of you type card. She holds an annual Christmas Tea and she love all types of tea accessories and cards.
To finish off my card, I added some small amber rhinestones to the doily and my sentiment flag.
Well Friends that's my card for today. I hope this provided some inspiration for you. The April release is filled with awesome dies to help you create some gorgeous floral cards. Check it out.
If you have any questions about any of the cards I create or would like something explained, just leave a comment. I will get back to you. So until next time.......inky hugs!!!