Friday, February 01, 2013

CottageCutz Inspiration Day


Hello everyone and welcome to CottageCutz Inspiration Day!

While everyday is an Inspirational Day here at the CottageCutz blog with all our talented CottageCutz Designers, we have decided to do a couple of Inspiration Days a month. This will consist of 2 or more designers creations for you to view.

Today we have  posting-
Lisa
Kathy
Cheryl

Hi Everyone! It's Lisa here today to share with you a "two sided" tag! I love making tags. I also love making my tags as I do with layouts---layering as much as I can and using lots of texture. I also like my tags to look pretty on both sides and will usually cover the back with pattern paper or inking. Today I took it a step further and created two sided tag with both sides embellished and layered.


On this side I used pattern paper in the background then added some molding paste over a mask. I then layered some basic shapes and the ADORABLE CottageCutz "dress form mini. I added some chipboards wings to the one in the center. I have also used my favorite leaf die the CottageCutz "leafy foliage".

Just a little close up.

On the backside of the tag I used more molding paste with the same mask. I then layered some basic shapes and placed the beautiful CottageCutz "Vintage Dress Form" I then wrapped some seaming binding around the waste and embellished with thread, buttons and a little hanger. So cute!

Go ahead and try making a tag. You will soon be addicted! Be sure to pick up these dress form dies. They are the perfect accent on a girly project!


********************************

Hello everyone Cheryl here with My last page of the Mini Album I was working on. I just had to make a mini album with the NEW Vintage Release. Once I complete the cover I will be sharing a video of the entire album.
I just LOVE these new CottageCutz Dies from the Vintage Release!!! Of course I LOVE all CottageCutz, but I really had a LOT of fun designing this album. On this page I used the CottageCutz Elegant Hat Box Die.

For the Hat, I used copics to color, and then added some Viva Pearl Pen to the bottom of the stand. I also added a flower shaped button.

On this page there are 2 spots for photo's I also added some swirl bling and and some buttons with flowers in the centers.

For the hat box I colored it too with copics, and added silver Pearl pen to make the dots. All ribbons are from Really Reasonable Ribbon, and the black lace is vintage from my stash. lastly I added some sewing :)

Here are the CottageCutz Dies Used:


**************************************

Hi there, Kathy here with a wall art piece I made using lots of the Vintage release! 
 I found this 6" x 19" unfinished wood frame and decided to make a vintage scene of rooms in a house.  I thought this would be pretty in a guest bedroom! 


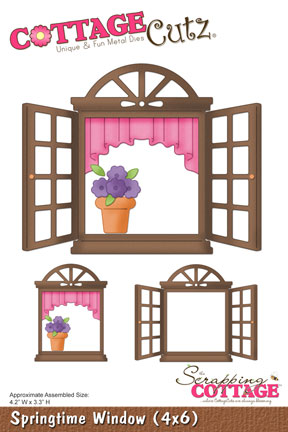
It's a little hard to see the details, so here are some close-ups for you!  Here's the left side, where I've used the Vintage Lamps, Springtime Window, Poodle Mini, Eiffel Tower Mini, and the Perfume Bottle Mini.


And the right side, where I've used the Vintage Pitcher & Basin, Vintage Lamps again, Pumps Mini, and the Clutch Mini.


I used all the same designer papers and cream cardstock so everything would coordinate and inked edges with Vintage Photo Distress Ink.

Here are the CottageCutz Dies I used:


**************************************


Thursday, January 31, 2013

CottageCutz Inspiration Day!

Hello everyone and Welcome To CottageCutz Inspiration Day!

While everyday is an Inspirational Day here at the CottageCutz blog with all our talented CottageCutz Designers, we have decided to do a couple of Inspiration Days a month. This will consist of 2 or more designers creations for you to view.

Today we have 
Vladka
Simona
Cheryl


1st is Vladka's Beautiful Cards using CottageCutz Vintage Lamps & Hand Mirror w/Cameo
Inspirational day, such fun and I’m really glad that I can do this together with Simona and Cheryl. I decided to use some dies from Vintage release, which is so special and so darling. It brings you to Jane Austen time and everybody who knows me, knows how much I love and admire her work, indeed! So, this was my inspiration for my two cards. They say, that eyes are the mirror of our soul and this is the reason I put heart in my mirror. I think this is the great way to show your best friend how you admire her kindness and tenderness of her heart. Mirror is cut from this great Hand Mirror and Cameo die and heart is made with Angel Wings Mini die.

Always when I think about Jane Austen books, especially about her book Pride and Prejudice, I think about all the letters which they send it to each other. So, I made little old letter and put this beautiful romantic Vintage Lamp on it. For a 'wax seal' I used bigger flower of the Vintage Lamps die and put the small one on the top of the letter.

This is it for today! Have a nice day.

Vladka


****************************************
Next we have Simona with her Beautiful card using CottageCutz Vintage Clock
Hello everyone and Welcome to CottageCutz Inspirational Day!
Today Vladka , I (Simona), & Cheryl are sharing new creations made with beautiful CottageCutz dies.

To make this card I chose Vintage Clock (4x4), Trellis w/ Vines (4x6) 
and Love Tags, set (4x6) dies and Cottage Impressions Frame 1 Lettering Clear Stamps (4 items). I used Distress Ink - walnut stain to color my clock. The face of the clock was colored with Copics and I added and heat embossed some clear UTEE. Around the clock face I added gold self adhesive plastic half beads.

The vines were colored with Distress Ink - peeled paint and for the little flowers I used a red Copic marker.
It's been a long time since I've last used my sewing machine to add some stitches to the card. I also distressed paper edges with distress tool.

To finish the card I added one of the tags from Love Tags set, a red bow and a brad. I stamped the word XOXO from the Frame 1 Lettering clear stamps and heat embossed it.

Hugs, Simona


*************************************
Next is Me(Cheryl) with my Card using CottageCutz Elegant Hat Box Die
My card  was designed for SCS Sketch Challenge, that is where I got this layout from. I wanted to use some bright and cheery colors, and chose to go with this bright blue. I airbrushed the hat box, and then colored the flowers,and leaves with copics. Next for the hat I colored it completely with copics. I did add some Viva Pearl Pen for the black and white.dots. The flower centers are flat back pearls. 

I thought it would be cute to add the flowers to buttons, and did that on all four.


Thank you all for stopping by and hope you have enjoyed today's INSPIRATION! We will be back tomorrow for another INSPIRATION DAY! Hope you will come back and take a peek tomorrow!!!
Have a wonderful day!!!!

Wednesday, January 30, 2013

Sew Vintage!

Hello everyone!  Today my card features the 
 as focal images.  

Another view:


The doily is the CottageCutz Scalloped Doily.  
I added some red twine, red/white paper flowers
and some charms to finish the card.  
 Enjoy the day!

Hugs,

Tuesday, January 29, 2013

Valentine Tussy Mussy

Hello Friends.  It's Carol here today to bring you a project just in time for your Valentine gift giving needs and it's made with something you normally would just throw away.  It's an empty toilet paper roll!
For this one the Eiffel Tower, Lamp, & Poodle Die was used.   I lined the inside of the tp roll with black cardstock  I stamped a piece of white cardstock with a Large French Script Stamp that I got at a yard sale for 50 cents.  Upon inquiring about this stamp the best I can come up with is that it may have been a Stampin Up stamp but I am not sure.  I then distressed with Brushed Corduroy Distress Ink and  glued to the tp roll.  The bottom was then hot glued together to form the holder.  I used some trim that I bought a long time about that is beaded and had that fufu on it.  The heart is a Martha Stewart Punch that was glued to black cardstock.  It was cut free hand so it would show up on the paper.  The heart on the Eiffel tower is a Recollection sticker, the flowers were in my stash.   The pink rhinestone flourish is also from Recollection.  Gathered lace was attached around the opening to dress it up and more eyelash yarn was glued at the top to compliment the bottom treatment.   The handle was punched with Martha Stewarts Heart border and glued to each side.  Little bows were made with ribbon and adhered to the top of the handles .  This is ready to have some Hershey's Chocolate kisses placed inside!

You know once you do one you can't just stop there!  So here is another one I made using the CottageCutz Small Teacup Die and the CottageCutz Tea Time Doily.  They are so addicting to make-just try it-you'll soon find out.  They are so fun.   This was made from various laces and Recollection trim and flourish pearls.  The sentiment was created in word and cut with a heart shape die with pearls applied around the edge.  The doily was folded over about 3/4's and glued to the tp roll.  Thanks for stopping by today.