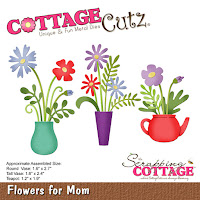
The new release of Mother's Day dies with 22 different designs is still on sale right now at 25% off. The Design Team has begun showing samples using these dies. Check out the previous days Blog posts to see those samples. There are also a couple of group posts with even more samples.
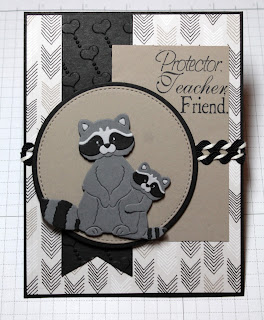
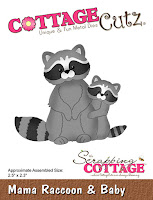
Now let's move onto my card for today. This one I created with the Mama Raccoon & Baby die that is part of the Mother's Day release. I am using it for a Mother's Day card but again this die could be used for a variety of occasion. How about to welcome a new baby or as a thank you from a new Mom or even for baby shower invitations just to mention a few ideas.
Step 1: Since I knew what die I would be showcasing today, I knew I wanted a layout where the raccoons would be the star. I found this sketch online and decided to go with it for this card.
Step 2: Once the layout was decided upon, I just needed to select my card colors. I found this designer paper that had the name of "go wild". It is a series of different animal prints and patterns. This arrow pattern seemed to work well for a raccoon.
So my card colors were chosen with taupe, and black. Not your typical Mother's Day colors but the raccoon and sentiment tie it all together.
The flag panel is cut at the size from the sketch and I used a heart embossing folder for texture.
Black card Base: 4 1/4" x 5 1/2"
Patterned Paper Panel: 4 1/8" x 5 3/8"
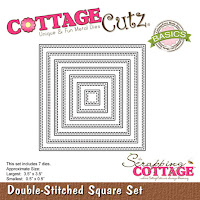
Taupe Circle: 3rd largest stitched circle die
Black circle: 4th largest circle die
Step 2: Cut my mama & baby raccoon. I followed the colors on the packaging and also used the photo to assemble them. CottageCutz always has a color photo on each die package and this makes die cut assembly quite easy. I used a medium, light gray and black for the animals
Step 3: Before I started my card assembly, I wanted to stamp the sentiment. The sentiment I am using reads -"thank you for being my protector, my teacher and my friend. I only wanted to use the words - protector, teacher, friend. So I pulled out my MISTI and masked off the other words and stamped what I needed.
I wasn't sure at first what to do for the middle thin panel, Then I remembered that I had some twine in my stash. I have had this for so many years and I almost got rid of it and now I am glad that I didn't. It's self adhesive so it was no issue getting it to stick.
The panels are all secured with double sided tape. This is my primary adhesive. On the image panel, I used mounting tape because I wanted it lifted off of the background somewhat. After this was done I scattered a few sequins just to enhance the panels a bit. Taupe is not a go to color choice for me. I usually shy away from the neutral colors. But I really like how this card turned out.
Well that's it for me for this post. I hope I have given you another idea for these new fun dies. See you again on Saturday.
dies I used to create card:


