Friday, December 08, 2023

Holiday Lantern Tea Light Décor


Happy Friday Crafties!

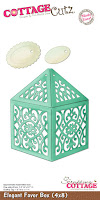
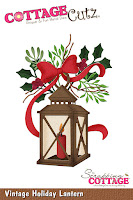
Kris here today sharing a home décor item for the holidays!  This can also be a cute li'l gift box by adding some printed tissue paper to hide the gift or gift card etc.  I was inspired by the new Vintage Holiday Lantern die (from the 2023 Christmas Release) to turn this Elegant Favor Box into a lantern using a battery operated tea light candle.  


How I made it:

I die cut (4) of the Elegant Favor Box die from one 12" x 12" piece of textured black cardstock.


As you can see, it also adds score lines where you need to fold ~ so I folded all of them inward.  


I glued 3 of the vertical side flaps together.  Then at the top, I glued only the tiny tabs to the larger tab of the next piece as shown below. 

*Do not glue the larger flaps together as you won't be able to get your hand in to pull out the contents. 😏 


Then I glued the final connecting side flap.  (You could do this before you glue the top tiny flaps.)


For the bottom, I folded the flaps in so that the 90 degree angled corners are hidden by overlapping the next one and so forth, and the last one tucks under the first flap.  Add glue to secure if you wish.


Next, I die cut my decorative elements -- the foliage from the Vintage Holiday Lantern die --from green, gold and red.  I also foiled a sentiment for my tag.


I placed a small battery operated tea light in the bottom of my lantern and added some fake greenery around it.

Next, I took some black/white gingham ribbon and cut the end at a deep angle so I can run it through the holes at the top to close it.  


This step took me a couple of times, but what worked best for me was to start from the outside and go into the first hole, come back out of the 2nd one, into the next and out of the last.  This way you end up with both strands coming out so you can tie a nice bow.


I glued my greenery to the back of my tag/sentiment piece, steering clear of the hole in the tag.

Then I tied my bow, adding my tag just before I made the loops of my bow.  ((yes, the tea light is on the outside of my lantern just because I wanted to show y'all what I used))


And ta-da!!  Super easy... yet elegant and festive décor for the holidays!  

*oops, just realized after seeing my photos that I forgot to add the gold jellyroll accents to my berries!  Let's just pretend there's gold accents there 😁


I hope I've inspired you in some way to get crafty with your favorite CottageCutz dies this week!  

Ink Something Crafty!
♡  ♡  ♡
~Kristine


Thursday, December 07, 2023

Puppy Carolers

Hello Friends 

I can't believe I am finishing my Christmas cards!  I have to send many cross country so I need to complete the handmade ones. 

I am using our new Christmas Release which is available at a wonderful 30% off.  This collection has over 40 different dies.   It has everything you will need for your holiday paper crafting. Make sure to stop by the online store and check out all the fantastic new designs!

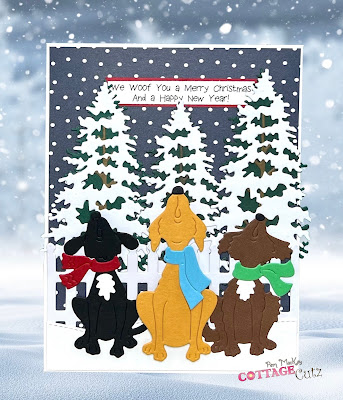
Today, I am using the Puppy Carolers and the Pine Tree Slim.  These pups are so sweet and make a perfect card for all those dog lovers in our lives!


Design Steps:

1.  Using the Pine Tree Slim die cut out the following colors of card stock: green, brown and white (I made three of these trees).  Using the Puppy Carolers die cut out the following colors of card stock: white, brown, red, green, blue, black, and mustard yellow.  Glue the pieces together with a fine tip glue
2.  Use a white A2 card base, cut a piece of navy snowy DP 4 1/8 x 5 3/8, use the Hills Slimline and cut the white bank of snow (cut it down to 4 1/8) and use the Picket Fence Slimline and cut it on white (cut the fence down to 4 1/8)
3.  Glue the navy DP to the white card base.  Next add the trees then fence and finally the snowy ground
4.  Glue the brown and black dogs down flat as shown above then put dimension squares on the yellow dog and pop him in the middle as shown below.  Add the sentiment layered on red and your card is complete


We have more inspiration on our YouTube Channel check it out HERE

Thanks so much for stopping by!  And I will see you next Thursday.

Blessings and Take Care


Wednesday, December 06, 2023

Thank You Garden Flower and Urn Card

Hello crafty friends. Thanks for taking the time to stop and visit with us for the Wednesday edition of the Blog. 

It's new release time!!! We have our annual Black Friday release available now in the online store. There are 19 different designs, and they can be used for all seasons.

We also have our Christmas 2023 release in the online store that has 40 designs. It's an old-fashioned Christmas theme. You can pick up the individual dies at 30% off for a limited time.
 

Today I am sharing a very quick, easy and pretty Thank You card created with some fantastic dies from the new Black Friday Cottage Cutz release. Here is what I created.
I made a top folding 5.5 x 5.5  square card. I love the larger size card as the sentiment is very big and bold!
I started by cutting out all my various dies in white cardstock. I went ahead and chalked the edges of my urn to give it some dimension and really make it look more like the concrete/cement urns you typically see.


I then colored the stems of the flowers I used with my green marker. I left the flower tips of them white. I then added some Stardust Stickles to them to give them a little touch of pizzazz. nI mounted the finished die cut onto some blue cardstock and then all that was mounted onto one of the stitched square scalloped eyelet dies.

I then cut out more of my blue cardstock and then added a piece of floral print paper as an additional mat layer.

I then cut the sentiment, Thank You out of the same dark blue cardstock and decided to add that to the top of my card. I then adhered everything to my card base and done! I think it turned out so pretty and love the big bold statement the sentiment makes.


Garden Flowers


Garden Tub & Urn


Sentiment, Thank You

The Stitched Nested Scallop Square I used is out of stock. Here is a very good, close alternative.


Well, that about covers it for today.  Until the next time, have a wonderfully crafty day!
Melinda

Tuesday, December 05, 2023

Garden Tub And Flowers Thank You Card

Hello crafty friends,
Today I am back again sharing another easy, quick and pretty card using the new Cottage Cutz Black Friday release dies. Here is what I created.
I created a top folding A4 sized card. I started with black cardstock for my base. I used the new pretty Trellis background die and cut it out of white cardstock.


I then cut out flowers from the Garden Flowers die. I cut them in white cardstock and then colored them in.

I also used the Greenhouse Plants die and did the same, cutting them out in white and then coloring them with my markers.

Here is a closer look at the flowers once I put them in the garden tub die that is also a part of the new release. I cut the tub out in black and the handles in white. I colored the handles with a tan marker that made them look more wooden. I added some chalk and some white accents with my gel pen. I added the cute little Thank you sentiment from the Sentiment, Thank You Berry Much die. I colored it in the same color as some of the flowers.  I mounted all of that onto a double stitched rectangle mat with a piece of patterned paper for a little touch of color.

Here's a closer look at me adding in some diamond dots where the trellis lines meet. I thought this gave the background a little extra subtle touch.

Here is one last look at my completed card. I think it turned out really cute and love the almost farmhouse kind of feel I think it has :-)


Garden Flowers

Garden Tub & Urn

Sentiment, Thank You Berry Much

Trellis Background


Well that about covers it for today. 
Until the next time, have a wonderfully crafty day!
Melinda