Thursday, March 09, 2023

Hello Flowers

 Hello CottageCutz Friends,

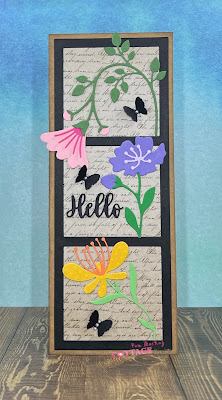
I like to send cards to family and friends with no special occasion.  So today I thought I would make a card just to say hello and I am thinking of you!

The dies I used for today's card are from the new collection.  They are Flower 2Flower 6 and Flower 7.  I decided to make a slimline to display these pretty flowers.

Designer Steps:

1.  Using the following dies Flower 2Flower 6 and Flower 7 cut out these colors of card stock: yellow, orange, pink, dark pink, purple, light purple and 3 shades of green
2.  Use a Kraft slimline base measuring 3 1/4 x 8 1/4
  • Use the Window Slimline and cut it out in black
  • Use the Hello w/Shadow and cut out the hello in black 3 times
  • Cut a piece of script designer paper 3 x 8
3.  Glue the 3 Hello's together.  Glue the black window frame to the designer script paper as shown above
4.  Glue the Hello and the purple flower in the middle window as shown above
5.  Glue the pink and yellow flowers as shown above
6.  Ink the edges of the kraft slimline card base in black 
7.  Glue the flower panel to the kraft card base.  Using the Spring Meadow die cut out 3 black butterflies.  Place 3 small pearls on each butterfly and then attach to the card front as shown below and your card is complete

CottageCutz Products


We have more inspiration on our YouTube Channel check it out HERE

Thanks so much for stopping by!  And I will see you next Thursday.

Blessings and Take Care


Wednesday, March 08, 2023

Dress Up Your Die Cuts


Hi my crafty friends, it's Marla back with another card share.  Easter is right around the corner and it's my favorite holiday for so many reasons.  One being, it's when all of the beautiful colors begin to show themselves again. For today's card I mixed several dies from The Scrapping Cottage to create a beautiful, yet playful Easter card.  


The "Flowers and More" release had so many floral and foliage dies that work well together to create amazing floral swags and clusters.  I wanted a colorful card, so instead of coloring the leaf die cuts in traditional greens, I used non-traditional color combinations.  If you look carefully, you'll see I included all of the colors of the rainbow on this card for a bright and vibrant touch.

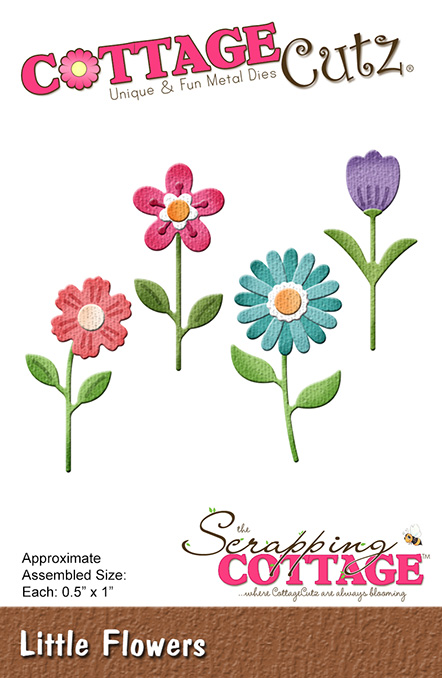
I hope you will head over to the CottageCutz YouTube Channel to see how this card came together.  I will also be giving away the "Little Flowers" die.  I provide all of the information on how you can win in the video. I have also added all of the products I used below for quick and easy shopping.

Until next time..... Marla


Tuesday, March 07, 2023

Happy Easter


Hello CottageCutz friends! Thanks for taking the time to stop and visit with us today. It's Mary Marsh here bringing you the Tuesday edition of the Blog.

We have a brand-new release of dies in the online store. It's our Flowers & More release. The individual dies are currently on sale for 30% off. This release has what we are calling "simple cuts". Meaning not as many pieces to put together so they assemble quickly.

They are so perfect for the many card making occasions that we all have. Birthdays, Thank You, Sympathy, Mother's Day or even a scrapbook layout just to name a few. Today for your viewing pleasure, I am featuring some of our older Spring release dies and I created an easy Easter card. 

I started my card with the colors from this week's color challenge on Splitcoaststampers #938. We were to use flirty flamingo, pear pizzazz and crushed curry for our color trio. Optional was to add any 4th color. I used gorgeous grape for my additional color. 

flirty flamingo, pear pizzazz, crushed curry
My card was inspired by an ad for an off-brand stamp company I saw on Facebook. I decided to recreate it with the challenge colors and CottageCutz dies to make it my own.

I thought the colors had a definite Spring vibe so I went with the Easter card idea. This one is a mini-slimline.
Grape Card Base: 6 1/4 "x 3 3/4"
White layer Panel: 6 1/8" x 3 5/8"
Grape Ombre Designer Paper: 6" x 3 1/2"

I used the Stitched Alphabet die for my Easter phrase. I cut the letters in the challenge colors using different dotted designer paper. 

I layered the letters on gorgeous grape ombre specialty paper. I loved all the sparkle this paper has. The Happy phrase is part of the Happy Easter Greeting die. This die also includes the bunny ears. I cut the ears in flirty flamingo and placed them above the letter A.  The happy word is cut from pear pizzazz cardstock.

The bunny feet are part of the Bottoms Up Bunny Baker die. That's it for today's sample. See you again on Saturday.

Reminder: Our YouTube Channel has a new video from Jen Hartsgrove. There is a giveaway for being a subscriber, liking the video and leaving a comment. Click here.

Dies I used to create card:


Monday, March 06, 2023

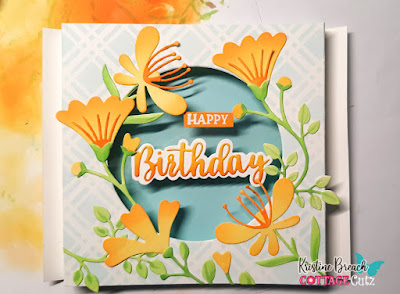
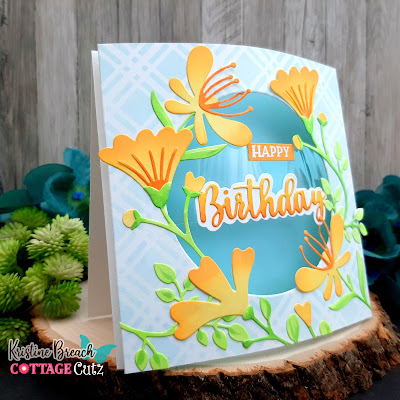
Floating Sentiment Shadowbox

Happy Monday CottageCutz friends!

Kris here sharing with you today.  I have a Floating Sentiment Shadowbox type of card.  I've used Flower 1, Flower 6, and Flower 7 from the newest Flowers & More Release.


This style is very easy to make, but if you'd like to watch a video, Jennifer McGuire recently shared this one and I was inspired to try it for my card this week. ☺

Design Steps:

1.  I cut a white card base at 5" x 10" and scored at 5 inches.  

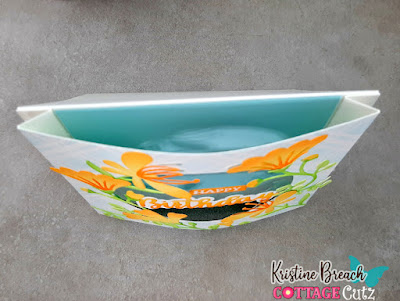
2.  I cut another piece of white cardstock at 5" x 7" and scored along the 7" side at 1/2" and 1" on both ends.  Accordion folded them and burnished.

3.  I stenciled a background with the Plaid stencil from the Daisy Stencil set (La-La Land Crafts) with Tumbled Glass Distress Oxide ink.


4.  I die cut a circle from the center of that piece using the 2nd largest Pierced Circle set.


5.  Next, I die cut my flowers from white cardstock and added Distress Oxide ink in Squeezed Lemonade, Wild Honey, Carved Pumpkin, Twisted Citron, and then I added some shading to the leaves with a Copic marker. 

6.  I then placed them around the opening and glued them down.


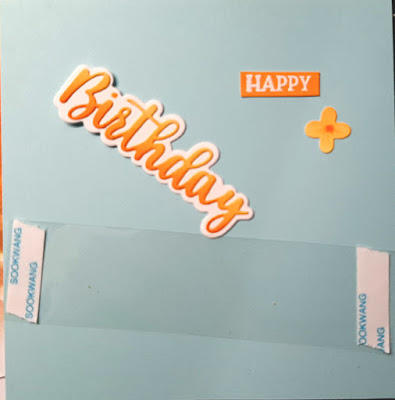
7.  I stamped & embossed my "Happy" sentiment and die cut the "Birthday" from the Happy Birthday w/ Shadow die.  

8.  I cut a strip of window sheet about 4-3/4' x 1-1/2" and added Scor Tape to each end.


9.  I then taped the window sheet to the back of my flower layer, in the center.


10.  I attached my sentiment pieces to the front of the window sheet.  I ended up cutting off one of the limbs from the stem on the left so it didn't cover up my sentiment too much. 

11.  I then tried out different colors of cardstock as my backdrop for my flowers and decided on this light teal color.  I cut it to 3-7/8" x 4-7/8" and set it aside.  *This is not attached to the front floral panel.


12.  I added Scor Tape to the 1/2" scored flaps of the flower panel piece and lined them up with the side edges of my card front.  I love how it causes the front panel to dome out!

13.  I then added glue to the backside of my blue panel and inserted it between my front floral panel and the card front so that the 4-7/8" is vertical.  


Done!


PRODUCT I USED:


Thanks for taking a peek!  I hope you are inspired to get creative with your favorite CottageCutz dies!

~Kristine