Sunday, July 03, 2022

Berry Sweet Box Card

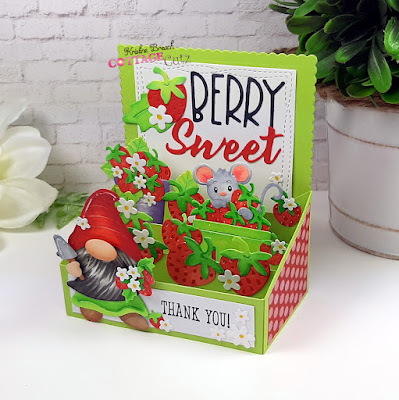
Hello and happy Sunday!  Kris here to share a "Berry Sweet" and easier-than-it-looks box card with you showcasing the NEW Strawberries & Bees release!  

Before I get to my project, I just want to say.... NOW is the perfect time to go shopping as this whole release is 50% off for a limited time.... individual dies in this release are 30% off.... and the store is having a huge 4th of July sale going on with up to 70% off other dies! Run, run -it won't last long ☺

Okay, onto my card...


CUTTING & SCORING

I began with the fun stuff first ... die-cut all my cute images and sentiments from white cardstock, colored with alcohol markers and pieced together.  Next, onto making the box!

BACK: 
Green cardstock:
•  Die-cut (1) using largest die from the Nested Scalloped Rectangles - then, trim off 1/4" from the bottom 

White cardstock:
•  Die-cut (1) using the 2nd from largest Wacky Stitched Rectangles

SIDES:
Green Cardstock:
•  With paper trimmer, cut (2) 2-3/8" x 2" and score at 3/8" on just one of the 2-3/8" sides.  One of the sides will have the score line on the LEFT, and the other one will be on the RIGHT (see photo below). Then, measure down 1" on the opposite side from the score line and place a pencil mark.  Cut from the TOP of the score line diagonally down to the mark.  Repeat on other piece.

From patterned paper:
•  Cut (2) 1-3/4" squares.  On one side, measure down 7/8" and place a mark.  Cut from top of the opposite corner down to the mark. *On other piece, you'll cut from the other corner.  (See photo below)

FRONT:
Green Cardstock:
•  Cut (1) 4-1/4" x 1" and score 3/8" from each end

White Cardstock:
•  Cut (1) 3-1/4" x 3/4"

MIDDLE SHELVES:
Green Cardstock:
•  Cut (3) 4-1/4" x 3/4" - and score at 3/8" from each end.  Miter the top only of each of the 2 scored flaps on each shelf.  (see photo below)


ASSEMBLY:

1.  Glue your patterned papers onto the side pieces.  Add glue to the flaps and adhere to the front lower sides of scalloped piece so that they both angle down towards the center of card.  The scored line of flap is FLUSH with the scallops, and the bottom edges are aligned.


2.  Adhere white Nested Wacky Stitched Rectangle to the front center, paying attention to the top and side borders for placement - not the bottom as remember we cut off 1/4" ;)


3.  Stamp on the front white piece if desired, and  adhere to FRONT green piece.  

4.  Add glue only to the LEFT flap of your FRONT piece and adhere the left side piece so that it bumps up to the score line, not over it.  


5.  Open that side & front piece to the left while we work on the middle shelves. 

6.  Add glue to just the left flap of one shelf, then bump it up to the score line (of the side piece), making sure that the top of your shelf is below the edge of the side piece.  You can click on the pic to enlarge if needed.


7.  Fold that first shelf over to the right and leave it there.  Do not attach the other end - we'll do that after all our shelves are in. 

8.  Add glue to the next shelf, and place it according to the photo below, again, making sure the top of the shelf is lower than the edge of your side piece.


9.  Fold that shelf to the right as shown and continue with the 3rd shelf. 

10.  Fold all shelves and front piece to the right and add glue to the remaining flaps.


11.  Fold your right side piece over flaps, aligning that front piece, and rub to adhere.


12.  For the very BACK of my card, I die-cut another Nested Scallop Rectangle, in red this time, and another Nested Wacky Stitched Rectangle (same size as the front back piece), stamped it and adhered, lining up the scallops.


13.  And lastly, add your decorative die-cut elements for a BERRY SWEET box card that folds flat to mail in a regular A2 sized envelope!


I hope I've inspired you to try this or your own creation using our new

~Kristine

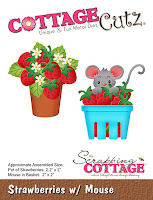
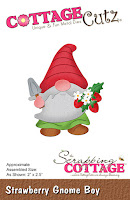
Here are the products I used today:


Saturday, July 02, 2022

Sweetest Berry in the Patch

Hello CottageCutz friends! Thanks for taking the time to stop and visit with us today. It's Mary Marsh here bringing you the Saturday edition of the Blog.

It's new release time!!! We have new dies in the online store. It's our Strawberries and Bees release with 16 new designs.  You can pick up the entire bundle for 50% off and the individual dies are 30% off.
The new dies are perfect for all your cardmaking needs. They would work for so many occasions.

Today for your viewing pleasure I am featuring the new Strawberries w/Mouse die and the Berry Phrases die, and I created a fun fold birthday card. So, let's get started with some details of how I created my card. 

Design Steps:
I found a cute fun fold idea on Pinterest and decided to use it for my card today. Here is a link if you would like to watch a video. I had this strawberry paper in my stash and thought it would work well for a strawberry themed birthday card. 

Red Card Base: 4 1/4" x 5 1/2"
Fun Fold Flap: 3" x 3 3/4"
Designer Paper: 1 1/2" x 4 1/8"
I took the 3" x 3 3/4" piece of cardstock and added glue to the scored part. This piece will create the flap. I glued it to the red card base. 
Then I added the 2 sections of designer paper using double sided tape. 
I used another piece of designer paper cut at 2 7/8" x 4 1/8" for the front of the flap.
I set the card base aside to start cutting my images. 
I cut the mouse image and berries from cardstock to complement the designer paper used. The Berry phrase was cut in complimentary cardstocks as well. I attached them with Art Glitter glue. I like this one because it dries clear. 
This panel was attached to the card front flap. I attached the image panel to a white card base measuring 4 3/8" x 5 5/8".
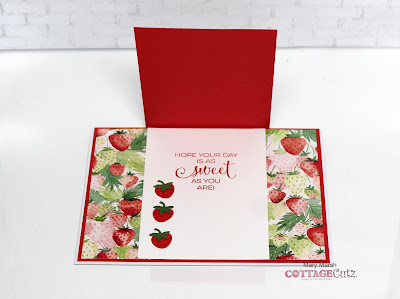
I also decided to finish off the card inside. I cut a piece of white cardstock measuring 2 7/8" x 4". I stamped my birthday sentiment and added a few additional strawberries. 
That complete my card for this week. I hope I have given you an idea for a way to use this cute new die. See you next Saturday!

Reminder: Our YouTube Channel has a new video from Marla Harris. There is a giveaway for being a subscriber, liking the video and leaving a comment. Click here.

We are also having a big July 4th sale with savings of up to 70%. So, shop early for the best picks.


Friday, July 01, 2022

June 2022 Release Strawberries & Bees


Hello CottageCutz Fans. We have a new release in the online store. It's our Strawberries and Bees release with 16 designs. You can pick up the entire bundle for 50% off and the individual dies are 30% off.

The new dies are perfect for all your cardmaking needs. They would work for so many occasions. We are also having a big July 4th sale with savings of up to 70%. So, shop early for the best picks.

Here is a quick YouTube video showing all the new dies. 


Stop by the Blog tomorrow for a card using these new dies. 


Thursday, June 30, 2022

It is New Release Time!!!

 Hello Friends,

The new release is just plain adorable.  It is called Strawberries and Bees perfect for those fun summertime cards.  For a limited time the entire bundle is 50% off!!   We also have a 4th of July sale with savings up to 70% off!!  Both of these sales won't last long so now is the time to shop until you drop!!

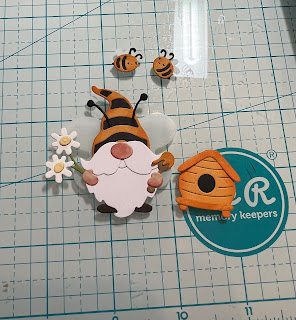
Here is my card using the new release dies Bee Gnome and Bee Phrases.


Design Steps:

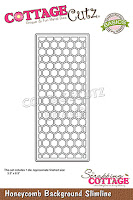
1.  Make a slimline base in white 3 1/2 x 8 1/2 cut a piece of yellow card stock 3 1/4 x 8 1/4, use the Honeycomb Background Slimline die and cut it out of white.  Glue the yellow to the base card and then glue the honeycomb on top of the yellow
2.  Using the Bee Phrase and the Bee Gnome dies cut out the following card stock colors: mustard, vellum, white, black, yellow and green
3.  Shade the mustard colored pieces with an orange ink and the face and hands with a pink
4.  Assemble the pieces with a fine tip, quick drying glue

5.  Glue your pieces to the card front as shown above and your card is complete

CottageCutz Products


Here is the new release so please check it out in our store today!!

We have more inspiration on our YouTube Channel check it out HERE
Thanks so much for stopping by!  And I will see you next Thursday.

Blessings and Take Care


Wednesday, June 29, 2022

New Release & Sale


Hello CottageCutz Fans. We have a new release in the online store. It's our Strawberries and Bees release with 16 designs.  You can pick up the entire bundle for 50% off and the individual dies are 30% off. 

The new dies are perfect for all your cardmaking needs. They would work for so many occasions. The DT will begin showing samples tomorrow. 

We are also having a big July 4th sale with savings of up to 70%. So shop early for the best picks.


Reminder: Our YouTube Channel has a new video from Marla Harris. There is a giveaway for being a subscriber, liking the video and leaving a comment. Click here


Tuesday, June 28, 2022

Welcome To Our Home Mini Décor Project

Hello Scrapping Cottage friends!  
Melinda here with you on this Terrific Tuesdie!  Today I am sharing a Patriotic Mini Home Décor project. It features some sweet little cupcakes from one of the dies from the New Sweet Treats Release! 
Here is my project.
I started with a cute little distressed home metal shaped silhouette. I found it at the dollar store.

I created the inner sentiment on my computer. I printed it off on some plain white cardstock. I printed it off on four different sizes as I wasn't sure which size would look the best.


Once I picked the size I felt would work, I used the third largest pierce circle die and cut it out.


I then cut, colored and assembled some of the sweet little cupcakes from the Pedestal Stand W/ Cupcakes die. I cut all the pieces out in white cardstock. I only had to color in the red and blue pieces. Easy peasy!  I also added some clear stickles to the "stars" on the cupcakes and on some of the white frosting.  I used some red stickles on the berries to give them a little sparkle.

I used some foliage from the Christmas Floral and Lantern With Pine Boughs Dies. I cut them all out in white cardstock as well. I then colored in the little stems with the "holly" berries on them.

I also added a dot of some blue stickles to the centers of the stars on the image. The little bow I added on the chimney is also from the Lantern With Pine Boughs Die.

Here are a couple of closeup photos of the cute cupcakes and foliage. You can see them sitting on the cute base that is a part of the die as well.

I did mount the white pierced circle with the image onto the next size up pierced circle that I used to cut out some Kraft cardstock. I added some foam tape between them to give it all a little lift from the base.

Here it is on my dining room table. I decided I didn't quite like it here. Felt like it got lost in the shuffle....lol.

Here is where I decided to put it. on my table in my entrance. 

Here is the new sweet treats release.

Sweet Treats Release


The Dies I used to create this project:


I also used the Lantern With Pine Boughs Die which is a discontinued die. However both the Christmas Farmhouse Floral and Deer Floral Spray dies both have some great "Holly berry" type alternatives.

Make sure you head over to the CottageCutz YouTube channel and check out all of the amazing projects on there. Our video team is doing a wonderful job of filling the channel with all sorts of creative content! You don't want to miss it!


Well that about covers it for today! Until the next time, have a wonderfully craft-die day!
Melinda Beltran