Saturday, March 05, 2022

Hippity Hoppity

Hello CottageCutz friends! Thanks for taking the time to stop and visit with us today. It's Mary Marsh here bringing you the Saturday edition of the Blog. 

IT'S NEW RELEASE TIME! The Spring Release with 20 new designs is in the online store. The individual dies are currently at 30% off. There is a nice combination of both religious and whimsical designs. So perfect for all card makers out there.

And the dies don't have to be used strictly for Spring or Easter. The team has done Valentine, Birthday and Thinking of You cards with these new dies. Take a look back on the Blog for lots of ideas.

Today for your viewing pleasure, I have a whimsical card for Easter. I used the new Spring Window w/Peekers  and the Spring Sentiments dies. I thought this card would be perfect for the two little ones who live next door to me. So, let's get started on some details of how I created my card. 

Design Steps:

Since I knew the image die I was going to use, I looked for some background designer paper. I knew I had some with a brick type look to it. I selected this one because I liked the color of the brick, so I paired it with the matching cardstock and then a jade cardstock base. 

Jade card base: 4 1/2" x 5 3/4"
Cinnamon layering panel: 4 3/8" x 5 5/8"
Cinnamon designer paper: 4 1/4" x 5 1/2" 
Next, I cut the window and bunny with colored cardstock that coordinated with the designer paper and card base. 
I cut out my hippity - hoppity phrase in the jade cardstock. I cut it 2x in jade and then once in white foam sheet and glued together with Art Glitter glue.  
Now that my elements are prepared, I am ready to start card assembly. I attached the designer paper to the cinnamon layer with double sided tape. Then the window is secured with dimensional adhesive.  I wanted it lifted off the panel to give it more depth. 
I removed the backing from the white foam and attached the hippity hoppity phrase to my card. Then attached the image panel to the jade card base to complete my card. I hope I have given you an idea for a way to use this new die. See you next Saturday!

Reminder: Our YouTube channel is active again. Check out the latest video from Theary for card inspirations. Click here.  
Unfortunately, this is the last video from Theary. Family obligations are her main priority right now. We will miss you, Theary. 
dies I used to create card:


Friday, March 04, 2022

Announcing New Addition to Design Team

Today I have the pleasure of announcing a new addition to the CottageCutz Design Team.


Jen Hartsgrove

My krafty korner of the world is in Northern Maine, where I live with my very tolerant husband, three active homeschooled children, our two naughty dogs, two spit fire cats, and two very stubborn house pigs…yes you read that right, pet pigs! Basically, I officially do reside in a funny farm!

My love of all things krafty started at a very young age, and led me to attending Green Mountain College in Vermont, and earning my BFA. While at GMC, I specialized in photography. I believe this was my steppingstone into my big passion, scrapbooking.

Scrapbooking had a natural evolution to stamping and card making. I love that I can play with all sorts of mediums and techniques such as die cutting, inks, watercolors, alcohol markers, and glitter….an artist’s dream!

Jen will be joining us as part of our YouTube team. She will be posting on the 1st & 3rd Wednesdays of each month. Here is a sample of the work that you can expect to see from this talented paper artist. 


And speaking of YouTube, the CottageCutz video artists are posting on our channel every Wednesdays. We have giveaways every Wednesday on the channel for subscribing, liking and commenting on the post. Here is a link to our channel. 

dies used to create card: 


Thursday, March 03, 2022

Leprechaun Gnome!

 Hello Friends,

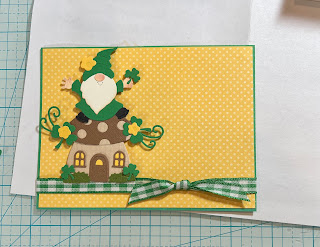
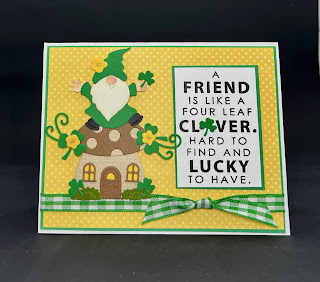
I am taking a break from making Easter cards and switching it up to St. Patrick's Day cards.  I am repurposing one of the new Spring Release dies and making it a cute St. Patty's Day card.  I just added some of the clovers from one of our older dies to give it a different look.

Designer Steps:

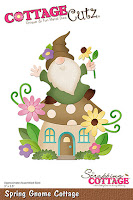
1.  I am using the Spring Gnome Cottage die and the St. Patrick's Day Cupcake die.  I cut the pieces out of tan, brown, yellow, green, and cream.  I added a little color to the hands and nose with my Copic maker E21.  I also added a little TH Vintage ink to the edge of the beard.  Glue together the pieces with a fine tip glue
2.  Use an A2 white card base cut the green 4 1/8 x 5 3/8 and the yellow dotted DP 4 x 5 1/4.  Glue the yellow and green together but do not glue to card base yet
3.  Pop the Gnome to the front of the card add the little clover to the grass and the yellow flowers to the center of the large clover
4.  Add the checked green ribbon to the bottom of the card with the knot off set to the right as shown above.  Glue your Gnome panel to the white card base
5. Stamp your sentiment in black and layer onto green card stock.  Glue the sentiment to the front as shown above.  Add yellow Stickles to the center of the flower and your card is complete

CottageCutz Products


Don't forget to check out the new Spring Release.  These sweet dies won't last long!
We have more inspiration on our YouTube Channel check it out HERE
Thanks so much for stopping by!  And I will see you next Thursday.

Blessings and Take Care


Wednesday, March 02, 2022

Congrats Blue Bird Card

Hello there friends! It's Theary back on the blog again today. For today's post, I wanted to share a card that I created using the BlueBird 4x4 Die from an older release. 

This card just screams Spring! And, honestly, I am eagerly waiting for the season to arrive. 

This card came together fairly quickly. You can use colored cardstock to cut the pieces out but, I opted to use white cardstock with alcohol markers. 

To get a better look at the process of this card please check out the video here: CottageCutz YouTube Channel

Until next time,
Theary Chea 


Tuesday, March 01, 2022

Miss Spring Bunny Center Step Card

Happy Terrific TuesDIE Scrapping Cottage friends!
Melinda here with you for another fun Tuesday. My project features another super adorable die from the new SPRING RELEASE! Here's what I created.


I made this super cute center step card. It features the sweet little Miss Spring Bunny die.


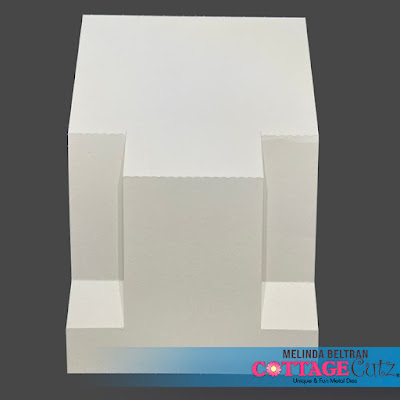
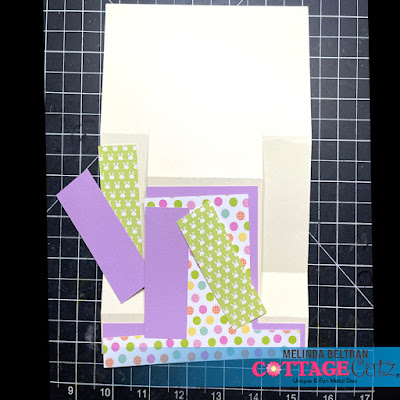
I started by creating the center step card base. I cut it out with my cutter once I created it.


I then cut out the corresponding mats.

Here is the base body of the card with just the mats. 

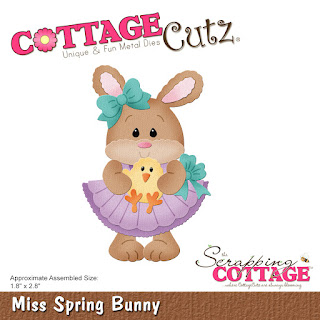
Next I cut out and pieced this sweet little Miss Spring Bunny holding chickee die. 
She is just too cute!!! I mounted her onto one of the scalloped rectangle dies from the nesting set. I used some more Doodlebug patterned paper for a mat.

Here are a couple of photos of the completed card. I mounted the scalloped mat with the bunny onto the center of the card. I added some decorative images from the paper pad set. 


I also mounted the sentiment Hello Sunshine from the same patterned paper pad onto the smallest rectangle die from the stitched nested rectangle die set.

To finish off the card I added a border of ribbon and a bow. I also added a couple of the Robin's Nest Dew drops. One to the center of the bow and the other two off to the top left corner of the center area. 


The Dies I used to create this project:


I used the Stitched Scallop version. That one is currently unavailable, but this is an excellent alternative.


In case you didn't hear, The CottageCutz YouTube channel is up and running.  Head over and check out the latest video! There is a giveaway for subscribing too!

Well that about covers it for today! Until the next time, have a wonderfully crafty day!
Melinda Beltran

Monday, February 28, 2022

Easel Card


Hi welcome to the Scrappin Cottage blog.  Today I have an circle easel card to share with everyone.
To make my easel card I used the Pierced Circle die and Pierces Frame to  reate the base for my easel.
 
Once done I diecut these gorgeous wildflowers and colored them with copics pens.  The color variation I used was 
RV61, 63, 66,69 for the wildflowers my leaves were colored using YG05,07,17 and G28
Next I added some water drops and added a chip border to finish the look


Sunday, February 27, 2022

Happy Easter


 I really appreciate all of the details found in CottageCutz dies.  I talk about this a lot in my videos.   The "Spring Sentiments" die is no exception. I used two of the sentiment words, on my card, from this die in my last video.  When I shared the die, I mentioned that it would also be great for creating a background. What do you think?  Was I right?

I couldn't pass up the opportunity to highlight another use for this die, so I am sharing this card on the CottageCutz YouTube Channel. I also think you will love the inking technique I share to bring this card some wonderful spring colors.

 You have a chance to win this die for yourself.  Head over to the channel to see what you need to do to enter the GIVEAWAY and to find out who the winner was from my last video. 

Until next time.... Marla