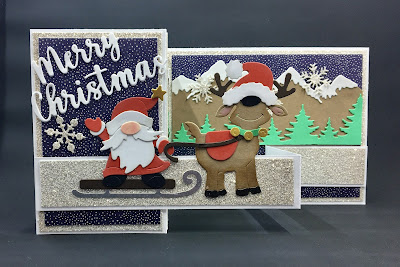
IT'S NEW RELEASE TIME! The new Christmas dies are in the online store with 40 new designs from Christmas Part 1 and 19 new designs from Christmas Part 2 and they are on a limited time sale at 30% off.
Today for your viewing pleasure, I am featuring the whimsical Christmas Deer w/Mailbox and The Merry Christmas w/Shadow dies. This one will go to my sister-in-law who loves woodland animals and feeds the deer regularly. So let's get started on some details of how I created my card.
Design Steps:
This week I started my card with my layout. As I have said so many times before having the sketch in mind helps start as well as simplify the card making process for me. I liked the sketch #877 at Splitcoaststampers. I thought it would work well for this cute little Christmas deer.
Next, I cut the images and stuck with the traditional Christmas colors of red and green. Then I looked through my selection of Christmas paper to see what would work for the sketch I chose. I found one that I liked. I thought I would use some vellum over the designer paper to tone down the somewhat busy pattern.
red card base: 4 1/4" x 5 1/2"
designer paper layer: 4 1/8" x 5 3/8"
white layer (element 3 of sketch: - 1 3/4" x 4 1/8"
The white panel with the sentiment is attached with double sided tape. I trimmed the design paper layer a bit because I was going to attach a snow bank.
The images are attached next with dimensional adhesive. I cut two snow banks from the North Pole die and attached them with double sided tape. I added two snowflakes for elements 4 & 5 of the sketch to complete my card.
Next, I cut my Merry Christmas w/Shadow sentiment in red and green. Love this new shadow die
Now that my card elements are prepared I am ready to start assembly. I attached the vellum to the designer paper with glue dots. I put them in places that I new would be covered with the white panel and then the images. The white panel with the sentiment is attached with double sided tape. I trimmed the design paper layer a bit because I was going to attach a snow bank.
The images are attached next with dimensional adhesive. I cut two snow banks from the North Pole die and attached them with double sided tape. I added two snowflakes for elements 4 & 5 of the sketch to complete my card.
Well, that's it for me for this week. I hope I have given you an idea for a way to use these new Christmas dies. See you next Saturday.
The CottageCutz YouTube channel is up and running. We are featuring videos every Wednesday. Drop by and subscribe so you don't miss one and give us a thumbs up on our videos

dies I used to create card:


