Friday, April 09, 2021

Sending Hugs Slimline Card

Happy Friday!  I'm so excited - there is a new release of SLIMLINE DIES!  These are wonderful, basic dies that should be a part of every card maker's collection. My card today utilizes several of these dies along with an adorable mouse from the Spring release.

Here is how I created the card:

I started by using the second largest of the Stitched Rectangles Slimline dies to cut two panels - one from white and the other from green cardstock. 

I then used one of the Grass Slimline dies to cut a strip of grass.  By cutting the grass from the Stitched Rectangle first the stitching continues around the whole rectangle when they are glued together.

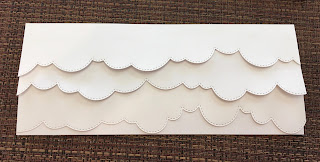
I then used the Clouds Slimline to make three stencils for my background.
Using a blending brush and Distress Oxide ink I stenciled the clouds.
I glued the grass to the background making sure I only glued the bottom and side edges (so I can slip my image under the grass.)  I stamped my "sending" sentiment and adhered the Hugs Phrase.  I placed a self adhesive sheet on the back of Hugs before die cutting to make this easier to place on the card.

Next I cut my image using the Mouse w/Flower Cart die.  The image is colored with a combination of Distress Oxide inks and Copic markers.

I wanted to use this yellow flower paper for my panel to cover the card base.  Because it was so lightweight, I cut a panel from lightweight white cardstock using  the largest of the Nested Rectangles Slimline dies.  I cut the floral from the largest of the Stitched Rectangles and glued them together.
I tucked my mouse and cart under the grass and adhered the image panel to my floral panel.  This all was glued to a card base.

I hope you've enjoyed my card today.  These slimline dies allow so many creative possibilities for your card making.  They are on sale for a limited time (52% off the bundle or 25% off individual dies) so please visit the online store.  There is also an Anniversary sale with up to 60% off select dies!

Dies used:


Thanks for visiting today!  I hope you have a fun and creative weekend!


Thursday, April 08, 2021

Soaring High! NEW SLIMLINE RELEASE

Hello Scrapping Cottage Friends!

WE ARE CELEBRATING 19 YEARS IN BUSINESS!  SO WE ARE PASSING ALONG OUR THANKS TO YOU!  Save up to 60% on select CottageCutz dies.  DURING OUR BIRHTDAY CELEBRATIONS!

AND TO CONTINUE THE PARTY WE HAVE A NEW RELEASE OF SLIMLINE DIES!  THERE ARE 9 DIES WITH A SPECIAL BUNDLE PRICE OF 52% OFF!

Today,  I am excited to share with you one of the new slimline dies called Clouds Slimline.  I combined it with one of our Spring Release dies which are also still on sale.  The die is the Fox in Airplane.


Design Steps:
1.  I started with the Fox in Airplane die and cut out all the pieces with yellow, red, green, blue, silver, tan, brown and vellum
2.  I assembled the pieces using a fine tip glue and a small pair of tweezers
3.  My base is a slimline white card measuring 8 1/2 x 7 scored on the 7 side 3 1/2.  Using the Clouds Slimline dies I cut the clouds using all 3 different dies
4.  Glue the clouds to the card leaving the bottom of the cloud with no glue so you can tuck in the next cloud just below it
5.  Create your little banner, I just did it free hand.  Pop your plane to the front of the card and then add clear sequin and you card if complete

CottageCutz Products


We are so excited about our Birthday Celebration and we hope you will take advantage of all of the special savings!

Blessings and Take Care
Pam


Wednesday, April 07, 2021

Blowing Wishes Your Way!

Hello!  This is Sukie and today I have a sweet card to share. The bunny dies worked perfectly for this card which I plan to use for a friend's birthday!  

Two of the die sets used on my card are from the Springtime die release; Bunny w/Butterfly and Bunnies in Pots.  I shaded the die cuts with some Oxide Inks for a soft appearance.  I also cut out a Nested Stitched Eyelet Rectangle.

I selected a patterned pink card base and cut out a rectangle with my paper trimmer and created a stenciled cloud background.  A whimsical sentiment was stamped on the rectangle.

The 2 card panels were layered for a perfect fit and then affixed to my card base.
Next, the adorable bunny was nestled inside the double rectangles.
The tiny bunny inside the pot was adhered in the empty space next to the larger bunny with the butterfly fluttering above.
Here are the die sets used on my card, available in the store:

Sunday, April 04, 2021

Easter Egg Hunt

Hi!

It's Anja here. I have my last Easter card for you today.

For this project I used:

- Cottage Cutz dies (Bunny Tree Cottage, Easter Egg Hunt),

- Distress inks,

- white card base (11x15 cm),

- white card stock for die cuts,

- black pen, 

- paper glue. 


First I cut and colored the bunnies and all the other pieces.

Next I cut and colored the eggs and the sign. 

Then I did the background.

Last I arranged all the pieces on the card base and glued it together. And my card was done.


And that's all from me for today. Have a nice Easter Sunday and see you again next week. 

Anja Z. 


Cottage Cutz dies I used for this card: 


Saturday, April 03, 2021

Easter Chick

It's Jeanne today with the Saturday post.  I have a cute little Easter card for you that is very simple to make.  Although this sweet chick is ready for Easter with her bunny ears, after Easter she can be used without the ears.  Wouldn't she make an adorable baby card!

Now on to my card.  I started with a sketch from Splitcoaststampers.

This simplifies the design process.  I decided that I would substitute the oval in the sketch with my chick and egg.

Then I picked my papers.  I cut a base panel  4 1/4 x 5 1/2 inches that will be adhered to my card base.  I used the largest of the Stitched Scallop Rectangle and Stitched Rectangle dies to cut my gingham layering panel.  When glued together the scallops just peek out from the gingham for a spring look.  Using the fourth largest of the Stitched Rectangles I cut my floral panel.

I arranged them as per the sketch and stamped my sentiment across the bottom.

It was time to cut my chick from various colors of scraps.  I chose a pink for her bow to coordinate with the flowers in the paper.

After gluing her down I added a few flowers I had leftover from another card that used the Bunnies in Pots die (also from this release).

I hope you've enjoyed my card today.  Be sure to visit the online store where the new release is on sale for a limited time!

Dies used:


Thanks for visiting.  I hope you have a blessed Easter weekend!