Friday, April 02, 2021

You Are Tea-riffic

Hello Scrapping Cottage friends! Thanks for taking the time to stop and visit with us today. It's Mary Marsh here bringing you the Friday edition of the Blog.

We have a brand new release of dies in the online store. It's our Spring Release with 22 new designs. Everything you need to create Spring, Easter, Birthday, Mother's Day, Father's Day, Thinking of you cards and so much more.

The Design Team has been showing samples using these new dies. So if you haven't seen them check back on the blog for lots of great ideas. The dies are currently on sale at 25% off so check all the new designs in the online store for some great selections. The Safari & Circus releases are still available at 25% off as well.

Now onto my card for today. I am featuring the new Spring Tea Party die and I created a Mother's day  card for a tea loving friend. She also collects teacups so I think she will like this one. Let's get started with some details on how I created my card.

Design Steps:

Since I knew what die I wanted to use I just needed the layout that would work with it. I found this one online. I liked the multiple layers and it gives me a chance to use designer paper. 
I looked through my papers to see what would work best. I decided to go with different shades of purple. 

Purple Posy card base: 4 1/4" x 5 1/2"
Designer Paper layer: 4 1/8" x 5 3/8"
Heather Highland rectangle layer: 1 7/8" x 4 1/8"
Gingham Designer Paper Layer: 1 3/4" x 4"
Purple Posy sentiment Layer: 2 1/4" x 3/4"
Grape embossed panel: 4" x 1 1/4"
White Circle Image Panel:  I used the 3rd largest Circle die.
Highland Heather Circle Layering Panel: I used the 3rd largest Stitched Circle die.
 
Now I am ready to cut my images. I used just the fox image from this set. I decided to cut the fox in light and dark gray cardstocks. This color worked better with my designer papers. Forgot to take a photo of the images before I attached them to Circle panel (LOL)!!!

Next, I stamped my sentiment in black ink with the help of my MISTI tool. Just in case I needed to double stamp. Sometimes the clear stamps don't make a good impression on the first stamping. And, for this one I did need to triple stamp to get a good image. 
Now that all my elements are prepared I am ready to start card assembly. I attached all the layers with double sided tape. 
For the image panel, I used dimensional adhesive on the fox. I usually like images lifted off the background slightly for added interest. 
To finish off my card I scattered a few grape rhinestones. And, that's it for me for this week. I hope you all have a blessed Easter celebration. See you next Saturday. 


dies I used to create card:


Thursday, April 01, 2021

Country Bicycle Ride

 Hello Scrapping Cottage Friends,

It is Pam creating with you on the blog today.

It is time to get out all of our summer toys!  How does a bike ride in the country sound to you?

I am using the Spring Bicycle for my card today.  


Designer Steps:

1.  Using the Spring Bicycle die cut it out of white card stock.  Use your makers to color the bicycle.  I used my Copic Markers
2.  Use an A2 Kraft card base, cut a piece of cream colored card stock 4 x 5 1/4 and run it through a brick embossing folder.  Cut a piece of kraft card stock 4 x 1 3/4 and give it a little hilly cut
3.  Glue the hilly kraft card stock to the bottom of the embossed cream paper.  Add the ribbon to the panel and then glue to the base of the card
4.  For the top of the card I used the little bird banner cut in white and then colored with Copic Markers.  I popped the banner up on the top of the card as shown below.  Glue the bicycle down flat and then add the sentiment glued flat also and your card is complete
I hope where ever you live here in the US you are able to get out doors and enjoy the beautiful spring weather.  

CottageCutz Products


Take Care and Blessings
Pam

Wednesday, March 31, 2021

You're Egg-stra Special!

Hello!  This is Sukie and today I have an Easter card to share for my design team day.  I used 2 die set from the new Springtime die release.  These die sets made for the sweetest Easter card!

I used a combination of colored card stock and some Oxide Inks for the die cut pieces.  I ended up cutting out the Hatching Bunny Chick twice.  All of the other die cut pieces are from the Mouse w/Flower Cart.
The background for my card was embossed with the Cuttlebug Chicken Wire embossing folder.  I punched out a strip of grass from the Fiskars Grass border punch. The sentiment sign was cut with my paper trimmer.
Once I adhered the grass border along the bottom edge of my card, I tucked the flowers in the center.
Next, I adhered one of the chicks on the left side of my card angling him just a bit for a whimsical appearance.
The other chick was affixed on the opposite side of my card, also angled a tiny bit.
The sentiment pieces were put together to create a sign which was propped up above the chicks.
The little bees were added to my card as the final finishing touch to create the sweet Easter scene!
Here are the die sets used on my card, available in the store:

Monday, March 29, 2021

Bunnies Secret Cottage

Hello Scrapping Cottage Friends,

Happy Monday!! 

It is Pam sharing with you on the blog today!

I am finishing up my Easter cards for friends and family.   So for today I am using Bunny Tree Cottage.  These little bunnies have a secret cottage in the woods.  There are so many wonderful details to this sweet die.  I am sure it will keep the recipient gazing at it for quite some time.


I cut out 3 frames using the largest of the Pierced Wide Rectangel Frame set.  Glue the frames together and cut out the pieces for the scene using the Bunny Tree Cottage die.  Shade and assemble your pieces
For the background I used blending brushes to create the sky and the area behind the door. I used an A2 card base and a slightly bigger piece of purple glued to the base.  Glue the background inked piece to the purple card stock and then pop up the frame scene on top.  I put a few more pop dots behind each bunnies head and some under the tree branch for support

Stamp the sentiment and layer it onto purple card stock then pop to card and you are done

CottageCutz Products


I am just about done with my Easter cards and I have had so much fun deciding which cards are going to which family member.  I hope you are having fun crafting too!

Blessings and Take Care

Pam


Sunday, March 28, 2021

Hoppy Easter

Hi!

It's Anja here. I have another Easter card for you today. I combined different dies from the latest release and come up with the card below.

For this project I used:

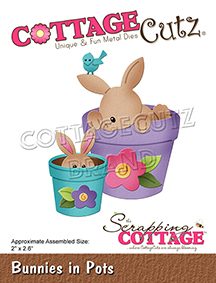
- Cottage Cutz dies (Bunnies in Pots, Hatching Bunny Chick, Bird w/Bluebells, Circle Set, Stitched Wide Circle Frame Set),

- Distress inks,

- white card base (15x15 cm),

- white card stock for die cuts,

- purple card stock for background (14,5x14,5 cm) and die cuts,

- patterned paper for background (14x14 cm),

- black pens (thinner and thicker),

- water spritzer,

- scissors,

- heat gun,

- paper glue. 


First I cut and colored the bunny and all the other pieces.

Next I cut all the papers for background. I used the biggest die from the frame set. 

Then I did the inside of the circle. I used smooching technique to color the background. I dried the paper with the heat gun. 


Last I added the sentiment. I wrote the sentiment with a thicker black pen. And then I cut it out of the paper. 


Then I arranged all the pieces on the card base and adhered it with the glue. And my card was done.


And that's all from me for today. Have a nice Sunday and see you again next week. 

Anja Z. 


Cottage Cutz dies I used for this card: 


Saturday, March 27, 2021

Spring Bicycle Shaker Card

Happy Saturday!  It's Jeanne with the Saturday edition of the blog.  I have an easy card that is sure to delight your recipient.  I don't know anyone who doesn't like a shaker card.   And while they can be intimidating, this one is pretty straightforward to create!

I started by backing the cardstock for my bicycle with an adhesive sheet.  This allows the bike to stick to the background of the shaker with no gaps.

Because the die is intricate I used a special tool I have to help separate all the pieces of the die.

My card is A2 in size so I cut a background panel and a front panel 5 1/2 x 4 1/4 inches along with a coordinating patterned paper.  Again, I used the adhesive sheet to adhere the paper to the card front.

Using the largest of the Stitched Square dies I cut a square centered side to side and up and down in the front panel.

I placed the top panel on the bottom and drew a light pencil line where the opening will be.  This allowed me to know where to stamp my sentiment.

Using a blending brush, I blended a medium purple and darker purple up from the bottom.

I glued an acetate window sheet to the opening on the front panel and added foam strips to the outside of bottom panel and just to the outside of the pencil lines. Then I erased the pencil lines.

Next I filled the inside of the shaker with sequins.  I would love to be able to say use a certain amount, but filling a shaker is really just by eye.

I put the top panel on the bottom panel and the shaker panel was finished.  All that was left was to add some embellishments and glue it to the card base!

I hope you've enjoyed my card today.  Be sure to visit the online store where the Spring release is on sale for a limited time!

Dies used:


Thanks for visiting today.  I hope you have a fun and creative weekend!