Saturday, October 27, 2018

Stitched Snowman

Hello Scrapping Cottage friends! Thanks for taking the time to stop and visit with us today. It's Mary Marsh here bringing you the Saturday edition of the Blog. 
We have a new release of dies over at the online store. Our Autumn 2018 dies are here with 10 new designs. They are currently 25% off for a limited time.

Today's card is from the Christmas Release Part 3. There are 14 new designs in this release and any of them would be so perfect for your Christmas card making. I used the Stitched Snowman die to create a Christmas card. So let's get started with some details on my card.
Step 1: I wanted to make a card that would be easy to recreate for multiple cards. With that in mind, I kept the layout relatively simple and not as many layers as I like to use. I also wanted traditional Christmas red and green. I chose my patterned paper with these colors in mind. 

red card base: 4 1/4" x 5 1/2"
patterned paper layer: 3 7/8" x 5 1/8"
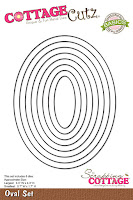
green stitched oval: used the 2nd largest die from the stitched oval set.
white oval: used the 2nd largest die from the oval set

Step 2: In keeping with my traditional colors, I used green cardstock for the snowman's ear muffs and gloves and red for the heart. Sponged a bit of soft blue around the snowman and snowbank.
I wanted the sentiment on the image panel so I stamped it with the help of my MISTI.
Then I used a snowfall embossing folder to add some background snow.
Step 3: Now that all my elements are ready, I started card assembly. I decided I wanted to add some ribbon to my card. I like using it on Christmas cards. But you could certainly skip this step to make mailing easier.
Attached my snowman image to the oval panels using dimensional adhesive. The slight lift off the background creates nice depth.

Attached this image panel to the card base. Again I used dimensional adhesive. My intent was to add a bow but I didn't like the look of a bow with this particular ribbon.
To finish off my card I added a few sequins. This was just for more of a festive look. Well that's my card for this week. I hope I have given you an idea for a way to use this super cute Stitched Snowman die. See you next Saturday.
Next week the DT will be showcasing the exclusive Dakota the Husky die in our posts. So hope you will come back and take a look at the different ways to use this new die.

Dies I used to create card:


http://www.scrappingcottage.com/cottagecutzstitchedsnowman.aspx
http://www.scrappingcottage.com/cottagecutzstitchedovalsetbasics.aspx

http://www.scrappingcottage.com/cottagecutzovalsetbasics.aspx


Friday, October 26, 2018

Autumn Leaves

Happy Friday Cottage Cutz fans!  It's Jeanne posting today.  I love these new leaf dies!  I decided to use a card sketch from CAS Colours & Sketches because it allowed me to concentrate on the technique instead of the layout.
 Here is the challenge:
https://cascoloursandsketches.blogspot.com/2018/10/design-team-call-and-challenge-295.html
I used my Distress Oxide inks and what I call a "splat" technique.  I swipe the ink pad on a plastic mat and spray with water, then I dip my paper into the mess.  I do this with several colors, most of the time using my heat gun to dry between layers.  I used Fossilized Amber, Wild Honey, Peeled Paint, Fired Brick, Spiced Marmalade and Gathered Twigs ink colors.
When the paper was nice and dry, I die cut the leaves.  This technique gives a randomness to the leaf colors - just like in nature!
I tipped the edges of the leaves in the brown and brick inks.  This gives a bit more realism to the leaves.

I cut a rectangle 2 1/2 x 3/1/4 inches from Early Espresso card stock and three strips of Copper Foil card stock 1/4  x 4 1/4 inches.  I also cut an A2 panel from white card stock and tipped the edges in the brick and brown since white edges seemed too stark for this card.
The brown panel is 7/8 inches from both the top and sides and I placed the top copper strip 1 3/4 inches from the bottom.  Each strip is 1/4 inch from the one above it.


Finally, I added some epoxy dots as "dew" drops.

This card is actually quite easy to make although it looks intricate and time consuming.  Because of the technique there will never be two cards alike, but that is the beauty of nature!

Dies:
http://www.scrappingcottage.com/cottagecutzfallleaves.aspx

Thanks for visiting today!  I hope you have a fun and creative weekend!


Thursday, October 25, 2018

Autumn Treats!

Good Morning Scrapping Cottage Friends!

Happy Thursday to you! It is Pam sharing with you on the blog today!  I hope you all are enjoying the beautiful fall weather and all of the colors that are starting to appear on the trees.  I am continuing to make fall cards not only for Halloween but for Thanksgiving as well.

My card today features the yummy cupcakes from the Autumn Sweets die and the lovely scripts are from the Fall Phrases die.

Design Steps

1.  Cut all of the pieces using the Autumn Sweets die out of white card stock

2.  Use your favorite markers to color all of the pieces


3.  Assemble the pieces with a fine tip glue.  I like to assemble them as soon as I get them colored so I don't misplace any of the small pieces.  Set the cupcakes aside
 4.  Use an A2 white card base.  Fold the front flap in half as shown above.  Cut 2 brown pieces 2 x 5 1/4 and glue to the front.  Then cut a brown piece 5 1/4 x 4 for the inside flap
 5.  Using designer paper cut 2 pieces slightly smaller then the front flap brown cards stock.  Cut one piece slightly smaller then the inside brown card stock
 6.  Using the Stitched Scalloped Oval cut out 2 ovals using lined DP
 7.  Using the Fall Phrases cut out the enjoy and fall out of brown card stock

8.  Glue one of the cup cakes to the oval and attach it to the front flap making sure you only put the glue on one side of the oval.  Also glue down the enjoy to the front flap
9.  On the inside of the card glue down the other cupcake to the lower right side of the card and then add the oval making sure it will be hidden right behind the front flap oval.  Add the word fall and your card is complete
CottageCutz Products


I hope you take some time to really enjoy all of the fall colors!  And you also use that as an inspiration to make some beautiful cards!
Blessings
Pam


Tuesday, October 23, 2018

Old MacDonald had a farm ...

Hi, Janja is here!
Today I have two cards for you with a lovely scene on the farm.
Let me show you how I created my cards.


Supplies:
- CottageCutz dies: Barn & Windmill, Chickens & Coop, Cow, Pony, Goat, Pig, Geese, Old Farm Fence, Grass, Tree & Vines
- white card base: 4.25 x 5,35" (10,7 x 13,9 cm), folded
- white card stock: 4 x 5.2" (10 x 13,2 cm)
- colored card stock
- colored ink pads
- glue, double-sided adhesive tape, self-adhesive pads

From the "Autumn" release I have chosen two new dies.
Cut out all the pieces we need.
I used different colors of card stock. The edges are further highlighted with colored pads.


I added some animals from the older release "On the Farm".


Now prepare the card base and a rectangle from a white card stock, which is slightly smaller than the base surface of the card.
Spray the white rectangle with a blue and green color.


To finish the card attach all the elements to the prepared background with glue and self-adhesive pads.


Thank you so much for joining me. Have a nice day.