Friday, October 27, 2017

Hop Project - Christmas Cupcake Double Easel Card

Hi everyone and happy Friday! It’s Janet and I’m so over the moon excited to kick off the video blog hop of projects using the new holiday releases. On top of getting all kinds of inspiration, the prizes the ladies and CottageCutz are offering are amazing. Don't miss out!

To go to the CottageCutz hop project, just click on the YouTube thumbnail below. Don’t forget that to qualify for the CottageCutz channel’s prize ($20 credit) and the CottageCutz Grand Prize, you need to visit each video in the hop, comment and subscribe. The video’s description will have the links to all the other hop videos so you can visit each one.


Here's a summary of the hop details:
1) It will start with some videos being released today and some on Saturday.
2) The CottageCutz hop video can be found in the thumbnail below.
3) The video description will contain all the project hop video links so you can follow along.
4) The cutoff to comment and subscribe is Midnight, Saturday, November 4th. The winners will be drawn and announced within 24 hours after the cutoff.
5) The CottageCutz video channel will be giving a $20 store credit to the lucky winner who comments and subscribes to all the channels!
6) Doing #5 will also automatically enter you in the Grand Prize drawing for the hop. This is going to be something really special from the Scrapping Cottage!
7) Every artist will be giving something fabulous away as well. Make sure you watch their videos to learn what to do to qualify for their channel prizes.
8) I'll be giving away a 24 pack of Spectrum Noir markers to a lucky participant over at my channel!
9) Have FUN and be INSPIRED!


PRIZE WINNER ANNOUNCEMENT!!!!!
We had a lot of visitors who commented that they would be joining the hop on Tuesday’s haul video. Thank you so much for watching and letting us know you are as excited as we are! As promised, I drew a winner from those who commented and the winner is…………………..
LISA FROM CHARLISA’S CRAFTY CORNER!!


Congratulations Lisa! You’ve won the paper pad, card blanks and wreath pack. I’ll contact you soon to get your mailing address.


And now to my hop video. Today’s project highlights three adorable new Christmas Cupcakes, some delicate snowflakes and a bold Merry Christmas message highlighted by reindeer and a pine cone stopper. This is a double-easel card and I'll show you how to make this design into a card that will be treasured by your recipients. Please note that the Santa Cupcake die is already out of stock but new stock is arriving soon so you can still get it if you want it. Look for him back in the store soon. He really is adorable!


Dies used in this project:


Thanks again for visiting us here and I hope you have a wonderful weekend! See you at the hop!

- Janet

Thursday, October 26, 2017

Peeking Santa

Hi Scrapping Cottage Friends

It is Pam sharing with you today!

Before I get started I wanted to share with you that tomorrow and Saturday we will be having a video blog hop!! Six talented YouTube crafters will be showing off their interpretations of some of the new holiday release dies during the hop.  The sneak peeks are amazing featuring some beautiful projects!  Please check out Janet's post to get all of the details!!

Now on to today's project, I am making my Christmas cards and this one is going to someone very special!  I just love this Santa peeking out the window!

Designer Steps:

 1.  Cut the pieces using the Window With Shutters and Window Christmas Friends dies.  I used red, green, white, brown and white card stock for all of the pieces.
 2.  Color and shade the pieces with Copic markers.  Add small rhinestones for the eyes and the centers of the poinsettias
 3.  Glue all the pieces together and add a small piece of yellow DP behind the window
 4.  Use an A2 white card base and glue a slightly smaller piece of DP with snowflakes on the card base.  Pop dot the window and sentiment to the front of the card


I hope you are inspired by all the new dies in our Store!

Blessings
Pam


Wednesday, October 25, 2017

Art Journal - Live Life Through Art

Hello creatives!  Do you love art journaling?  
I am excited to be sharing the start of my newest art journal, live life through art using the Cornucopia die.
I die cut using watercolor paper.  Then I used watercolors to color in the pieces.
With the leaves, I blended the rich colors of autumn together.
Once dried, I used a charcoal pencil to add additional details.
Then I layered the die cuts adding pop dots to some of the dies to add dimension.
Next, I added lace, additional papers, burlap and ribbon to complete the front of the art journal.

Die used:

Wishing you a creative day.

Tuesday, October 24, 2017

Hop Announcement, DT Haul & Prize


Hello everyone. It's Janet from SugarShine Designs and I'm excited to announce that the Scrapping Cottage is sponsoring a video blog hop which will be held this Friday and Saturday, October 27th and 28th! Six talented YouTube crafters will be showing off their interpretations of some of the new holiday release dies during the hop. I've seen some sneak peeks and there's going to be some beautiful projects and a variety of project types to give you some inspiration as we start thinking about making all of our holiday creations this season. Please read the whole post because there is an opportunity for a pre-hop giveaway from me that you can qualify for today.

Here's a summary of the hop details:
1) It will start with some videos being released on Friday and some on Saturday.
2) The CottageCutz hop video will be released right here on Friday morning.
3) Friday's video will include links to all the project videos in the hop so you can visit them all.
4) You'll have about a week after the hop ends to watch all the videos before the prizes are drawn.
5) The CottageCutz video channel will be giving a $20 store credit to the lucky winner who comments and subscribes to all the channels!
6) Doing #5 will also automatically enter you in the Grand Prize drawing for the hop. This is going to be something really special from the Scrapping Cottage!
7) Every artist will be giving something fabulous away as well. Make sure you watch their videos to learn what to do to qualify for their channel prizes.
8) I'll be giving away a 24 pack of Spectrum Noir markers to a lucky participant over at my channel!
9) Have FUN and be INSPIRED!

So now on to my video for you guys. In it, I repeat the information for the hop and I also show you the dies I received as a DT member to use in my projects here on the blog. Although there are a lot of them, it's still a drop in the bucket compared to all the designs that are part of the release. It's a truly a mammoth release of holiday goodness!

Today's Giveaway:
After you watch the video below, leave a comment in the video description section to say that you'll be hopping with us and hit the thumbs up icon. That's all it takes to be entered into the drawing! You'll see what's included in the prize at the end of the video. I'll include the winner's name in the description of Friday's hop video so make sure you come back to find out who won.

Have a great week and I'll see you back here on Friday!


Monday, October 23, 2017

Christmas Tag Cards

Hi, Lois here today.  I have created a project made with one of the new Christmas dies -- Christmas Tags.  BUT . . . instead of using the tags as they were intended, I thought it would be fun to make three small square cards with them.


First I cut the cardstock and patterned paper.  The card bases are 4 1/4" x 8 1/2", scored in half; and the patterned paper layers are 4" square.


I scored the cardstock in half and adhered the patterned paper to each one.


Then I cut the pieces using the Christmas Tags die.  The tags were cut from fun foam, and the small embellishment pieces were all cut from white cardstock and colored with markers -- except for the snowflakes, which were cut from silver paper.


To make adhering the small embellishment pieces easier, I ran them through my Xyron X sticker maker . . .


. . . then I constructed the tags.


Using the second largest Double-Stitched Circle die, I cut three colored circles, and using the second largest Nested Stitched Scallop Circle die, I cut three white circles.


All I had to do then was construct the circles, add foam dots to the undersides and adhere the tags.


I wanted  to show that you can use dies for something other than their original purpose.  CottageCutz dies used on my cards are:

http://www.scrappingcottage.com/cottagecutzchristmastags.aspx


http://www.scrappingcottage.com/cottagecutzdouble-stitchedcirclesetbasics.aspx


http://www.scrappingcottage.com/cottagecutznestedstitchedscallopcircleset.aspx


Sunday, October 22, 2017

Paper design inspiration

Hi!

It's Anja here. We got a terrible Sunday weather today here in Slovenia. Rainy and foggy, but perfect for crafting. And crafting is what I'm doing today. I was organizing my Christmas stash and found a fun pack of papers with holiday designs. Two of them caught my eye. I immediately knew which dies to pair them with.


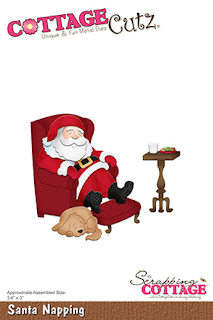
 - Cottage Cutz dies (Santa Napping, Christmas Flamingo, Nested Stitched Scallop Circle Set, Nested Stitched Scallop Oval Set),
- Distress Inks (Fired Brick, Vintage Photo, Walnut Stain, Pumice Stone, Black Soot) ans Oxides (Worn Lipstick, Picked Raspberry, Vintage Photo, Antique Linen),
- craft and white card base (15x15 cm and 10,5x15 cm),
- design paper,
- white, black and red card stock for die cuts,
- Zig markers (grey and flesh shades),
- colored pens (black, green, yellow, red),
- paper glue.

This is the pack of papers I used for my inspiration. I cut two pieces of each. Ones are 14x14 cm and
the others 10x14,5 cm. I used Distress Oxides around the edges.


Then I die cut all the pieces for Santa. This time I also used red and black card stock. Santa was quite a challenge and additional instructions given to the die really helped. I colored him with the combination of Distress Inks and Oxides and different colored pens.


I made the flamingo in the same way as Santa. I die cut all the pieces from white paper.


I also die cut two ovals and two circles. I used one for the outside and the other for the inside of the card.


When I had everything cut and colored I used glued it together and made two cards. 


This is all from me today. I hope you have a crafty Sunday.
Anja Z.


Cottage Cutz dies I used: