Saturday, December 03, 2022

We Wish You A Merry Christmas Owl Card.

Happy Saturday Cottage Cutz Friends!
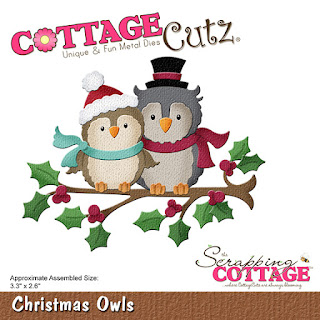
Melinda here with you, and today I am sharing a simple but effective Christmas themed card I created featuring the cute Christmas Owl die from the FABULOUS Christmas release!
My card is a standard A4 size: 4.25 x 5.5. This card is a regular side fold card. I thought these Owls were adorable. I wanted to make them in  my favorite color...pink. So I ended up with this very non-traditional looking Christmas card. 

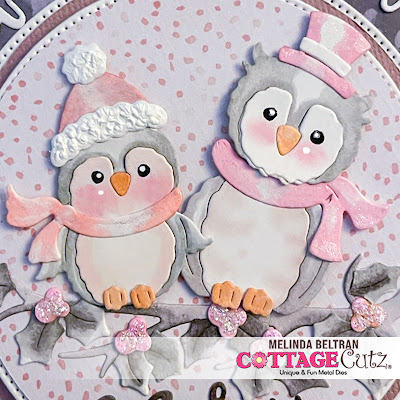
I started by die cutting all of my pieces in white cardstock. I then proceeded to color the various pieces in. I wanted to keep my little owls on the lighter colored side. So I used shades of gray and light pink-peach for their bodies. I used some chalks for their cheeks. I also added some stickles to the berries and some puffy paint to the little owl with the hat on the left. I added the paint to the rim and the pom pom of the hat and it gave it the perfect texture and dimension.  


I mounted the adorable owls onto a pierced circle mat cut from white cardstock. I used some pretty patterned paper for the mat layer. I then repeated that with the largest pierced circle die cut in white cardstock and to that I added a mat of some rusty pink cardstock. I then used the phrase We Wish You A Merry Christmas from the Merry Christmas tree die. I curved the letters around the large circle die. 


Here is a closer look at the work merry. I colored that in some dark gray marker and it matched the leaves and theme of the card perfectly.


Here is one last look at the completed card. I loved the way this turned out!


Don't forget to head over to the CottageCutz YouTube channel and check out all of the amazing projects on there. Our video team is doing a wonderful job of filling the channel with all sorts of creative content! You don't want to miss it!

Dies I Used
Christmas Owls

Merry Christmas Tree


Pierced Circle Set

Here's a look at the entire release. Be sure to head over and grab them while they last!

Well that about covers it for today! Until the next time, have a wonderfully craft-die day!
Melinda Beltran

Thursday, December 01, 2022

Christmas Owls

Hello CottageCutz Friends,

It is Pam sharing with you today!

TOMORROW at 9:00 PST IS THE LAST DAY OF THE BLACK FRIDAY SALE!  Don't miss out on all the incredible bargains.  You can save up to 85% on some of the items in the store!  Time to stock up or buy your crafty friends an amazing Christmas gift!!

Today,  I am using the Christmas Owls.  


Design Steps

1.  Cut out the pieces using the Christmas Owls die and the following colors of card stock: green, red, brown, light gray, dark gray, white, brown, tan, yellow, and black.  Use DP for the scarfs light red snow and stripes.  Shade the pieces if desired with the matching ink colors and a small applicator.  Assemble the pieces with a fine tip glue
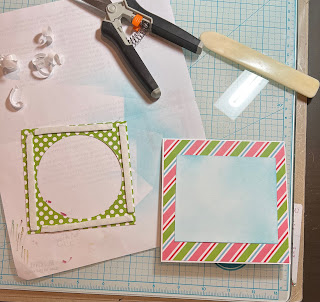
2.  Use a white card base measuring 5 x 5 folded, a piece of striped DP 4 7/8 x 4 7/8, a piece of snowy DP 4 1/4 x 4 1/4. Cut a circle in the middle using the second to the largest Pierced Circle die.  Also cut a piece of white 4 1/8 x 4 1/8 and ink with blue
3.  Glue the striped DP to the white card base and then glue the inked blue piece onto the stripes directly in the center of the card.  Place dimension tape on the back of the piece with the circle cut out and then pop it over the blue
4.  Glue the branch with the holly leaves inside of the circle.
5.  Glue down the owls onto the branch as shown above.  Add the bow and the sentiment and your card is complete

CottageCutz Products


We have more inspiration on our YouTube Channel check it out HERE

Thanks so much for stopping by!  And I will see you next Thursday.

Blessings and Take Care


Wednesday, November 30, 2022

More Classic 50's - Card & Scrapbook Layout

Hello CottageCutz friends! Thanks for taking the time to stop and visit with us today. It's still Black Friday release week here on the Blog.

We have a new Classic 50's release that makes its debut here on the Blog and also in the online store. You can pick up the bundle for a huge 65% off. That's under $97 or 30% off individual dies. The release is filled with some amazing retro images from the 50's era.

We have been featuring group posts for the past week to give you lots of inspiration on different ways to use the dies. If you missed any of the posts, just check back on the Blog for lots of eye candy. Today, we have 2 samples for  you from Design Team member, Jen Hartsgrove

Card 1:  Turning 50 and images from the 50's are so perfect for the card Jen created to celebrate this milestone birthday. She used the Fifties Soda Bar and the Fifties Phrases #1 dies to create a fabulous scene from the era where soda fountains were the rage. 

Her background designer paper is a great choice for "wallpaper". So much detail with this new die- check out the juke box on the counter! Don't you just love it!!!
This is the card inside view. 
Project 2:  Jen has been showing us quite a few layouts over the past couple of months. Check out our YouTube channel if you are a scrapbooker. All of our dies are so easy to add to any scrapbook layout. 

On this 8 x 8 layout Jen used the Fifties Diner and the Fifties Phrases #2 die. So perfect for the car hop they host each summer at her restaurant in Maine. How fun would that be for a 50's throwback! Her daughters and nieces are the car hop waitresses. 

The Diner die has lots of detail as well. Here is a close up photo. 

That's it for today's samples. We hope you have been enjoying the samples we have been creating using these new dies. The team has had so much fun using them in our card designs, 3D projects and scrapbook layouts.

dies used to create card:


Tuesday, November 29, 2022

Pop-Up Record Player

Hello CottageCutz friends! Thanks for taking the time to stop and visit with us today. It's still Black Friday release week here on the Blog.

We have a new Classic 50's release that makes its debut here on the Blog and also in the online store. You can pick up the bundle for a huge 65% off. That's under $97 or 30% off individual dies. The release is filled with some amazing retro images from the 50's era.

We have been featuring group posts for the past week to give you lots of inspiration on different ways to use the dies. If you missed any of the posts, just check back on the Blog for lots of eye candy. I have another project idea for you today using the Fifties Phrases #1Fifties Phrases #2, Guitar Music Notes & Records dies to create a pop-up record player. 

Vinyl records & record players have been trending for the past few years. So, I thought I would try to create a paper one as a birthday card. It's going to my brother in January, and I am pretty sure he will think it's something fun & unique.

Design Steps:

I started by creating the "record player base" It's really easy to make with one sheet of cardstock.  I used a piece of red cardstock measuring 4" x 12". Then I scored the paper at 4″, 7 1/2″, 8″ and 11 1/2″. 
You only need one piece of Scor-tape added to 11 1/2" score line or other strong tape to secure the pop-up base together.
This the base taped together. 
Then I started my decorating. For the card front, I used some musical score designer paper layered onto black card stock and then onto the card front.  The phrases are part of the Fifties Phrases #1 die. 
Next, onto the card inside. For the turntable, I used the largest Stitched Rounded Square die and cut in white cardstock.  I cut the largest record from the Guitar Music Notes & Records die. 
I had to get a bit creative for the needle arm. When I looked online some of the needles looked like hockey sticks. We have a die from last winter the Winter Hockey Bunny that had a perfect sized hockey stick. I cut it in silver cardstock. I made a needle base in black. It's cut from the smallest Square Set die. The on - off buttons are cut from the Circle Set die in black and silver.
I made a pocket on the inside of the lid to hold another record. You could also add a gift card here. I don't exchange gifts with my brother, so I used a record. I took the largest Square Set die- cut in white cardstock and then used the 5th largest Circle Set die to cut the pocket opening. 
To finish off the card, I added some music notes. That's it for me for this post. I hope you have been enjoying the samples we have been creating using these new dies. The team has had so much fun using them in our card designs and 3D projects.

Dies I used to create project:


Monday, November 28, 2022

50's Girly Birthday

Happy Monday CottageCutz Friends!

It's Kris sharing with you today ☺


My card features the Poodle Skirt, Rollerskate, and the Fifties Phrases #1 from the Black Friday Release, along with a couple of circle sets: Pierced Wide Circle Frame set  and the Nested Wacky Stitched Circles Set

This BLACK FRIDAY RELEASE BUNDLE as well as their BLACK FRIDAY BLOWOUT SALE ends this Friday, Dec. 2nd ~ SAVE up to 85% on CottageCutz dies!  Now is a great time to snag some basic dies -- some slimlines -- or something else on your wishlist (there's so many CUTE dies to choose from!!)  

CUTTING & SCORING:

BLACK CARDSTOCK
Card Base = cut a 5-1/4" x 10-1/2", scored at 5-1/4" 
Black Circle = Die cut the largest from the Pierced Wide Circle Frame set
Happy Birthday = Die cut the Fifties Phrases #1

WHITE CARDSTOCK
White Circle = Die cut largest from the Nested Wacky Stitched Circles Set
50's Elements = Die cut the Poodle Skirt, Rollerskate, and Fifties Phrases #1 

PATTERNED PAPER
Polka-Dot Layer = cut a 5" square

ASSEMBLY STEPS:
1.  I rounded the corners of my card base and patterned paper.
2.  I wrapped gingham ribbon around the patterned paper, about 2/3 way down, then attached to card front.
3.  I colored my diecuts (Poodle Skirt and Rollerskate) with Copics and assembled. 
4.  I glued my skirt to the white circle, then onto the black circle and onto card front.
5.  I added foam dots to the back of the skate and attached to card front.
6.  I glued the black "birthday" saying to the white of the same, offsetting it a bit, then glued onto card front.
7.  I glued the black "Happy" letters to the white rectangles from that die, then offset them onto the black rectangles and attached to card front so that the tops are hanging off the card a bit.  
Done! ☺

Again, here are the products I used:


We'd LOVE to see what you are creating with this FUN 50's RELEASE!! 
Be sure the add #cottagecutz when you post on social media ☺

Want more inspiration?!
Subscribe to our YouTube channel HERE!