Saturday, September 21, 2019

Autumn On The Farm

Hi, Janja is here with you.
A little more, and autumn will come. This is the richest time of the year, enchanting us with beautiful autumn colors, juicy fruits and vegetables.
I tried to capture some of this on a card I share with you today.


CottageCutz dies - Lucky Leprechaun, Hats, Glasses & Mustaches, Old Farm Fence, Cornucopia, Ivy, Carrot Patch Bunny
- white card base: 5.3 x 5.3" (13,5 x 13,5 cm), folded
- patterned paper: 5 x 5" (12,7 x 13,7 cm)
- colored cardstock
- corrugated kraft cardstock
- colored ink pads
- watercolor brush
- glue, double-sided adhesive tape, self-adhesive foam pads
Cut out the central motif with Lucky Leprechaun die and add a mustache.


Now cut out the various autumn crops.


Cut ivy from watercolor paper. I colored ivy with Distress Inks, brush and water.


Prepare a card base and trim a patterned paper. From corrugated kraft cardstock cut a frame and a fence. The outer edge of the frame is the same size as the card base.


First, attach a pattern paper and frame to the front of the card. Then paste the central motif, a fence and ivy. Finally, fill the bottom of the card with all the vegetables and fruits.


Have a nice day.
Janja


Friday, September 20, 2019

Teacup Christmas Kitty

Happy Friday!  It's Jeanne today with a die from the new Christmas release.  When I saw this Kitten in Teacup die I fell in love.  The kitty is so cute and although it is a Christmas die, it doesn't need to be.  Just take off the Santa hat and holly and it can be used all year long!
To start I chose some Christmas paper so I would have my colors.  I like the two tones of red in this pattern.  I cut an A2 panel and a circle in vanilla using the second largest of the Wacky Stitched Circle dies.
Then I cut my pieces using various colors of card stock.  I cut two sets of paws, one grey and one white as I wasn't sure which ones I wanted to use.  I used two shades of red - bright for the hat and berries, and a dark for the saucer and teacup decoration.  For the greenery, I used an older Christmas die in two shades of green. To make the teacup a bit "fancy" I cut the rim in gold to match the sentiment.
Using a fine tip liner pen I colored his eyes.  I used Distress Oxide ink and a sponge dauber to tip the edges of the cup, cat, paws and hat pompom and band.  This gives them a little bit of depth.
I assembled my teacup and kitty on a silicone mat.
The I assembled my card front, angling my sentiment and using a thin gold washi tape down the left side.
My kitty is popped up using foam dots on the back.  I adhered the panel to a vanilla A2 card base.
As you can see, I decided on the white paws.  I think this card will be my Christmas card for a friend who adores her gray and white cat.  (And it has white paws!)

Don't forget to stop by the online store where the new Christmas release is 25% off for a limited time.  They are adorable and the design team is looking forward to sharing them with you!

Dies used:
http://www.scrappingcottage.com/cottagecutzkitteninteacup.aspx

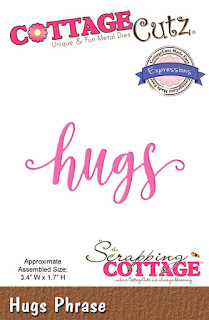
http://www.scrappingcottage.com/cottagecutzexpressionsplushugsphrase.aspx

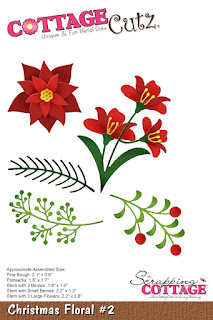
http://www.scrappingcottage.com/cottagecutzchristmasfloral2.aspx
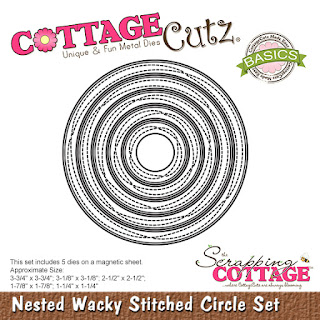
http://www.scrappingcottage.com/cottagecutznestedwackystitchedcircleset.aspx

Thanks for joining me today.  I hope you have a fun and creative weekend!

Thursday, September 19, 2019

Polar Bear Christmas!
Hello Scrapping Cottage Friends!

It is here! The adorable new Christmas release is available in the store today!  And to make it even better there is a 25% off discount!  Go and check out all of the fantastic new designs.

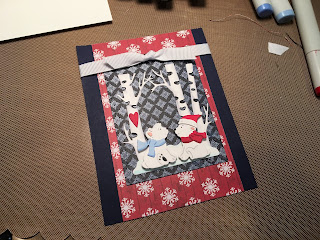
I am using one of the new dies for my card today! The die is Polar Bears w/Birch Trees.

Design Steps:

 1.  Using the Polar Bear w/Birch Trees die cut out all of the pieces in white card stock
 2.  Use your favorite markers to color the pieces and assemble them
 3.  Using the Wacky Stitched Rectangle second from the largest cut out a piece of navy DP
 4.  Assemble the snow and birch trees onto the DP.  Use pop dots and attach the bears

5.  Use an A2 white card base, cut a piece of navy card stock slightly smaller then the card base, cut a piece of red snowflake DP 5 1/4 x 3 1/4 (I have the red DP on the wrong side Hee Hee) Also cut a piece of white ribbon
 6.  Place the red snowflake paper in the center add the navy panel with the bears and finally add your ribbon

CottageCutz Dies


Here is a peek at all of the wonderful Christmas Dies!

Don't miss the 25% off sale for all of these wonderful Christmas Dies!
Blessings
Pam


Wednesday, September 18, 2019

A Christmas Wish Just for You!

Hello!  This is Sukie and today I'm sharing a project created with the new Christmas dies.  There are 25 new dies in this collection and they are perfect for those Christmas creations and they are all on sale right now!
I went with a traditional color palette for my card pulling the colors from the beautiful patterned paper.
The die cuts are from the Christmas Car & Trailer set.  I mixed in some additional patterned papers from my stash for the details on the car & trailer.  I also cut the oval for the background in white card stock from the Double Stitched Oval set.
As I was thinking of my card design, I found a fun sentiment in my stash from the Scrappy Moms (retired) Merry Kissmas stamp set.  I also cut out a frame for my sentiment using the coordinating card stock.  The white oval was given a splash of color with some Oxide Inks.
I pulled my card base together and layered it with the oval which would eventually frame the scene on my card.  The shaded oval helped to mute the fun and vibrant colors of my card.
The trees were placed to the right of the oval frame.  The layering of the trees created a bit of dimension behind the car & trailer.
The sentiment fit perfectly above the Christmas scene which was the final accent on this festive card.
Here are the dies used on my card, available in the shop: