Friday, August 02, 2019

It's A Party!

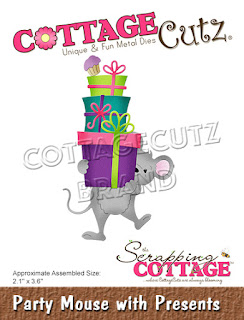
Happy Friday!  It's Jeanne today with a clean and simple birthday card using a die from the new birthday release.  This Party Mouse with Presents is adorable and makes for a very festive birthday card.  About half way through making this card, I realized that by making the presents in Christmas colors and changing the sentiment I could have a sweet Christmas card too!  How wonderful is that?
I started by stamping my stripes on a white A2 card base.
I then cut the die pieces from white card stock and used a combination of die inks and Distress Oxide inks to color them.
I stamped the sentiment in green and used the second largest oval from the Wacky Stitched Oval set to cut it out.
I glued the mouse and packages to the oval.
I used some gold cord underneath and popped the oval off of the card base using foam dots.  As a final touch I added a few gold sequins.
I hope you enjoyed today's card.  It went very quickly but I think it is very effective.  I will definitely be making this card again using a Christmas theme!

Dies:
http://www.scrappingcottage.com/cottagecutzpartymousewithpresents.aspx
http://www.scrappingcottage.com/cottagecutznestedwackystitchedovalset.aspx

Thanks for stopping by today - I hope you have a fun and creative weekend!

Thursday, August 01, 2019

Lemon Cupcake!


Hi Scrapping Cottage Friends!

It is Pam playing and creating with you on the blog today!

The new Birthday release is charming with all of it's yummy cupcakes and darling little critters  You are going to love decorating your special birthday cards with each of these dies!  And to make it even better they are 25% off in the online store now!  Don't miss this special new release sale!

Design Steps:


 1.  Start with an A2 white card base. Cut a yellow piece of card stock 4 x 5 1/4.  Cut a green piece of card stock 3 3/4 x 5 and last a piece of lemon DP 3 1/2 x 4 3/4.  Glue them together and set the card base aside
 2.  Using the Birthday Cupcake w/Lemon Slice die cut out all of the pieces in white
 3.  Using your favorite markers (I used Copics) color in the cupcake and glue together
 4.  Color the ribbon and little candy dots and add them to the cupcake
 5.  Cut out a scallop circle in white using the Stitched  Scalloped Circle die.  I used the second from the largest
6.  Place dimension tape on the back of the cupcake and pop it to the scalloped circle.  Then add dimension tape to the scalloped circle and pop it to the card.  Add the sentiment and your card is complete
CottageCutz Products


Whatever you do don't miss this fun and festive birthday release!
Blessings
Pam


Wednesday, July 31, 2019

Happy Birthday

Hello!  This is Sukie and today I'm sharing this birthday card for my design team post. Birthday cards are my absolute favorite to create so I had a blast working with the new Birthday dies from Cottage Cutz.
I selected a cheerful color palette with a happy vibe which was combined with some basic white card stock.
I cut out the Birthday Puppy and shaded him and the little cupcake with some Oxide Inks.  I also cut out a couple of circles with the Circle Set and the Nested Stitched Scallop Circle Set.  A bit of Stickles added some sparkle to the candle flame.
I selected a smaller sentiment from the Scrappy Moms (retired) Simple Sentiments stamp set along with some "Tickled with Teal" Trendy Twine.
Once I put my card base together, I layered it with a hand cut flag which was wrapped with the twine to add some softness to the top of my card.  The two circles were nested together and adhered on top of the oversized flag.
The puppy and cupcake were placed inside the double circles and the sentiment was anchored below. I finished off my card with a twine bow.
Here are the dies used on my card, available in the shop:

Sunday, July 28, 2019

Elephant With Balloons

Hi!

It's Anja here. I have another cad for you today. This time I combined this cute new die with some older ones and made a card that open a bit differently than usual.


For this card I used:
- Cottage Cutz dies (Party Elephant, Tree With Tire Swing, Nested Stitched Scallop Square Set, Pierced Square Set),
- Distress Inks (Broken China, Peeled Paint, Vintage Photo, Black Soot, Spiced Marmalade,
- white, colored and patterned card stock for die cuts,
- black pen
- white pen,
- hole punch,.
- ruler,
- pencil,
- metal rings,
- paper glue.

First I cut and colored the elephant and the tree. This time I used colored paper for die cuts. I emphasized the cuts with Distress Inks.


Next I made the background. I cut two squares. I colored the edges on the left one, and sky and grass on the right one.

Instead of the card base I cut two scalloped squares this time. I used patterned paper.


I glued the squares together and made two holes on top for the metal rings.


Then I combined both sides with the rings and glued the elephant on top. And my card was done.


And that is all from me for today. Have a nice Sunday and see you again next week.

Anja Z.


Cottage Cutz dies I used for this project:


Saturday, July 27, 2019

Never to Old for Cake

Hello Scrapping Cottage friends! Thanks for taking the time to stop and visit with us today. It's Mary Marsh here bringing you the Saturday edition of the Blog. 

We have a brand new release of Birthday dies in the online store. There are 25 new designs and they are currently on sale at 25% off. This release is filled with cute little whimsical animals, birthday cakes, cupcakes and birthday phrases. Everything you need to create some outstanding birthday cards.

Today, I am featuring the Mouse with Cake & Festive Birthday Greeting dies. So let's get started with some details on how I created my card. Looks like the Mouse with Cake die has been really popular and not in stock right now. It will be back in stock around August 10th. 

Step 1:  I found this interesting sketch #759 on Splitcoaststampers this week. I thought it would be a different layout to feature this new die and allow me to use designer paper, a birthday phrase and a stamped sentiment. 
This was a work in progress for me as I figured out how to make the curved shapes and other elements of the sketch. For the curved border I used the largest stitched oval die and that is also currently out of stock but you could use the largest double stitched oval which is the same size. 
I laid the die cutting side down on my paper. I only wanted to  cut just a little of the designer paper and the cardstock. 

I started with the designer paper layer at the size of 3 5/8" x 4 7/8" and then I made my cut. 
I cut the  apple green cardstock with the same die for element 2 of the sketch. This is just a layering panel so after I cut the curve I trimmed the cardstock down to about 2" and layered underneath. For elemnt 1 of the sketch, I used a small piece of striped designer paper and cut it 1" x 3 5/". Adhered these panels using double sided tape.
Step 2: I cut the cute little mouse with a light gray cardstock for his body and a bright pink for his ears. On the cake I used an ivory cardstock and sponged with wild honey distress ink. The icing is a light purple cardstock. 
I had the perfect sentiment for this image, It is a one line stamp and too large for my panel so with the help of my MISTI I turned it into a 2 line sentiment. I used painters tape and taped off the part I didn't want for each line. The sentiment is tamped in grape ink. 
I wanted the Birthday phrase above the stamped sentiment. It's from the new Festive Birthday Greeting die and I cut it in the apple green cardstock. I cut it 2x for a bit more dimension and used Ranger multi matte medium to secure. I used the phrase for the bow that is part of the sketch. 
Attached the mouse and cake image using dimensional adhesive. He is just the cutest little thing. 
Step 3: To complete my card I adhered the Birthday phrase. I decided to add some small streamers and a couple of glitter enamel dots. That's my sample for this week. Hope I have given you a bit of inspiration on a way to use this die.

See you next Saturday!

dies I used to create card: