Friday, March 29, 2019

Bunny and Butterflies

Happy Friday!  It's Jeanne today with a card that makes quite a statement and is easy to create as long as you don't mind inky fingers!
I love the intricate silhouette dies.  They just call for a beautiful background!
For this card I used a favorite method.  I wipe Distress Oxide inks on a craft mat, spray with water and dip my mixed media (or water color) paper in the puddles.  I use a heat gun to dry between layers.
The backgrounds always turn out gorgeous and no two are alike.  For this one I started with a piece of paper about 6 x 9 inches and several shades of blue and purple inks.
I cut the background down to 4 1/4 x 5 inches and mounted that to a 4 1/4 x 5 1/4 inch dark purple panel.
Next I cut my images from a piece of pearlized white card stock.
Using paper snips, I cut the butterfly from the eggs.
I glued the Easter die cut to the panel,wrapped ribbon around it and tied a small bow.  Then I adhered it to an A2 card base made from the same pearlized card stock.
I glued down the body of the butterfly and bent the wings up slightly to add dimension.  Finally I added some pearls.

Dies used:
http://www.scrappingcottage.com/cottagecutzeasterbunnyandbutterflieselites.aspx

http://www.scrappingcottage.com/cottagecutzspringbutterflyweggselites.aspx

Thanks for stopping by today.  I hope you have a fun, creative weekend!


Thursday, March 28, 2019

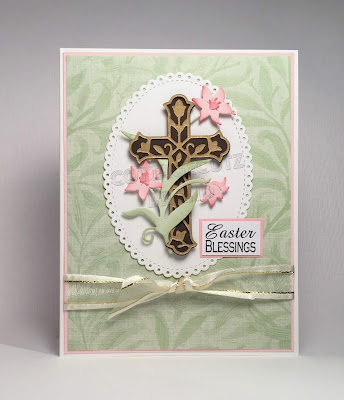
Easter Blessings

Hello Scrapping Cottage Friends!

It is Pam sharing with you today.

I can't believe we are at the end of March!  And Easter is just a few weeks away.  Time seems to go faster and faster the older I get!  Today, I am using a gorgeous die from the Spring Release.  I hope you can spend some time in our store to check out this amazing collections.

Designer Steps:
 1.  Cut out the pieces using the Cross with Spring Lilies die.  I used dark brown, light green, soft pink and gold card stock for the pieces
 2.  Shade the pink flowers and the leaves with in and then assemble the pieces
 3.  The flower wraps beautifully around the cross.  Add some small drops of glue to attach the leaves
 4.  Use a white A2 card base, a piece of pink card stock cut slightly smaller and a pieces of DP cut just slightly smaller then the pink.
 5.  Use the Nested Stitched Eyelet Oval over second from the largest and cut it out of white card stock.  Then pop the cross up on the oval as shown
5.  Layer the DP to the pink card stock and then glue the oval to the DP.  And before you glue the pink card stock to the white card base add the sheer white ribbon and your card is complete
CottageCutz Products


Thanks so much for stopping by.  We really appreciate the time you spend with us!
Blessings
Pam


Wednesday, March 27, 2019

Happy Easter Card

Hello!  This is Sukie and today I'm sharing this sweet Easter card for my guest designer.  The bunnies in this die set are absolutely adorable.
I cut out all of my pieces from the Spring Potted Bunnies in white card stock and shaded them with my Oxide Inks.  The colors of the pots are deeper shades so they would pop on my card.  A few extra carrots were cut out for embellishments.  The strips of grass were cut from the Spring Grass die.
The inspiration for my card came from the pretty striped paper I had in my stash.  The colors remind me of Spring which are perfect for an Easter card.  I layered a piece of white card stock to break up the background.
To create the scene on my card I pieced the strips of grass along the bottom edge of the white card stock. The strips of grass were trimmed on the edges so that it would fit perfectly.
Next, the potted bunnies were placed along the bed of grass.  The carrots were adhered as extra embellishments.  The "Happy Easter" sentiment is from the Scrappy Moms (retired) For Peep's Sake stamp set.
Here are the dies I used to create my card available in the shop:

Tuesday, March 26, 2019

Easter Wreath

Hi, Janja is here with you.
You have probably started looking for ideas and decorations for the Easter.
While I'm waiting for the spring dies I prepared an Easter card with some older dies.


- CottageCutz dies: Egg Painting Bunny, Spring Watering Can, Be My Valentine Puppies (banner), Build-A-Grapevine Wreath
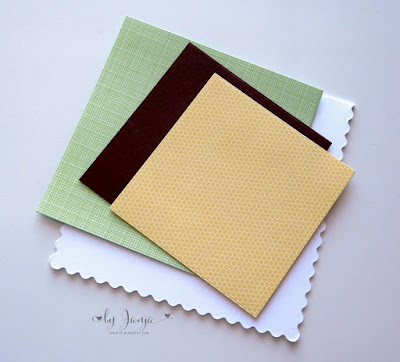
- white scalloped card base: 5.3" x 5.3" (13,5 x 13,5 cm), folded
- patterned paper: 4.7" x 4.7" (12 x 12 cm)
- patterned paper: 3.7" x 3.7" (9,5 x 9,5 cm)
- colored card stock
- colored ink pads
- glue, double-sided adhesive tape, self-adhesive foam pads

From colored card stock cut out bunny, eggs, wreath and flowers with greenery. Emphasize edges with colored pads.


Cut out a banner and stamp a sentiment.


Prepare a card base. Trim brown card stock and two patterned papers.


Gradually attach all the elements to the wreath with glue.


Completed card.


Have a nice day.
Janja


Sunday, March 24, 2019

Best of Luck

Hi!

It's Anja here. Today I have a tag for you instead of a card. I used different dies from the previous release and made a tag you cab send to a friend to wish them luck.


For this project I used:
- Cottage Cutz dies (Be My Valentine Puppies, Lucky Leprechaun, Shamrock & Valentine Scottie, St. Patrick's Day Cupcake, St. Patrick's Day Phrase & More, Mail Tag Set),
- Distress Inks (Black Soot, Mowed Lawn, Forest Moss) and Oxides (Squeezed Lemonade, Wild Honey, Fossilized Amber, Spiced Marmalade)
- white card stock and watercolor paper for die cuts,
- silver pigment ink,
- gold pigment ink,
- white pigment ink,
- gold color spray,
- black pen,
- embossing tools,
- hole punch,
- white pen,
- heat gun,
- string,
- paper glue,
- adhesive foam pads.

First I cut and colored the heart.


Then I prayed it with gold and dried it with the heat gun.


Next I cut and colored the shamrocks and other pieces.


I used white pigment ink and white pen to make it a bit more realistic.


I added the shamrocks a little dimension using the embossing tools.


I wrote the sentiment with black pen.


 I punched a hole into the heart and glued a golden ring around it.


And then I just arranged the shamrocks and other pieces on the heart I used adhesive foam pad for the sentiment.


That's all from me for today. Have a nice Sunday and see you again next week.

Anja Z.


Cottage Cutz dies I used for this project: