Wednesday, May 03, 2017

Christening cards

Hi!

It's Anja here. The new Cottage Cutz baby collection has these two beautiful dies with which you can make gorgeous christening gowns. Today I made two cards, one for a baby girl and one for a baby boy. They are very simple to make and can be used as a christening invitations or congratulation cards.


I used:
- Cottage Cutz dies (Boy Christening Outfit, Girl Christening Gown, Fancy Mary Jane Shoes, Spring Greenery, Stitched Rounded Square Set),
- Distress Inks (Stormy Sky, Worn Lipstick),
- white card base (15 x 10,5 cm),
- white, pink, blue and green card stock,
- white liquid pearls,
- embossing folder,
- paper glue and foam glue pads.

First I cut all the pieces for the outfits. I used white, blue and pink paper. I put distress ink around the edges of every small piece.


I used the same procedure for the flowers. I used a special tool to make a 3D effect.


Then I cut some greenery from the green card stock.


I made each background from two pieces of paper. First I cut pink and blue (14,5 x 10 cm) and then white (14 x 9,5 cm). I embossed the white one with an embossing folder. I could use any other design. Then I cut the third largest square from the Stitched Rounded Square Set to put my gowns on. 


Then I just had to put all the pieces together. This is how I glued the greenery.


And in the end I glued the little flowers and decorated it with liquid pearls.


And this is it from me today.

Have a nice Wednesday.
Anja Ž.

Cottage Cutz products I used:


Tuesday, May 02, 2017

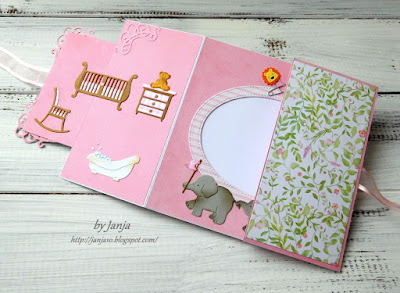
Bear on cloud (gate fold card)

Hi, Janja here!

Teddy bears are so popular toys. They are so soft to touch and ideal for cuddling.
On a gate fold card, that I share with you today, I put a lovely bear on cloud.


Supplies:
- CottageCutz dies: Bear On Cloud and Moon, Baby, Nursery Furniture, Elephants on Parade, Baby Diaper Pins, Stroller mini, Baby Carrier mini, Bathtub mini, Fancy Victorian Frame, Cross-Stitched Square set, Stitched Wide Oval Frame set
- white cardstock for card base: 11.4 x 5.7" (29 x 14,5 cm)
- patterned paper
- white and colored cardstock
- light pink organza ribbon

For card base trim white cardstock and fold it at 2.85" and 8.55 " (7,25 cm and 21,75 cm)


Trim patterned paper. First, attach organza ribbon on card base, and then cover the base with patterned paper. Use two-sided adhesive tape.


Cut out a square from patterned paper with the largest die from cross-stitched square set. Place it on to a little larger square from white cardstock.
Also cut out frames from white and patterned paper. Cut them in half with scissors, and attach to the back of the square.


Place square over the center fold. Take care that the adhesive is applied only to one-half of a square.


Add selected patterned paper also on the inside of the card. In the middle add space for text. Use the largest die from stitched wide oval frame set.


Cut out with dies all pieces, and assemble them into a whole.


To complete the card, mount all motives as shown, using glue and self-adhesive foam pads.


Thank you for coming over. Have a nice day.


Monday, May 01, 2017

Colorful Tri-Shutter Card

Hi, Lois here today with a card full of bright sunny colors -- and lots of folds!   Yellow/orange/lime green is such a happy color combination.   I used a die/stamp set and several other dies from CottageCutz.


Supplies used on today's card are:

Yellow cardstock - 12 x 5 1/2"
Lime green for the mats
Patterned paper for the panels
Scraps of orange and black for the sentiment and butterfly
Copic markers
Scor-Pal
Foam pop dots
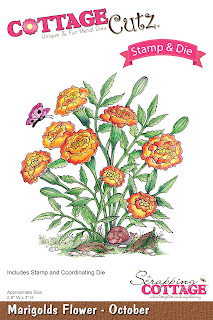
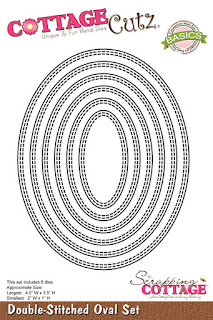
CottageCutz dies - Marigolds - October (stamp/die set), Happy, Birthday, Double-stitched Ovals, Spring Butterfly 1

Cut the yellow cardstock  to 12" x 5 1/2" and score on the 2", 4", 8", and 10" marks.


Place the panel in your paper cutter with the long edge at the 1 1/2" mark.  Cut a slit from the 2" scoreline to the 10" scoreline.  Rotate 180 degrees and cut the same way on the other side.


Fold on the scorelines  as shown in the photo.


I used the card base and traced around the end T-shape section and cut a template.  I then cut 1/16" around the edge to make a template for the mat piece, and again another 1/16" to make a template for the patterned paper piece.


Cut the mat  and patterned paper pieces as follows:

Lime green - 4 pieces 1 3/8" x 1 7/8", 2 pieces 1 3/8" x 3 7/8", 1 piece 2 3/8" x 3 7/8", and two pieces using the larger of the two T-shaped templates.

Patterned paper - 4 pieces 1 1/4" x 1 3/4", 2 pieces 1 1/4" x 3 3/4", 1 piece 2 1/4" x 3 3/4", two pieces using the smaller of the two T-shaped templates.

Layer and adhere the patterned paper to the lime green pieces.  Adhere to the card base, as shown.


Stamp and color the marigolds onto white cardstock and then cut all the die-cut pieces.


Apply the die-cut pieces to your card, and you're finished.


This is such a fun card to make.  I hope you'll give it a try.

CottageCutz dies used on my card are:


http://www.scrappingcottage.com/cottagecutzmarigolds-octoberstampanddie.aspx

http://www.scrappingcottage.com/cottagecutzexpressionshappy.aspx

http://www.scrappingcottage.com/cottagecutzexpressionsbirthday.aspx

http://www.scrappingcottage.com/cottagecutzdouble-stitchedovalsetbasics.aspx

http://www.scrappingcottage.com/cottagecutzspringbutterfly1.aspx