 My tip today is a fun way to use Perfect Pearls and a Mini Mister. You will need Perfect Pearls, a Mini Mister (they normally come in sets of 3), and some Ranger Re-inker (I used Peeled Paint - great neutral base with just enough die to make the Pearls show up). Now, you want to pick a couple colors of Perfect Pearls that you want to use. I chose Perfect Bronze and Sunflower Sparkle because they both said Autumn to me. Put a tiny scoop of each color into your Mini Mister. Then drop 3 drops from the Re-Inker bottle into the Mini Mister (FYI - You MUST use a re-inker and not regular alcohol inks. Alcohol inks are not designed to be aerosolized and are TOXIC if used in this manner!!) Now, just fill the Mini Mister up the rest of the way with water and mix it all together.
You are now ready to start spraying!!
 When you are ready to spray, make sure you have the area surrounding your pieces covered unless you want your work surface to have a new Bronze coating ;)
 Here are the rest of my leaves. I know it is hard to see the bronze flecks on the leaves but hopefully you get the idea.
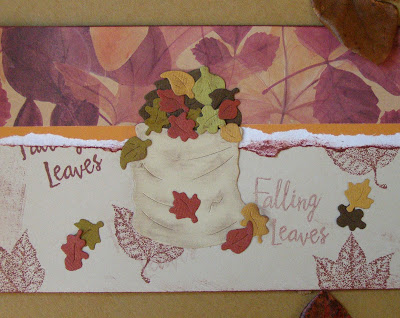
  Once all of my Perfect Pearl leaves were dried, I added them to my layout. I used the Cottage Cutz mini maple leaf die from the August Cottage Cutz Release to cut out all of the leaves. Then before I sprayed them with my Mini Mister, I inked the edges and then outlined the inside veins of each of the leaves with my Copic Markers. I also used the Cottage Cutz Raking the Leaves Die as another Fall accent to my page. And once again, the November Pagemaps were my inspiration for my page design.
Here is a before picture of a whole bunch of leaves that I have cut out to be sprayed with my Perfect Pearls solution. I have gone ahead and inked the edges and also outlined the leaf veins with my Copic markers before I spray them with my solution.
 When you are ready to spray, make sure you have the area surrounding your pieces covered unless you want your work surface to have a new Bronze coating ;)
Hold the Mini Mister about 12" or 14" above your pieces and give it a couple of sprays. When you are first starting out, you are going to be tempted to over-spray. It will take a few minutes for the spray to dry so that the color will show up. Spray it a couple of times and then let it dry before you spray again. You can always add more color - you can't take it away once it is there! You may even want to practice on some spare sheets just to get a feel for it and to see if you like more or less color.
I gave this leaf a heavier coating than my others so you would really be able to see the change. The spray really gives the leaf such a wonderful sheen.
 Here are the rest of my leaves. I know it is hard to see the bronze flecks on the leaves but hopefully you get the idea.
  Once all of my Perfect Pearl leaves were dried, I added them to my layout. I used the Cottage Cutz mini maple leaf die from the August Cottage Cutz Release to cut out all of the leaves. Then before I sprayed them with my Mini Mister, I inked the edges and then outlined the inside veins of each of the leaves with my Copic Markers. I also used the Cottage Cutz Raking the Leaves Die as another Fall accent to my page. And once again, the November Pagemaps were my inspiration for my page design.
This technique would also be great to use on your Winter layouts to make snow glisten and shine! Just change your Pearl colors! Really, what projects couldn't use a little something extra ;)
I hope you liked this tip. Now, run out to the store and stock up so you can start spraying your cards and layouts!!


 I thought he would be the perfect addition to an otherwise traditional looking Christmas card. You know - kind of catch people of guard and have a little fun while you're at it!


 CottageCutz Country Turkey


 WE MUST BE AT THE PUMPKIN PATCH!!!!
  I AM A FAN OF FALL COLORS AND THE


