

Are you like me that sometimes has trouble separating the foam from the backing sheet??? Or are you new to using CottageCutz dies and are not to sure how and where you are meant to use the foam. Well then, this tip is especially for you.
I was just about to foam my COTTAGECUTZ HAUNTED HOUSE die, and thought I would share this tip with you.
Please excuse the dirty nails…. Its just ink – I promise!!!!


STEP 1- Firstly, put the CottageCutz die flat on the table – smooth side down with the picture facing up.
STEP 2- Take the foam that is supplied with the die and hold it so that the foam section is at the bottom and the backing sheet is on top.
STEP 3- Because I don’t have long enough nails to use, I use a pair of fine sharp point scissors to carefully wedge in between the Foam and the backing Sheet. It doesn’t have to go in far, just enough for you to be able to see the foam and backing sheet separate.
STEP 4- While my scissors are still in between the foam and the backing sheet, I very gently slide my scissor blade along until I have made enough of a split to hold just the backing sheet with my fingers and then pull it to separate if from the foam. You can know throw the backing sheet away.


STEP 5– I carefully line up the sticky foam with the picture side of the die and stick them together.

STEP 6- Use your fingers to carefully and firmly push the foam down onto the die and rub gently to make sure its attached properly . A good indication that it is attached properly is once you have rubbed the die, you seen the picture indentation show on the foam.
For those of you that are beginners in the die cutting world of COTTAGECUTZ DIES, I hope this helps. And for those of you that are well educated on the subject, I hope you enjoyed the trip down memory lane.
Click link below to see a short video on how to use CottageCutz products...
http://www.scrappingcottage.com/index.asp?PageAction=Custom&ID=20


 No, you are not seeing things and I did not misspell the word "witch" for my page title. When my oldest daughter was 2, she called witches, "itches". It was really the cutest thing! So, when we found this fancy witch costume, we knew it would be absolutely perfect for her for Halloween. In an effort to not be too scary, we called her a Glitter Witch. The
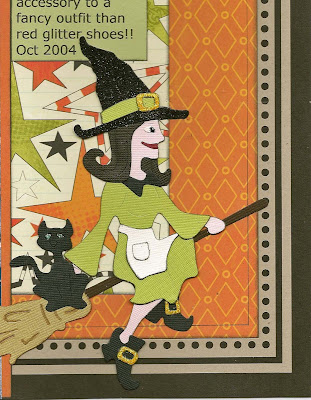


 If you want to take your creativity one step further, you could actually replace a letter with a shape that matches the theme of your layout or card. For instance, if you were using Halloween as your title, change the o to a small pumpkin, the n to a screeching cat, the l to a witches broom, and so on. You can have equally as much fun with lots of other themes and holidays.


 On my second page, I used a grid pattern to include lots of pictures. I broke up the rows by using different shaped pictures and also by adding a square of patterned paper and then the square containing my Haunted Mansion using the
 It is amazing how different the house can look by using different papers and leaving off some of the different embellishments that this die has. I can't wait to use this Haunted House on a fun Halloween card, too!! Oops! Did I just give away my next post?! ;)


