Showing posts with label card. Show all posts

Thursday, April 06, 2017

Spring Bunnies!

Good Morning to All of Our Scrapping Cottage Friends!

It is Pam with an Easter card to share with you today.  I have created a card using inlays from the die called Spring Bunny Egg.


1.  Begin by cutting the Spring Bunny Egg die and removing all the pieces. Be careful to put them in a place where the piece will not get lost.  I actually place them in a small box until I am ready for them

2.  Trace the egg to make a back so that you can glue down the inlaid small pieces after you are finished coloring them set aside

3.  Mask the top half of the egg using green ink sponge the bottom half of the egg.

 4.   Then mask the bottom of the egg using blue ink sponge the top part of the egg

5.   Gather all the inside pieces and begin coloring them with your copic markers or any coloring tools you may enjoy using

6.  After you are finished coloring glue the back to the egg and then start adding the colored inlay pieces
7.  Next using the largest Double Stitched Rectangle die center a piece 5 1/4 x 4 inch piece of yellow checked paper to make a frame

8.   Using the second largest Double Stitched Rectangle die cut 5 1/4 x 4 inch piece of yellow card stock
9.   Glue the yellow card stock directly under the checked paper
10.  Using the Grass Border die cut a strip of grass and glue it behind the frame on the yellow card stock

 11.  Glue the entire frame to the front of an A2 card
 12.  Center your Spring Bunny Egg in the frame under the grass
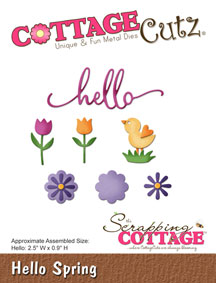
 13.  Cut two more bunnies using the Spring Bunny Egg and color them plus cut 3 orange flowers using the Hello Spring die
 14.  Add the bunnies and flowers as shown and for a final touch add a small bow to the top left of the frame
Cottage Cutz Products used:


I hope you enjoyed this Spring tutorial and that you will give it a try!!

Thanks for stopping by today! I am always so glad you did!!

Blessings
Pam


Sunday, April 02, 2017

Spring Scene with Cute Animals


Hi everyone! It's Anja here and this is my first post on the Cottage Cutz blog. I'm very honored and happy to be able to share my work with you for the next six months.

For my first post I decided to combine a few different dies and made a spring scene with some cute animals.


I used:
- white card stock base (13x34 cm, folded at 8,5 cm and 25,5 cm)
- white card stock strip (4x36 cm, folded at 8,5 cm and 25,7 cm)
- white paper for die cuts
- Distress Ink pads: Peeled paint, Mowed lawn, Barn Door, Shabby Shutters, Stormy Sky, Spun Sugar, Squeezed Lemonade, Wild Honey, Spiced Marmalade, Vintage Photo, Weathered Wood, Tea Dye, Pumice Stone
- patterned paper (12,6x16,6 cm, 2x 12,6x8,3 cm)
- white and black pen
- paper glue

First I cut all the little elements from white paper.


Then I colored them with Distress Inks and glued them together. I made the eyes with black pen and bunny and mouse ears and nose with white pen.


I then folded the white card stock base at 8,5 and 25,5 cm and glued on some patterned paper. I applied some Peeled Paint Distress Ink on the edges of patterned paper.


Then I colored the sky and grass with a sponge and Distress Inks. And glued all the pieces together.


In the end I made a strip that holds the card closed. I cut tree stitched squares and decorated them with the cute little snail that goes well with the patterned paper.


Cottage Cutz dies I used:


Thank you for stopping by. I wish you a beautiful Sunday!


Anja Z. 

Thursday, March 30, 2017

Larkspur Beauty!

Good Morning to All of Our Sweet Scrapping Cottage Friends!

It is Pam today excited to share a mixed media card with you today!
At the Cottage Cutz store you will find some wonderful stamps that represent all the flowers for each month of the year!  The stamps are beautiful and have a sweet whimsical quality!

Today,  I used the Larkspur stamp which I am partial too because my birthday is in July!

1.  Started with an A2 white card base and a slightly smaller piece of deep purple card stock.  I glued the purple card stock to the front of the white card base and set aside


2.  Using a 4 x 5 1/4 piece of notebook designer paper I decided to do a bit of a mixed media background. Use TH distressed inks and sponged them onto the designer paper.  The two colors used are Peeled Paint and Seedless Preserves
3.  Continuing the process by using a stenciling and Tumbled Glass ink

4.  After the sponging to soften the look use a white acyrlic wash over the top.  Mix the white paint with a lot of water and apply one coat over the whole background
5.  Let dry then added some of the Seedless Preserves splatters.  Do this by smearing some of the ink on a plastic sheet and added water.  Then pick up the ink with a brush and tap it on your finger above the paper in different spots
6.  Let the background dry and while it was drying  color the Larkspur and Dragonfly with copic markers: Y13, 15 - V000, 01, 04, 06, 09 - YG03, 63, 67 - G21, 40, 94, 99 - E23 - B02 - C02
7.  Using the coordinating dies cut out the Larkspur and Dragonfly. Add a purple ribbon to the Mixed Media background paper then mount flat to the card front.  Add a silver cord by just taping it down. Then Using the Double Stitched Rectangle die cut a light purple piece of card stock.  Pop it to the front of the card over the silver cording
8.  Pop up the Larkspur and Dragonfly onto the die cut rectangle.  Using the same deep purple card stock cut out Thanks and glue it just above the on the right side

Here is the finished card!

Cottage Cutz Products Used in this project:


I hope you try one of our lovely flower stamp sets soon! And as always thanks so very much for taking the time to stop by today! We really appreciate it!

Blessings
Pam