Showing posts with label Winter Hockey Bunny. Show all posts

Tuesday, November 29, 2022

Pop-Up Record Player

Hello CottageCutz friends! Thanks for taking the time to stop and visit with us today. It's still Black Friday release week here on the Blog.

We have a new Classic 50's release that makes its debut here on the Blog and also in the online store. You can pick up the bundle for a huge 65% off. That's under $97 or 30% off individual dies. The release is filled with some amazing retro images from the 50's era.

We have been featuring group posts for the past week to give you lots of inspiration on different ways to use the dies. If you missed any of the posts, just check back on the Blog for lots of eye candy. I have another project idea for you today using the Fifties Phrases #1Fifties Phrases #2, Guitar Music Notes & Records dies to create a pop-up record player. 

Vinyl records & record players have been trending for the past few years. So, I thought I would try to create a paper one as a birthday card. It's going to my brother in January, and I am pretty sure he will think it's something fun & unique.

Design Steps:

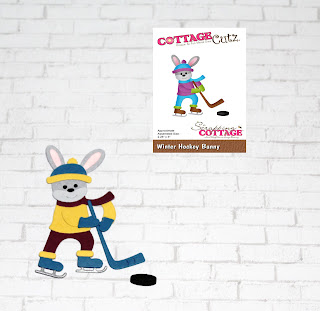
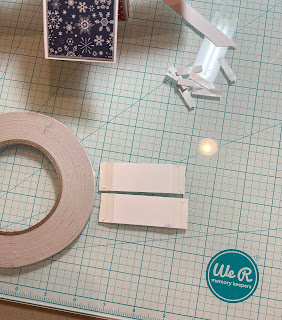
I started by creating the "record player base" It's really easy to make with one sheet of cardstock.  I used a piece of red cardstock measuring 4" x 12". Then I scored the paper at 4″, 7 1/2″, 8″ and 11 1/2″. 
You only need one piece of Scor-tape added to 11 1/2" score line or other strong tape to secure the pop-up base together.
This the base taped together. 
Then I started my decorating. For the card front, I used some musical score designer paper layered onto black card stock and then onto the card front.  The phrases are part of the Fifties Phrases #1 die. 
Next, onto the card inside. For the turntable, I used the largest Stitched Rounded Square die and cut in white cardstock.  I cut the largest record from the Guitar Music Notes & Records die. 
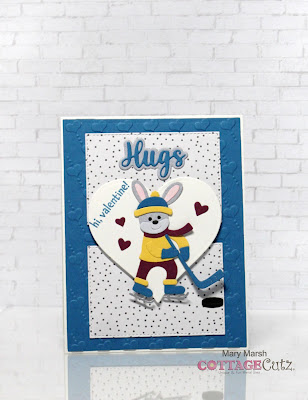
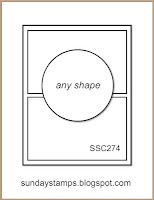
I had to get a bit creative for the needle arm. When I looked online some of the needles looked like hockey sticks. We have a die from last winter the Winter Hockey Bunny that had a perfect sized hockey stick. I cut it in silver cardstock. I made a needle base in black. It's cut from the smallest Square Set die. The on - off buttons are cut from the Circle Set die in black and silver.
I made a pocket on the inside of the lid to hold another record. You could also add a gift card here. I don't exchange gifts with my brother, so I used a record. I took the largest Square Set die- cut in white cardstock and then used the 5th largest Circle Set die to cut the pocket opening. 
To finish off the card, I added some music notes. That's it for me for this post. I hope you have been enjoying the samples we have been creating using these new dies. The team has had so much fun using them in our card designs and 3D projects.

Dies I used to create project:


Saturday, January 15, 2022

Hockey Bunny Valentine


Hello CottageCutz friends! Thanks for taking the time to stop and visit with us today. It's Mary Marsh here bringing you the Saturday edition of the Blog.

IT'S NEW RELEASE TIME! The Winter Release with 15 new designs is in the online store. They are perfect for creating cards for all your winter celebrations. I think they work great for Valentine cards. You can pick them up on a limited time 30% off sale.

Today, I am using the new Winter Hockey Bunny to create a masculine Valentine card. I have little boys that I send Valentine cards to so this will be a cute one for one of them. I like to make non-traditional cards for this holiday, and I thought this image would work great for a boy or even an adult man. 

Design Steps:

I started my card this week with the colors from this week's color challenge #878 on Splitcoaststampers. I was hosting the challenge and I chose daffodil delight, pacific point and rich razzleberry for the color trio. Optional was to make a masculine Valentine card. 
daffodil delight, pacific point, rich razzleberry
For the layout I used a sketch I found online from the Sunday Stamps Blog.
I cut the hockey bunny with cardstock in the challenge colors. 
Next, I chose the colors for the card base and the sketch layers. I used pacific point cardstock and embossed with a hearts folder. For the 2 rectangles of the sketch, I used designer paper and cut with the 5th largest of the Stitched Rectangle die.   
Now that my card elements are prepared, I am ready to start assembly. I attached the card layers to the base with double sided tape. Since this is a Valentine card, I decided to place the hockey bunny in the center of a heart. I used the largest heart from the Heart Set and cut in white cardstock and attached with dimensional adhesive. 
After I attached the heart, I realized I forgot to stamp the sentiment I wanted. So, with the help of my MISTI I was able to get it stamped and even did a 2nd stamping. I used pacific point ink. The Hockey Bunny is attached with glue dots. 
To complete my card, I used the Hugs w/Shadow die and cut a sentiment and then scattered a few hearts. They are cut in the rich razzleberry color. I used the Be My Valentine Puppies die to cut the hearts. 

And that's my sample for this week. I hope I have given you a new idea for a way to use this cute hocky bunny to create a Valentine card. Do you have any hockey players that you could send a card like this to? The die is available in our online store and it's 30% off right now. 
Reminder: Our YouTube channel is active again. Check out the latest video and we are having a giveaway for subscribing, liking the video and giving it a thumbs up. Click here.


dies I used to create card:


Thursday, January 13, 2022

Winter Fun

 Hello Scrapping Cottage Friends

I am working with our new release called Winter with 15 snowy fun designs!  I decided to use 3 of the dies and made an adorable box card perfect for my friend who loves all the winter activities!  I am using Winter Penguin Snowboarding, Winter Hockey Bunny and Winter Bear on Sled.

Here are the design steps for this cute little box card. (For the first few steps I am using kraft card stock so you can see it a little better.  Then I will switch back to white)

1.  Start with a 5 1/2 x 9 inch piece of white card stock.  Score with paper placed horizontally on the scoreboard at 2 1/8, 4 1/4, 6 3/8, and 8 1/2.  Then flip card stock vertically on the scoreboard and score at 2 3/4

2.  On the top half of the card cut down to the center line and stop. On the bottom half on the 1/2 inch score line make a diagonal cut all the way to the top and remove that piece as shown

3.  Silver card stock (2 Pieces) 2 x 5 3/8 glue the mats to the card closest to the 1/2 flap on the front. This piece of the box will not bend


4.  Cut the silver card stock for the rest of the box (9 pieces) 2 x 2 5/8. Glue the green mats to the outside of the box as shown below

5.  Flip the box over and glue the rest of the Silver card stock to the inside of the box as shown below. The bottom that is not covered is the inside of the box which will not be seen

6.  Flip the box over again.  Cut one piece with white card stock 1 7/8 x 5 1/4 for the outside of the box and glue down.  This is where you will stamp your sentiment and sign your name. You should do your stamping and signing now because it is much easy at this point

7.  Flip the box over again and cut one piece of snow designer paper 1 7/8 x 5 1/4 for the inside of the box and glue down. Cut snow designer paper (3 pieces) 1 7/8 x 2 1/2 glue to the inside of the box on top of the silver card stock


8.  Flip the box over and cut different red polka dot designer paper (6 pieces) 1 7/8 x 2 1/2 glue to the outside of the box

9.  Using a sturdy tape place several pieces of tape to the small flap and close up the box.  Make sure that you have the side of all the rectangles covered with designer paper on the outside of the box


10.  You can't see the red because it is on the bottom of the box under the flaps.  The inside of the box is just white 
11. Cut (2 pieces) of kraft card stock 3 x 1 score them on each end 1/2.  Fold them and add sturdy tape to each folded end as shown below
12.  Place the first brace toward the front of the box as show making sure to really press down the tape.   Place the second brace about an 1 1/4 behind the first brace as shown
13.  Use the following dies to create you snow critters:  Winter Penguin SnowboardingWinter Hockey Bunny and Winter Bear on Sled
14.  Use Expressions Let it Snow and the Hills Slimline for the snowy banks

15.  Place the snowy backs into the box card first and then add your critters starting from the back


This box is so much fun to make and it is sure to delight whomever you decide to send it to!  I am including a link to a video done by Sandi MacLver on how to make the box just in case!

CottageCutz Products


And just to remind you we have a wonderful YouTube Channel for more inspiration.  Check it out HERE

Blessings

Pam