Showing posts with label Window Christmas Friends. Show all posts

Tuesday, December 14, 2021

Christmas Window


Good morning Cottagecutz fans. I hope your week is gong well and that you are almost ready for Christmas. I can’t believe it’s next week. I say this every year but where does the year go?

Anyway, it’s Wendy bringing you the blog today. I have a simple sweet card for you using some of my very extensive Cottagecutz stash.

I thought’s I’d make a little window scene. I have had these dies for a while and I thought, let’s use them.

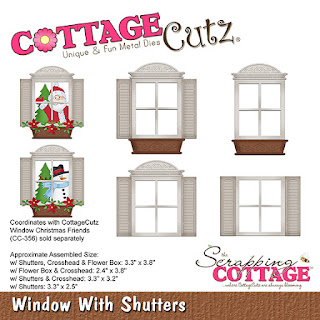
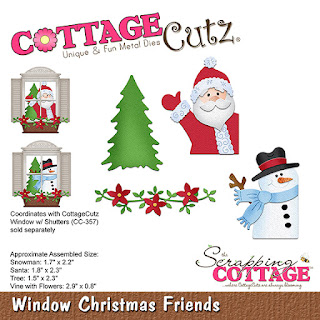
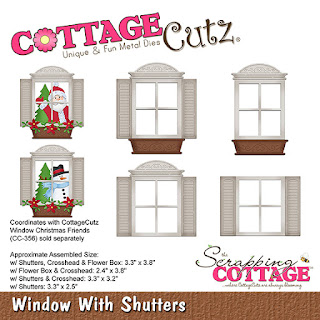
To begin with I took s card 6” x 4”. At each inch point I have scored a line. I then cut out the ‘Window with  Shutters’ die in white an then the top and bottom in grey. Behind the window I used the “Window Christmas Friends” tree die and added some some gold tinsel from the same die. I then added some red pearls to look like lights. I thought it would be fun to have wallpaper behind the tree so I had this in my crafty stash.

I attached the window with 2mm foam pads as I wanted some dimension. At the top of the card I used the same ‘tinsel’ that I used on the tree and added some poinsettias,l finished with gold gems.

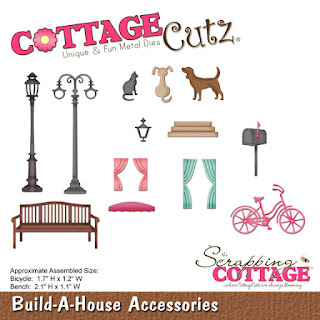
Next I thought the card looked a little bland so I used the ‘Build a House Accessories’ and cut out the lamps twice for each side of the card. I also used the dog which I layered 3 times so it looked more realistic. That is our card done


Dies I have used:


I have been a little bit distracted and excited this week as my craft room was finally finished,I am so blessed to have such a large room and my family have really pulled together to get this finished for me.

Here’s a few photos, excuse my crafty mess


Tuesday, November 02, 2021

Santa Gnome in Throne


Good Morning Cottagecutz fans. I hope you’ve had a wonderful weekend crafting. My usual weekend includes dog walks with my Border Terrier Betty and a whole lot of crafting 

Todays post is a light tutorial as I will be including a full tutorial on my Friday post

I’m including some of the designs from the new release where you can still get 30% off which is amazing. These dies have really inspired me to make some really different cards, not usually my style. Get your dies why the discount is still available.

Top tip from me today, If I know I’m going to repeat a card, tag etc. many times, I always buy more than one of the design. If you have an A4 cutting plate you can load several does at once.

So lets get on to todays project 

I started with a card when folded measured 6” square. The next layer was a piece of red card measuring 
5  3/4”square, followed by a silver piece of card measuring 5 1/2” square. Finally I took a piece of white card measuring 5 1/4” square and in the centre using the largest of the nested stitched circles I cut a hole. With all the other pieces of card stick I stuck them down with glue but the white piece of card I adhered using 1mm foam pads.

Next I cut out the Santa Gnome and the chair in the colours above. I used a small stitched oval coloured in blue to act as a rug and then adhered the design on the top with 1mm foam pads. I took the mug from the new Smores die and gave it to Santa. He needed a hot cup of cocoa after delivering all those presents. I used some brown chalk to look like the marshmallow is toasted

I thought it might be nice to adorn the card with some additional elements so I used the ‘Window Christmas Friends’. From this I took the Christmas tree, the vine and the poinsettia. What I liked about the vine is that you could bend it to fit around the tree and also for the top left hand corner of the card.

Finally I used the new ‘Merry Christmas W/Shadow’ sentiment. I think the red looks really powerful on the silver card. I used a diamanté above the ‘I’ in Christmas to give the card a little more bling. I attached the sentiment with 1mm foam pads

I really hope you like the card. I’ve tried to keep this simple and clean and a card that can be easily repeated for your crafty stash. Have a wonderful week and I really look forward to seeing you Friday with something a little different

Dies I’ve used for the card


Saturday, December 09, 2017

Merry Christmas Shaker

Hello Scrapping Cottage friends! Thanks for taking the time to stop and visit today. It's Mary Marsh here bringing you the Saturday edition of the Blog.

As you can see, I am still creating Christmas cards. I don't have all that I need for sending this year so I have been busy in my craft room making cards. Christmas is my favorite season and I love making and sending cards.

Today for your viewing pleasure, I created a Christmas shaker card. I used the Merry Christmas w/reindeer and Mistletoe & Bells dies. So let's get started with some details on how I created this card.

Step 1: Shaker cards are not difficult to make. And the following tutorial will show you how simple they really are. I started by cutting my circle in the image panel. Used the 3rd largest of the Circle dies- it's a 2 3/4"" circle. I embossed the panel with a falling snow folder.
Image Panel: 3 7/8" x 5 1/8"
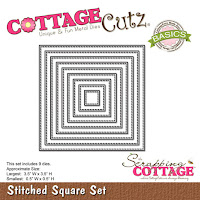
Step 2: Cut the dies I am using for my card. The pine tree inside the shaker is from the Window Christmas Friends die, also used the Merry Christmas w/reindeer and Mistletoe & Bells dies. I used the largest of the Stitched Square dies and cut the panel that would hold the shaker elements in place. I stamped this panel with some snowflakes.
Step 3: Started the assembly of the shaker part of card. Used glue dots to attach the  3 1/2" window sheet to the back side of the image panel. I took a used dryer sheet and rubbed it across the window sheet. It eliminates the static. Used dimensional foam adhesive and attached to edge of circle. I used my powder tool (EK Success) and ran it around the inside of the foam adhesive. It keeps the sequins from sticking to the adhesive.
Added some different colored sequins to the inside of the circle.  
I glued the pine trees to the square panel and then centered the panel over the sequins.  
I used more dimensional adhesive on the back of this panel to allow it to sit evenly on the card base.
Attached this shaker panel to the red card base.
Step 4: Cut my Merry Christmas sentiment in red cardstock.
Used Ranger multi medium matte and attached to card front.
To complete my card, I added the mistletoe and bells and scattered a few red sequins. I hope I have given you some inspiration on a way to use these new dies. I will be back next Saturday- see you then!!!
 
Dies I used to create card:
http://www.scrappingcottage.com/cottagecutzmerrychristmaswreindeer.aspx

http://www.scrappingcottage.com/cottagecutzwindowchristmasfriends.aspx

http://www.scrappingcottage.com/cottagecutzcirclesetbasics.aspx

http://www.scrappingcottage.com/cottagecutzstitchedsquaresetbasics.aspx
http://www.scrappingcottage.com/cottagecutzmistletoeandbells.aspx


Monday, December 04, 2017

Santa at the Window


Hi, CottageCutz friends!  Lois here with a Christmas card today.  It's hard to believe that it's already December.  If you haven't made all your Christmas cards yet, you best get cracking!   CottageCutz has lots of fun Christmas dies in their store.  Be sure to take a look!  My card for today uses two coordinating dies, Window with Shutters and Window Christmas Friends.


To start my card I cut cardstock and patterned paper as follows:

Black - 8 1/2" x 5 1/2", scored at 4 1/4"
White - 4" x 5 1/4"
Patterned paper - 3" x 4 1/2"


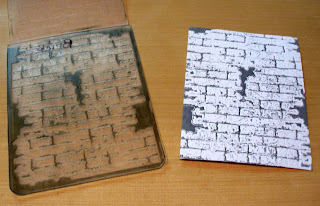
One of my favorite embossing techniques is to ink up the embossing folder before placing the cardstock inside.  This Sizzix Bricked folder always works so well with this technique.  I inked it up with gray ink, inserted the white cardstock, and ran it through my Cuttlebug.  When you use a dye-based ink (such as Memento), the folder rinses clean under the faucet.


Next I die-cut the pieces from the coordinating dies, placing them on my sticky board to keep the small pieces from getting lost.


Using ink or markers, I added some texture to various die-cut pieces.


I wanted a window in my brick wall, so I laid the die-cut window in the center of the panel and drew inside the panes.  Then, using an Exacto knife, I cut the opening just outside the lines that I had drawn.


This photo shows the opening.


I placed some Scor-Tape around the perimeter of the window and cut a piece of acetate slightly larger than the opening . . .


. . . and, removing the protective paper from the Scor-Tape, I carefully placed the acetate over the opening.


I then glued the patterned paper in the center of the black card base.


I decorated the front of the card, gluing down the window frame and cornice and adhering the shutters and window box with foam pop dots.  After gluing the three flowers to the garland, I pierced the centers and added a yellow mini brad to the center of each.  I then glued the whole garland to the window box.


Before attaching the front of the card to the base, I had to construct Santa.  I used the illustration on the front of the packaging as a guide.  His head is attached with foam pop dots, which made it easy to place him on the front -- leaving his arm not glued down.  I then slipped the tree (on which I had applied some liquid glue) under his arm and pressed it down to hold it firm.  I had lined him up so that he would show through the window.


Because I had used pop dots on Santa's head, I needed to use thicker pop dots on the brick card front so that there was a bit of room between Santa and the window sheet.


I attached the brick card front so that Santa and the tree showed through the window -- and I was finished.


Be sure to check out all the wonderful Christmas dies on the CottageCutz website.  Dies used on this card are:

http://www.scrappingcottage.com/cottagecutzwindowwithshutters.aspx


http://www.scrappingcottage.com/cottagecutzwindowchristmasfriends.aspx