Showing posts with label Whimsical Heart Slimline. Show all posts

Tuesday, January 03, 2023

Slimline Birthday Puppies Card

Happy Tuesday Cottage Cutz Friends!
Melinda here with you, and today I am sharing a fun and cheerful slimline birthday card. Here's a look at my finished project. I used the sweet little Christmas Puppies Dies from this year's Christmas release.
My card is pretty straightforward. It is a side folding slimline card. I started with a white card base. I cut a piece of paper to 8 x 9. I folded it in half at the 4" mark along the 8" length. I then cut a piece of red cardstock paper at 3.75 x 7.75. After I added that to my card base, I cut out the slimline circle windows base out. I then cut out a piece of the cute dotted patterned paper from doodlebug. I used some foam tape to give the slimline circle window base some lift. I then went to work cutting out the cute little puppies from some plain white cardstock. I then colored them with my markers.

Here's a closeup of the Happy title and the cute puppies in the first - top circle. The Happy title comes from the Fifties Phrase 1 die. I cut those pieces out in plain white and then used my markers to color the backgrounds.


Here is another closeup showing the cute puppy on the second window. I colored him with my markers and then put the paws along the rim.

In this final closeup, I have two more of the cute puppies. I colored them with my markers along with the Birthday sentiment. As for the hearts, I cut out the Whimsical Hearts Slimline die. You get a TON of hearts as part of the negative spaces. I love using them. I colored them with my same markers.

Dies I Used


Today's the last day for the fabulous New Year Sale! So head over and do some shopping and grab some terrific dies at a super price!


Well that about covers it for today! Until the next time, have a wonderfully craft-die day!
Melinda Beltran

Monday, January 02, 2023

Sweet Hearts Slimline Shaker

Happy New Year crafters!

Kris here sharing with you today.  I have a feeling we're in for a very long cold winter here, so I decided to make a cute Snowman Slimline Shaker card for Valentine's Day using the Snowmen Friends and the Cookies & Cocoa dies from the Christmas Release #2.  I've also used the Whimsical Hearts Slimline die - I thought with many open spaces it would be perfect for a shaker card!  (See product list at end for a full list with links.)


- CUTTING -

Dark Teal Cardstock
•  8" x 9" and score the 8" side in half for a top folding horizontal base.
• Whimsical Hearts Slimline (try to keep the hearts in place after they're cut)

Pixie Pink Cardstock
Whimsical Hearts Slimline (punch out all hearts)
 
Patterned paper (teal with white grid)
• 3-3/8" x 8-3/8" (for background behind the sequins)

Acetate/Window Sheet
• 8-3/8" x 8-3/8"

Light Teal Cardstock
• Stitched Hearts (2nd largest centered in middle of largest die to make a frame)

Dark Pink Cardstock
• Stitched Hearts (largest die)

White Cardstock

Black Cardstock

- ASSEMBLY -

1.  Teal Whimsical Hearts Slimline piece - punch out all the large and medium hearts, but try to keep all the tiny & small hearts in place.

    - Turn piece onto backside and place a small dot of glue onto each tiny & small heart.
    - Place acetate onto back of teal piece and press down where glued hearts are.
    - Turn piece over and carefully lift off the Teal background, leaving the tiny/small hearts

2.  Pixie Pink Whimsical Hearts Slimline piece - add glue to the backside and place carefully onto front of acetate, lining up the teal hearts.

    - Glue in any remaining tiny/small hearts that may not have stuck or that fell out after die-cutting so that all the tiny/small hearts are filled in and all the medium/large hearts are empty.

3.  Turn Pink piece onto backside and add 1/8" foam strips all along the 4 edges, getting very close to the edge, but not past it.  

    - Remove backing from foam strips.
    - Add shaker elements (ie. sequins, glitter, beads, etc)

4.  With your patterned paper piece turned upside-down, carefully fit it onto the top of foam strips, lining up the edges.

5.  Add tape or glue to back of shaker and center it onto card front.

6.  Add dimensional tape or foam strips to back of Light Teal heart frame and adhere to Dark Pink heart.

7.  Color Cocoa mug, and 2 of the Snowmen and pop them onto heart with foam tape.

8.  Glue the white "Sweet" onto it's black shadow and adhere to the top left of large heart. 

    - Adhere hearts to middle of shaker.


I hope this project inspire you to get crafty in 2023 with your favorite CottageCutz dies!

~ Kristine

PRODUCTS USED:


Tuesday, April 12, 2022

Have Faith Easy Easel Card

Happy Terrific TuesDIE Scrapping Cottage friends!
Melinda here with you for another fun Tuesday. My project today features some dies from the fabulous new Australian Friends Die Release!!! Here is what I created.

This super cute and very easy easel card!


To create the base:
I started with a piece of 4.25 x 11 white cardstock. I folded that in half at 5.5"

I then folded the right half, which would be the "top" in half again. I just folded that half to the 5.5 fold I made first. I burnished it with my bone folder.

Here is what the base looks like once you have made the two folds. EASY PEASY!

I then cut a separate piece of 4.25 x 5.5 and that became the "top" of my card. I simply attached it with some adhesive to the bottom half of that top fold.... tent if you will in the picture above.

Here is a side view to show how I attached it once it was done.


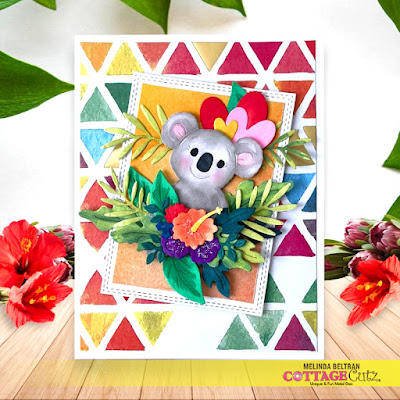
To make a "ledge" where the top can "stop" and be held in place I used the double stitched rectangle die set to create this sentiment. I hand wrote the word "Have" and then die cut faith from the Faith Sentiments die set. I cut out a couple of sets of that adorable Koala die from the new release and added some flowers to the corner of the sentiment. I added some foam tape under the rectangle when attaching it to the base. That gives it just enough lift to allow the top to catch

Here's a closer look at that sweet Koala. I nestled her among all the pretty foliage and flowers that come with the die. To finish off, I added a few hearts from the hearts slimline die. I love all the hearts that come out of the negative space of that die in just one pass! I added all of that to one of the double stitched rectangles. I used some fun and super colorful patterned paper from Paper House Productions.

Here's a view of the front finished.

Here's a view of the side of the card. You can see that I added a piece of white cardstock to the top half of the base. This is so I can write a note to the recipient. 


Here is the fantastic new collection 
FROM DOWN UNDER!
Hurry for a limited time...
New CottageCutz 
Australian Friends Release
Save 30% on Individual Designs
14 New CottageCutz Designs

PLUS FOR A LIMITED TIME....

The Dies I used to create this project:
In case you didn't hear, The CottageCutz YouTube channel is filling up with beautiful projects and great how-tos!  Head over and check out the latest video! 

Well that about covers it for today! Until the next time, have a wonderfully crafty day!
Melinda Beltran

Monday, February 21, 2022

Shaker Slimline

Welcome back to the Scrappin Cottage blog.  Today I have created a slimline shaker using Miss Spring Bunny with the Whimsical Heart slimline die.

1.  Diecut using a white piece of cardstock using the slimline die.  Next punch out the hears that may be remaining.  I chose to leave a few hears sparingly along the slimline for a different look.


2.  I next diecut the slimline die using a piece of black foam.  This allows for height when creating the shaker portions for the card.

3.  Add your shaker piece in the hearts as desired.  You could have made the entire card a shaker by adding the foam along the outer edge the die.

4.  Now take your Miss Spring Bunny and diecut and embellish as desired.  I used some mulberry paper to make my bunny to give it a furry look and feel, but the weight of the die machine actually pressed the mulberry paper.
To complete my card I pieced and glued all the parts together. 

In case you didn't hear, The CottageCutz YouTube channel is up and running.  Head over and check out the latest video! There is a giveaway for subscribing too!

Thursday, January 20, 2022

Valentine Kitten

 Hello Scrapping Cottage Friends

GUESS WHAT???  We have a new Spring release with 20 sweet designs.  The bundle for the entire release is at 60% off right now.  Just check it out HERE.  

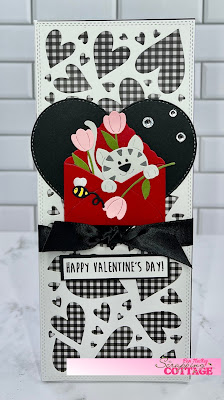
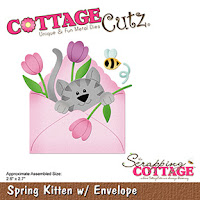
I am using the Spring Kitten with Envelope.  I decided to make a slimline and pair the kitten with the Whimsical Hearts slimline die.


Design Steps:

1.  Using the Spring Kitten with Envelope cut out the pieces using: red, light grey, dark grey, pink, green and black card stock

2.  Assemble the pieces using a fine tip glue

3.  For the base use a piece of black card stock cut at 8 1/2 x 7 folded in half.  A piece of checked DP cut at 3 1/4 x 6 3/4. A piece of white card stock cut with the Whimsical Hearts Slimline die. A piece of black card stock cut with the largest Stitched Heart die. And finally a piece of satin ribbon cut at 11 inches

4.  Glue the checked DP to the back of the heart slimline.  Tie the ribbon into a square knot and tape it to the back of the white heart card stock then glue to the black card base.  Glue the black heart as shown above

5.  Pop up the kitten in the envelope to the front of the card just above the square knot

6.  Add the little bee, the sentiment and rhinestones and your card is complete


CottageCutz Products


Don't forget to check out the new Spring Release.  It is perfect for Valentines, Spring Birthdays and of course Easter!
We have more inspiration on our YouTube Channel check it out HERE
Thanks so much for stopping by!  And I will see you next Thursday.

Blessings and Take Care
Pam