Showing posts with label Stitched Circle Set. Show all posts

Saturday, August 31, 2019

Sending Hedgehugs


Hello Scrapping Cottage friends! Thanks for taking the time to stop and visit with us today. It's Mary Marsh here bringing you the Saturday edition of the Blog. 

The new release of Birthday dies have been restocked in the online store and on a 25% off sale So if you didn't get the ones you wanted previously, all 25 designs are in stock. This release is filled with cute little whimsical animals, birthday cakes, cupcakes and birthday phrases. Everything you need to create some outstanding birthday cards.

Today for your viewing pleasure, I am featuring the Birthday Hedgehog die. I created a card of encouragement for a friend who needs some hugs and encouragement. So let's get started with some details on how I created my card.  

Step 1: Since I knew what die I was using and I also had my designer paper and coordinating cardstocks selected, I just needed my layout. The sketch #764 over on Splitcoaststampers caught my eye. It would allow me to cut the designer paper in varying sizes. This paper is a bit busy and having it broken up just a little with a cardstock layer underneath would work out just right. 
I decided to add an additional layer to the sketch. I liked the coral and green coordinating colors so I went with both. 
garden green card base: 4 1/4" x 5 1/2"
calypso coral layering panel: 4 1/8" x 5 3/8"
designer paper layer: 3 7/8" x 5 1/8"
 
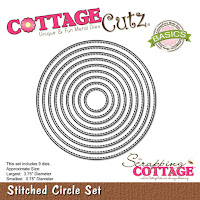
I cut my hedgie in 2 shades of brown cardstocks - soft suede and taupe. I layered him on a cantaloupe circle cut with the 6th largest die from the Circle set. For a layering panel I used coral cardstock and the 6th largest die from the Stitched Circle set.
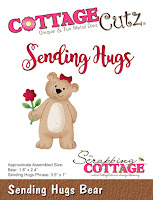
The Sending phrase is from the Sending Hugs Bear die. I cut it 2x in garden green cardstock to make it stand out on the designer paper. It's an older die but still available in the store and currently on sale. 

Step 2: I am ready to start assembly of my card. I cut the designer paper at 7/8", 1 1/8", 1 3/8"and 1 5/8". Adhered that to the coral base with double sided tape.
I stamped my "hedgehugs" sentiment on a coral flag banner. It also had the word sending but I just masked that with tape before inking. I used my MISTI for placement.
Attached the hedgie to the circle panels using dimensional adhesive. I added the flag to the bottom of the circles. I wanted it to look like the hedgie was standing on it.

Step 3: I am ready for final steps. I added the hedgie image to the designer paper layer.
The "sending phrase" was attached with Ranger multi medium matte. I like this adhesive because it dries clear unlike some other glues.  
To complete my card, I added this panel to the garden green base. I decided not to add any other embellishments because I thought the background scallop design was sufficient.

Well, that's it for me for this week. see you next Saturday. There is a big Labor Day sale going on right now. Check it out here.

dies I used to create card:
http://www.scrappingcottage.com/cottagecutzbirthdayhedgehog.aspx
http://www.scrappingcottage.com/cottagecutzsendinghugsbear.aspx
 

http://www.scrappingcottage.com/cottagecutzstitchedcirclesetbasics.aspx


Saturday, May 25, 2019

Princess Birthday

Hello Scrapping Cottage friends! Thanks for taking the time to stop and visit with us today. It's Mary Marsh here bringing you the Saturday edition of the Blog.

We are still featuring cards using the new Magical Fantasy release.  If you haven't seen the Magical Fantasy release yet, you have to drop by the online store and check it out. These new dies are all so cute and whimsical. There are 27 new designs, and I am in love with everyone of them. They are currently on a Memorial Day sale at 25% off.

Today, I am featuring the new Fairytale Castle + Little Princess & Roses dies to create a birthday card for a little girl. The princess theme is so popular with little girls, and I have plenty of friends with little girls and friends with granddaughters. I used a inlay technique for this card. So let's get started with some details on how I created it. 

Step 1: I selected some patterned paper that had a cloud like background. I used a white card base to keep it neutral since its going to a little girl.
card base: 4 1/4" x 5 1/2"
designer paper layer: 4 1/8" x 5 3/8"

I used the 2nd largest stitched circle die (3 3/8") to cut my circle in the designer paper.
I built my castle on the die cut circle. Used the colors on the packaging because they were perfect for this card. 
Stamped the birthday sentiment in grape ink. I knew I was going to angle the Princess sentiment so the card corner was the best spot.
I decided at this point to start some card assembly. I used a double layer of mounting tape on the back of the image panel. I wanted it to be raised up enough so the castle image would sit flat against the card base. 


I cut the Princess phrase in pink cardstock using the Little Princess & Roses die. I cut 2 phrases to make it stand out more on the designer paper. 
I adhered this to image panel with Ranger multi matte medium. I also used the crown that is part of the Princess die. The Princess wand is from the Once Upon a Time Die. 
Well that's it for me for this Saturday. I hope you enjoy the holiday weekend and that there are some fun plans in your schedule. See you next time!

dies I used to create card:


Wednesday, March 13, 2019

Happy St. Patrick's Day

Hello!  This is Sukie and today I'm sharing a card for my guest designer post.  My card was created with dies from the Valentine's release featuring the darling scottie!
I cut out the oversized sentiment in two different shades of green from the St. Patrick's Day Phrases & More die set.  The sentiments were adhered together and offset slightly.  The two colors give the sentiment some depth and dimension.
I also pieced together the Shamrock & Valentine Scottie and the hat from the St. Patrick's Day Cupcake die.  The hat on the scottie was bit oversized for my card so I cut out a tiny bow from the Lovebug Bee & Ladybug die set instead.
Once I selected the colors for my A2 card base, I used a circle from the Stitched Circle Set to create a window.  A smaller circle was also die cut.
The layers were adhered on my card base.  Next, I  placed the die cut circle inside of the window ensuring it was centered.
The sentiment was added to my card at an angle for a whimsical look and anchored with the hat.
Here are all of the dies I used on my card available in the shop:

Wednesday, February 20, 2019

For Peep's Sake

Hello!  This is Sukie and I'm excited to share an Easter card for my guest designer post today. My card was created with one of the many new dies from the new Cottage Cutz Spring release. These new dies are currently on sale too!
I was completely inspired by this fun paper from the DCWV "Pocket Full of Posies" stack, the colors have a "Spring" look to them and are perfect for an Easter card.
I used the colors as inspiration for the die cuts for the Spring Bunnies Trio and for the Stitched Circles.  To achieve the perfect colors, I used my Oxide Inks to shade all of the die cuts.
I used the circle dies to cut out a couple of windows on my card background.  Next, I layered the grass strips behind the windows and along the bottom edge of my card.
The die cut circles were adhered behind the grass in each of the windows.  I tucked in the sweet bunnies between the grass and circles.  I picked out a few paper flowers from my stash and adhered them along the grass on my card.  One of the flowers was strategically placed where the 2 pieces of grass meet.
My card was finished off with a sentiment from the Scrappy Moms (retired) For Peep's Sake stamp set. The sentiment was stamped on a hand cut flag.
Here are the dies used on my card, available here:


Wednesday, February 13, 2019

Be My Valentine

Hello!  This is Sukie and today I'm sharing a set of Valentine's cards for my guest designer post.  With Valentine's Day tomorrow, these are perfect to share with that special someone especially an animal lover.
These sweet puppies were die cut from the Puppy with Valentine and Puppy Love Letter dies.  The sentiment, banner and hearts are from the Be My Valentine Puppies die set.  I also cut out two circles from the Stitched Circle Set and two squares from the Double Stitched Square Set.
I went with a black, white and red theme for my card so the die cuts came together very quickly.  The puppies were cut with neutral shaded card stock.  A bit of Glossy Accents were added to the eyes and noses of the puppies.
The puppies were centered perfectly on the white circles.  After I adhered the tiny hearts next to the puppies, I decided to cut the black circles with my electronic die cutter for a frame.  The patterned papers are from the My Minds Eye "Charmed" 6x6 paper pad.  I love the row of neutral hearts amongst the black hearts.
The sentiment banner was adhered along the top edge of the die cut squares so that it would be centered above the puppies.
The finished die cuts were layered on the base of my card.  The sweet puppies are the perfect focal point for these Valentine's cards.
Here are the dies I used on my cards, available here: