Showing posts with label Square Set. Show all posts

Saturday, July 01, 2017

~ Precious Little One ~

Hello Scrapping Cottage friends! Thanks for taking the time to stop and visit today. It's Mary Marsh here bringing you the Saturday edition of the Blog.

Hope you are continuing to enjoy all the different cards from the DT using the new Expressions Plus word dies. The team has shown some really creative ways to use these word dies with your existing collection of dies. With 35 different word phrases, there is so much you can do with them in your own card making.

I have been showing you over the past several weeks how to combine word die phrases with a stamped sentiment. Check out my cards here, here, here here and here.  I am continuing with this series today as well.

Today I wanted to create a baby card and use the Baby Koala w/Blanket die. I thought the Precious Phrase would work nicely along with a baby sentiment. So let's get started with some details on how I created my card.

Step 1: I started my card this week with a sketch. I liked this one because it's a square card and I thought it would fit the Koala Bear well.
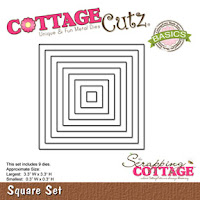
Step 2: Once the layout was decided on, I started figuring out my square card base and the additional layers. I decided to make a 4 3/4" square card. Then I picked my card colors. For the center squares I was able to use the stitched square & square set dies. I used the 2nd largest of each set.

Sugarplum Card Base: 4 3/4" square
Vanilla Layer: 4 1/2" square
Green Striped Patterned Paper: 4 3/8" square
Yellow Center Square Layer: 3 1/8" square
Vanilla Center Square Layer: 3" square
Step 3: I cut the Koala Bear in a medium and dark brown cardstocks. Decided to use a yellow for the blanket. The ears and tummy are cut in vanilla and I shade them with cocoa ink.
Step 4: Started some partial card assembly. I hadn't cut the oval or the rectangle layers yet and I needed to determine how large to make those.
Step 5: Placed my Precious Phrase in this step. This helped in the placement of the center square. The sketch has everything evened off. I moved my image panels down slightly to accommodate the phrase.
Step 6: I decided to use the 4th largest oval from the Oval set. The Koala Bear fit nicely in that size oval.
The rectangle panel underneath the oval is cut at 1" x 3 3/4". I used a hearts embossing folder on this panel. These were both cut in the sugarplum cardstock.
The green flag is 5/8" x 4 3/8" and I cut in a wasabi green shade that matched the patterned paper.
Step 7: Before I assembled all the center layers, I stamped my sentiment. It is a bit large and I wanted to make sure everything would fit. It also had more words than I wanted to use.  So I used my MISTI and taped off the words "for a special". I inked up just "Little One".
 
 Step 8:  Almost finished. I adhered the image to the oval panel and then attached it to the square sentiment panel.  
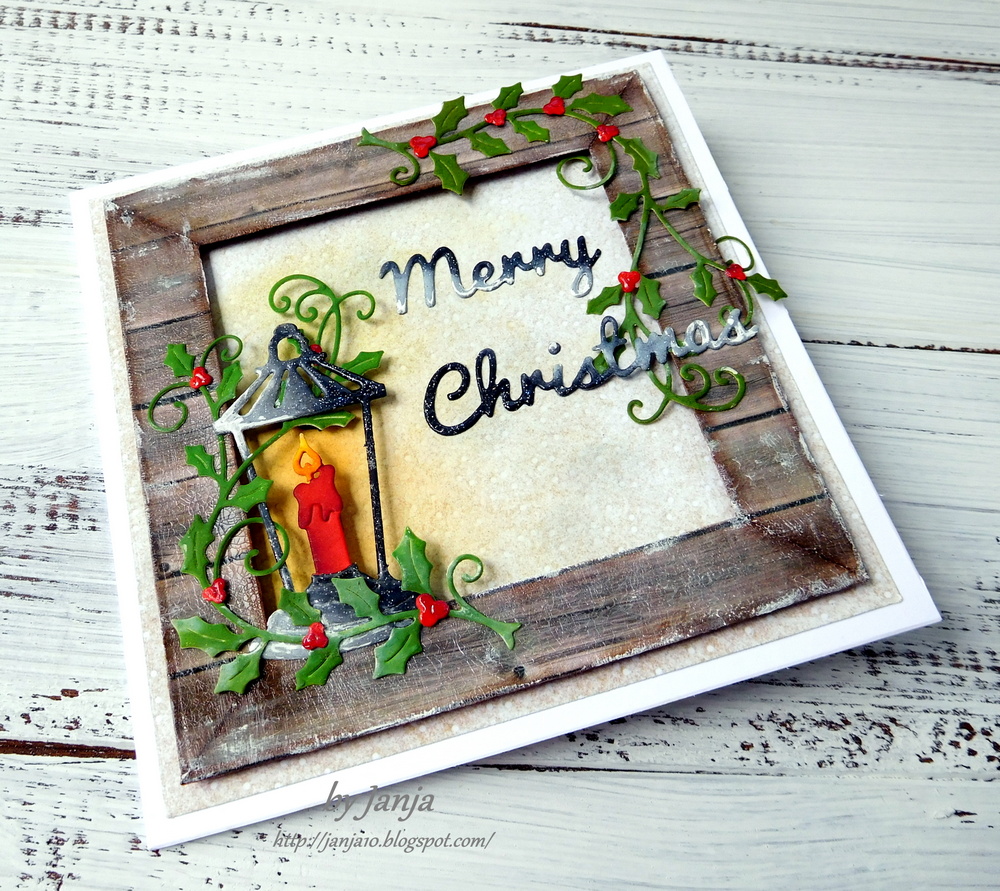
Step 9: Assembled this panel to the card base to complete my project. I used a couple of hearts in the sugarplum shade to finish it off. There is such detail in he CottageCutz dies. Here is a close-up of the Koala Bear. Love the font on these new phrase dies as well.
I hope I have given you some inspiration this week. If you need a baby card this bear is just too sweet. And, by changing the color of the blanket you could make it for a boy or girl. Well, that's it for me for this week. See you next Saturday.
 
Dies I used to create card:
http://www.scrappingcottage.com/cottagecutzbabykoalawblanket.aspx
http://www.scrappingcottage.com/cottagecutzexpressionspluspreciousphrase.aspx
http://www.scrappingcottage.com/cottagecutzovalsetbasics.aspx

http://www.scrappingcottage.com/cottagecutzstitchedsquaresetbasics.aspx
http://www.scrappingcottage.com/cottagecutzsquaresetbasics.aspx


Tuesday, March 14, 2017

Notepad with Chloe

Hi, Janja here!

Small notepads are always useful for writing or drawing. They can also be a nice gift.
I prepared one today and decorated it with lovely bear Chloe.


Supplies:
- CottageCutz stamp & die sets: Chloe with Kitty, Garden Gnomes 2 (butterfly and flowers), Victorian Fence, Square set, Stitched Square set
- white cardstock (2x): 5.3 x 5.1" (13,5 x 13 cm)
- patterned paper: 4.9 x 4.9" (12,5 x 12,5 cm)
- white cardstock: 4.7 x 4.7" (12 x 12 cm)
- white blank sheets: 5.1 x 5.1" (13 x 13 cm)
- Distress ink: Worn Lipstick, Mustard Seed, Tumbled Glass, Twisted Citron, Antique Linen, Vintage Photo
- watercolor brushes
- clouds mask
- stencil brushes

Stamp Chloe with black Archival ink on watercolor paper, and color her.


Cut out all the elements with dies.


Fasten masking tape on white front page, and shadow background.


Trim white and patterned paper. Cut out square in the middle of both with a dies. Use the largest dies from both sets.


Cut off the lower corners on both cardstock and frame with a corner puncher. Glue both frames to each other.


Fasten frame to the front page and decorate it partially.


Bind the sheets with a spiral, and complete the front page of notepad.


Thank you for joining me today. See you again at next Tuesday. 


Saturday, November 19, 2016

Mistletoe Christmas Card

Hello Scrapping Cottage friends! Thanks for taking the time to stop and visit today. It's Mary Marsh here bringing you the Saturday edition of the Blog.

This upcoming week we are celebrating Thanksgiving here in the USA and then comes the frantic Christmas rush (lol)!!! Card making, gift buying and wrapping, baking and decorating will be in the forefront for the month of December.

So if you haven't started your cards as yet, I am showing one today that could very easily be mass produced. You could change it up by simply using a different patterned paper.

So let's get started on some details of how I created my "Mistletoe Christmas" card. My mistletoe is from the Holiday Greenery die. It was part of the Christmas 2 release.

Green Card Base: 4 1/4" x 5 1/2" (A2 size)
Red Layer: 4 1/8" x 5 3/8"
Patterned Paper Layer: 3 7/8" x 5 1/8"
Image Panel: 2 1/2" x 2 1/2"
Black layering Panel: 2 3/4" x 2 3/4"

Step 1: I started my card this week by choosing my patterned paper. Once I did that, I just matched my cardstock to the colors used on the patterned paper.
Step 2: Cut my first 3 layers of cardstock to the above sizes and assembled using double sided tape. I decided to add some red seam binding just for added card interest.  No bow because I want to keep the card flat for mailing.
 
Step 3: I cut my image panel using the basic square in vanilla and the stitched square in black. There is black in this patterned paper so I used that cardstock to help accent my card. I stamped my sentiment and added some dots cut from the holiday greenery die. I used dimensional tape on this panel to lift it away from the patterned panel.
 
That completes my card for this week. As I said, this one could be mass produced easily. And, that would free you up to do other Christmas tasks. Here is another look at the completed card.
Well Blogger friends, that's it for me fo this week so until next time.......inky hugs.
 
http://www.scrappingcottage.com/search.aspx?find=square+set
http://www.scrappingcottage.com/cottagecutzstitchedsquaresetbasics.aspx
 
http://www.scrappingcottage.com/cottagecutzholidaygreenery.aspx


Tuesday, August 09, 2016

Lantern with holly

Hi everyone, Janja here!

Christmas is my favorite time of the year. I love all the events and moments that come along with Christmas. New release of Christmas dies are already available. They are so beautiful. For sure you will like them.
As the first one I chose the die lantern with holly vine.


For the card we need:
- white card base: 5.3 x 5.3" (13,5 x 13,5 cm)
- patterned paper: 5 x 5" (12,7 x 12,7 cm)
- patterned paper with the appearance of wood
- white and color cardstock
- Distress ink: Rusty Hinge, Barn Door, Aged Mahogany, Lawn Mowed, Peeled Paint, Vintage Photo,  Walnut Stain
- Memento ink: Cantaloupe, London Fog
- white pigment pad
- glossy accents
- crackle clear paint
- embossing ink pad and transparent embossing powder with glitter
- double-sided foam tape

We cut out all the elements available by the die lantern with holly vine and shadow them.


Sprinkle the sentiment Merry Christmas and lantern with transparent embossing powder with glitter, and treat them with hot embossing technique. On red holly berries apply a few dots of glossy accents.


Shadow the patterned paper with yellow and gray ink on the place where we attach lantern. We will use it for the background of a card.
Now we start with the frame. Choose a patterned paper with the appearance of wood. Cut it out by the size of 4.65 x 4.65" (11,8 x 11,8 cm). In the middle, cut out the opening with the largest die of the square set
Cut the frame in diagonal lines and shadow all four sides of the frame with Distress ink: Vintage Photo and Walnut Stain. Re-assemble the frame. 
In the end coat the frame with a crackle clear paint.


Brush the surface of the frame with a sponge here and there with white color. Apply it also to lantern and sentiment.
All the elements for the card are now prepared. It only remains to assemble the card. 
To begin assembling the card first apply adhesive foam tape to the back of the frame. If we look on the card from the side, we see the foam tape, so color it with matching color of the frame.
Composed card.


I would like to remind you on our CottageCutz challenge #5 - birthday card. Join us.
 
Thanks for stopping by!
 
Janja