Showing posts with label Rainy Day Duck. Show all posts

Monday, February 22, 2021

New Release Time!!

Hello Friends

It is Pam creating with you on the blog this wonderful Monday morning!

I am very exciting to share with you a die from the NEW RELEASE!  The die is called Spring Shower Buddies.  And I decided to use this die for a card of encouragement with a little perk inside!

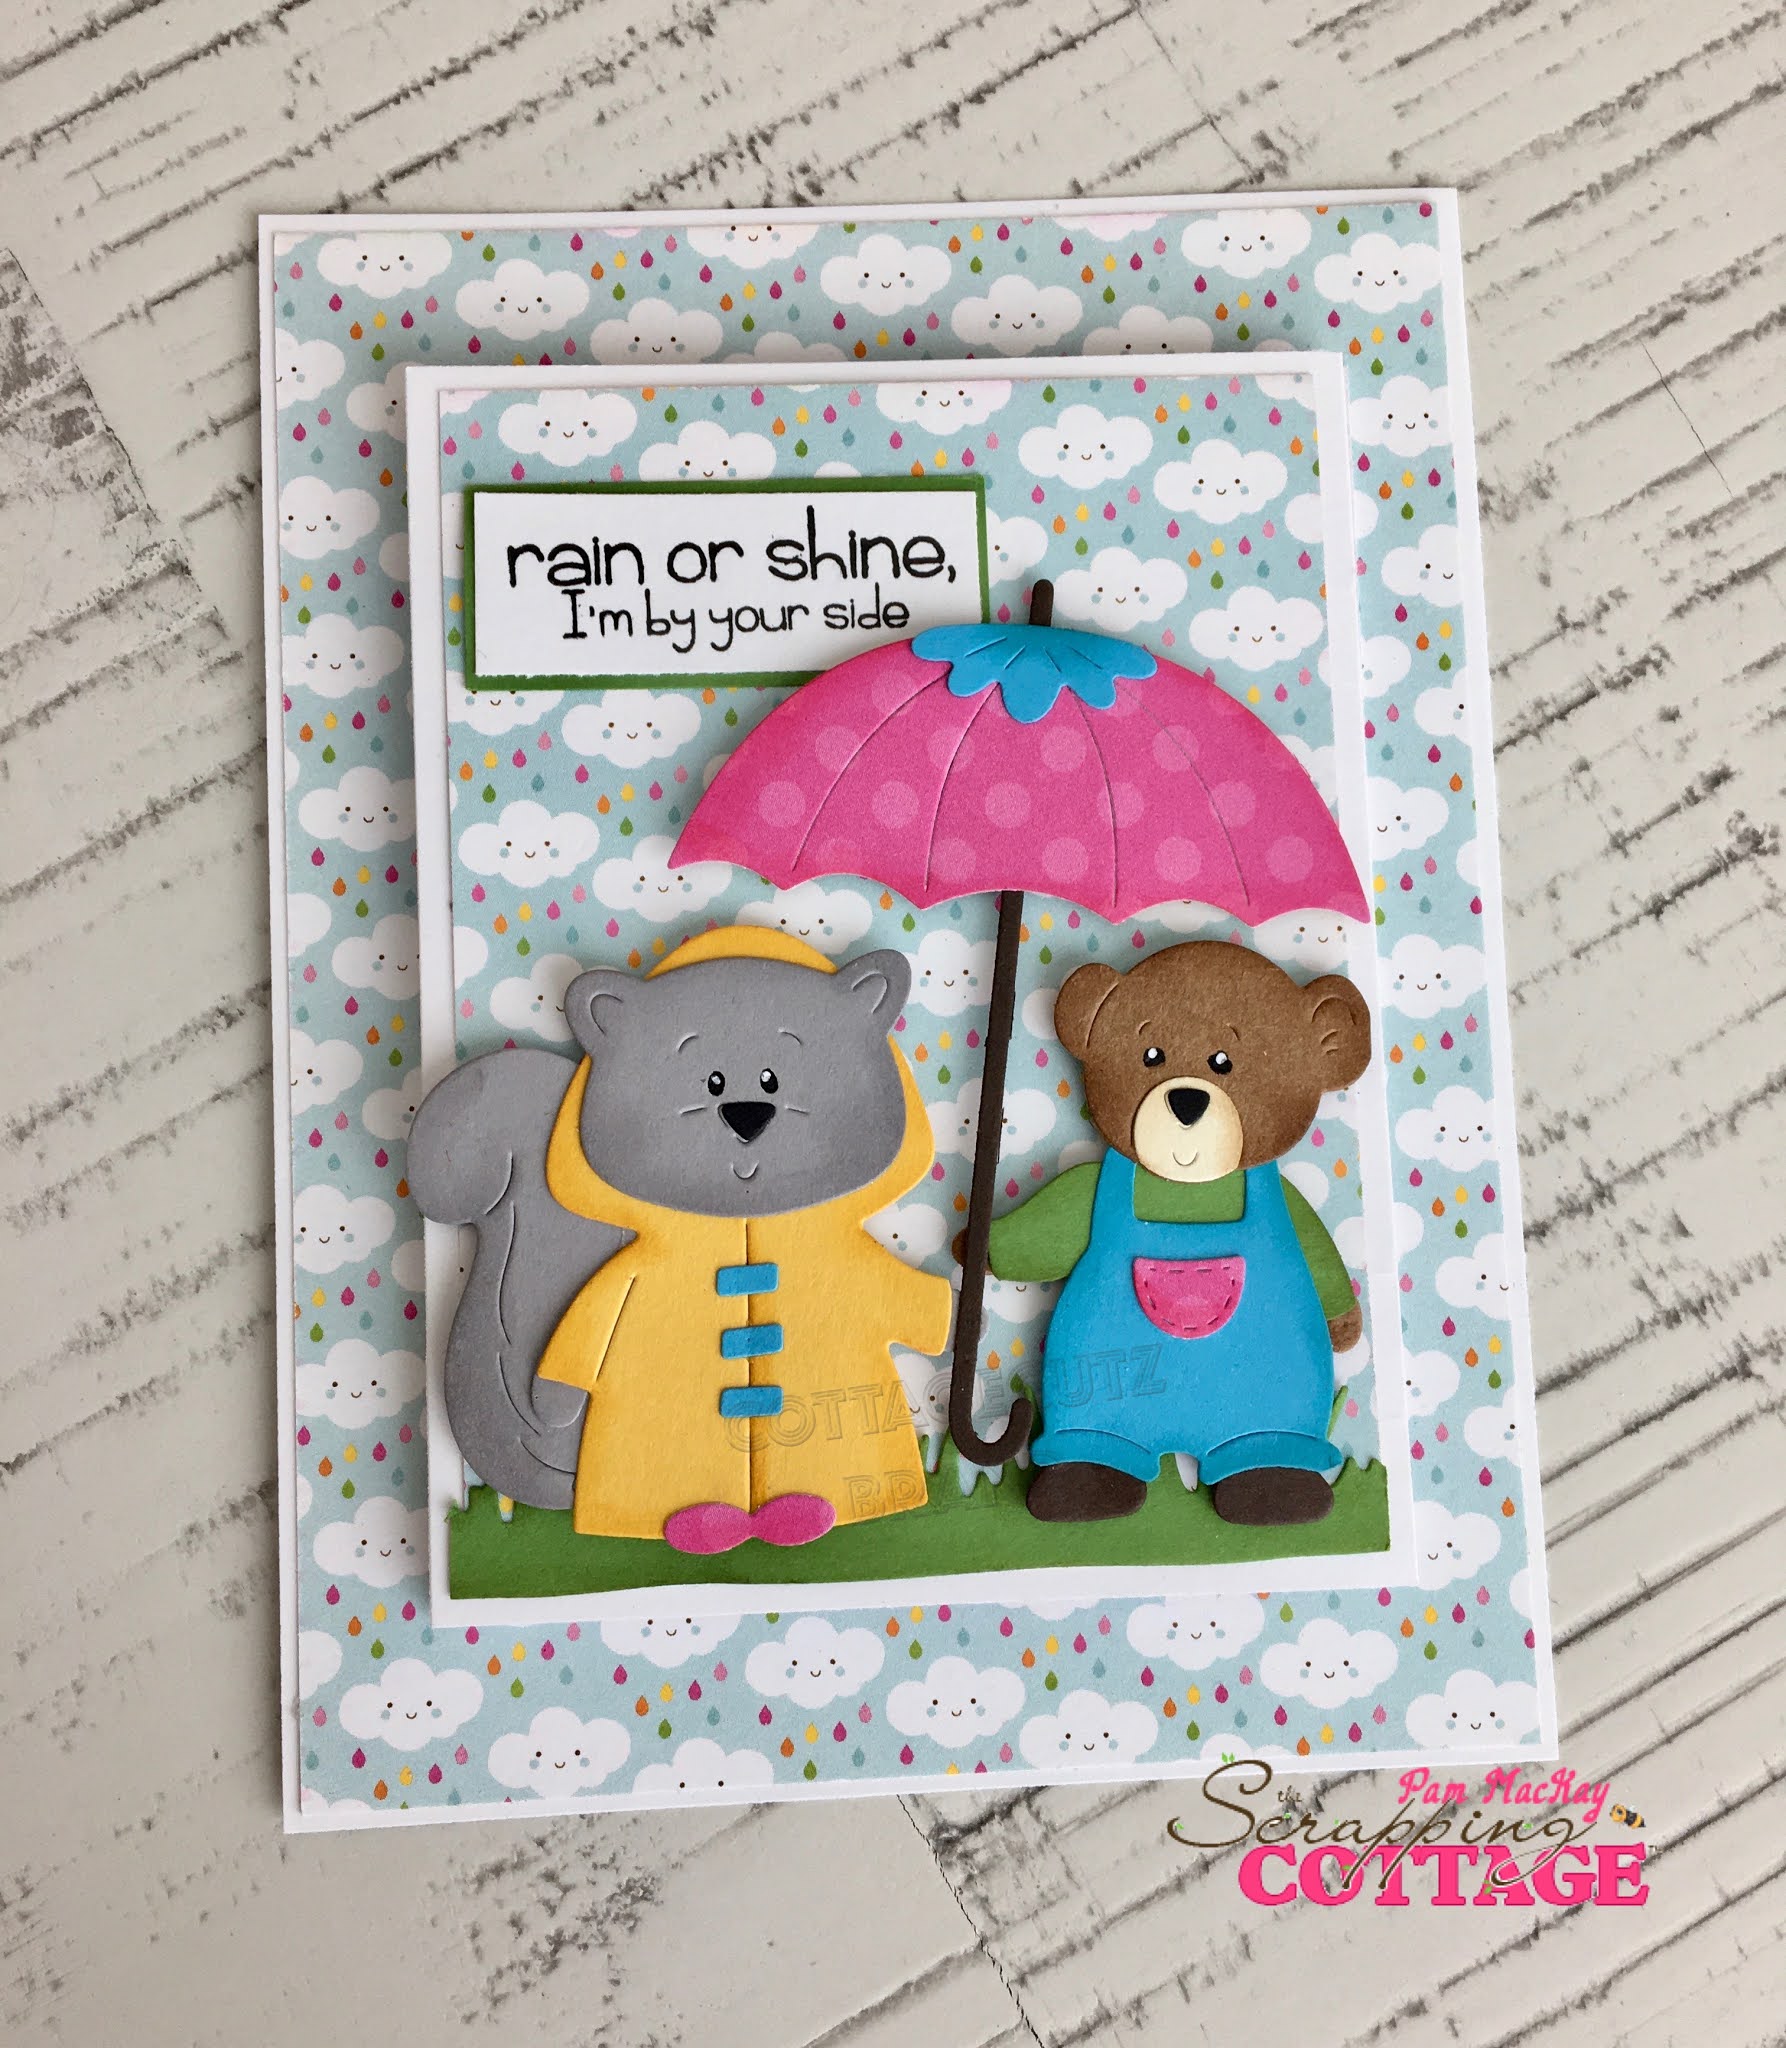
For this card base I used a piece of white card stock 5 1/2 x 4 1/4.  And then added some cute DP on top of that. On top of the base you are going to add a piece of white card stock 9 3/4 x 4 1/4 scored on the long side at 3 1/4 x 6 1/2.  The fold is an accordion fold.  I then added more DB and my cute little animals cut with the Spring Shower Buddies die

On the middle panel I made a little pocket for the surprise gift card.  I stamped the sentiment on the far right panel and added another little umbrella that I cut from the Rainy Day Duck die


These new CottageCutz Products are coming soon!  Make sure to be watching for them in the store.  This release is out of this world adorable!

Blessings and Take Care
Pam

die used to create card:


Thursday, April 11, 2019

Splash!

Good Morning Scrapping Cottage Friends!

It is Pam creating with you!

Today, I am making a card that will be a big hit with my little 2 year old nephew.  He loves bright colors and ducks so this card fits both of his favorite things except that it is a little girl duck! But at his age it really makes no difference!!  Also we have a new release called Magical Fantasy!  And believe me it is Magical and so darling.  It is 25% off in our stores so don't miss out!  I can't wait to make cards with it.


Design Steps:
 1.  Cut out the duck and accessories using: the Rainy Day Duck die, orange, blue, yellow, black card stock and Polka Dot DP
 2.  Use your favorite inks to shade and highlight the pieces
 3.  I had some pre-embossed square cards that I decided to stop hoarding!  They have really cute envelopes to match.(Lasting Impressions) I assembled the cute little duck and umbrella
 3.  Glue down the puddle and then the duck.  I placed a pop dot behind the umbrella for some dimension and then glued down the splashes
 4.  On the inside of the card I layered a piece of DP behind the white then glued that inside
 5.  I made another umbrella and assembled it
6.  Then glued the umbrella to the inside of the card and add your sentiment to the front of the card


CottageCutz Products

I just love how this card came out and I had such fun making it! Hope you stop by the store and check out the new release called Magical Fantasy! It is just so whimsical and fun!  I will be making samples really soon. Make sure and check out all of my talented teammates samples too!
Blessings
Pam


Sunday, April 07, 2019

Duck Hugs

Hi!

It's Anja here. My mother just got 5 cute little ducks for her birthday. And ducks were on my mind when I made this card.


For this card I used:
- Cottage Cutz dies (Rainy Day Duck, Quackers & Quack, Sending Hugs Bear),
- Distress Inks (Mustard Seed, Wild Honey, Spiced Marmalade) and Oxides (Broken China),
- craft card base (18x12,5 cm),
- white card stock for die cuts and background (17x11,5 cm),
- green card stock (17,5x12 cm),
- black pen,
- white pen,
- brush,
- paper glue.

First I cut and colored the ducks. I used black and white pen for the eyes. I used green paper for the sentiment.


Next I colored the sky background. I used brush this time to color the paper.


I used green card stock for the background. I cut a stripe of paper for the grass. 


I arranged and glued all the pieces to the card base and my card was done.


Have a nice Sunday and see you again next week.

Anja Z.


Cottage Cutz dies I used:


Wednesday, April 03, 2019

Friends Through Rain & Shine

Hello!  This is Sukie and today I'm super excited to share that I'm the newest member of the Scrapping Cottage design team. I absolutely adore this company and their collection of dies.  I'm looking forward to creating lots of inspiring projects during my design team term.
When I saw this adorable die I was inspired to create this fun card.  I cut out the Rainy Day Duck die pieces in white card stock and used my Oxide Inks to shade the pieces.  I also shaded the Nested Stitched Scallop Circle Set to coordinate with the duck's hat.  Another circle was cut out in white card stock with the Circle Set.  The clouds are from the Snowman Lane die set.
The inspiration for the duck and rainy day scene came from the gorgeous chevron patterned paper. The paper is from an older Doodlebug paper pad from my stash.  I layered the chevron paper on white card stock and adhered it to a yellow card base.
The two circles were adhered together and layered on my card.  Next, I added the puddle, clouds and duck to begin building the scene.
Initially, I didn't cut out the water splashes thinking they wouldn't fit inside the circle, however, they ended up being the perfect addition along with the umbrella to the scene.
The finishing touch was a sentiment from the Scrappy Moms (retired) Fun Celebrations stamp set.  I stamped the sentiment on a hand cut flag and added it to my card.
Here are the dies used on my card available in the shop, check out the anniversary sale going on now:

Saturday, March 09, 2019

Rainy Day Duck (new die)

Hello Scrapping Cottage friends! Thanks for taking the time to stop and visit with us today. It's Mary Marsh here bringing you the Saturday edition of the Blog.

We have a new release of 36 Spring dies in the online store. There are a variety of designs so perfect for Easter or Spring cardmaking. Take a look in the store you definitely won't be disappointed.

For my card today I am using the new Rainy Day Duck die. This little ducky has such detail right down to the water puddle and splashes of water coming off the puddle. It would be so perfect for a get well card, a thinking of you, a thank you and even a birthday card. So let's get started with some details on how I created my card. 

Step 1: Having a layout in mind at the card start is always a big boost for me. That way I can just choose the card colors and designer paper and I am good to go. I liked this week's sketch #739 on Splitcoaststampers because there are lots of layers and the image panel is big enough to show off the sweet little ducky. 
I looked through my designer papers to get one that would coordinate with the whimsical die cut image I was using. Well that took much longer than I anticipated (lol)!! I selected 4 papers before I settled on the one I am using on this card. Dotted paper always works for me. 
Teal card base: 4 1/4" x 5 1/2"
Teal dotted designer paper: 4 1/8" x 5 3/8"
Teal diamond paper (Layer 3 on the sketch): I used the largest die of the Rectangle set
White image Layer: Again I used the largest die of the Rectangle set
Next I cut the duck image. I used a daffodil cardstock for the body and a tangerine cardstock for the beak and legs. I selected another patterned paper for her umbrella and a coordinating cardstock for the handle. I cut the umbrella twice to give a little contrasting edge.


I love how the water puddle has splashes of water coming out to give the appearance of movement. CottageCutz dies are so detailed. I used the puddle of water as element 6 of the sketch. 

For the rain cloud and raindrops I used the Stitched Sun, Clouds and Umbrella die. I used dimensional adhesive on the rain cloud. The umbrella I used on my card is part of the Rainy Day Duck die. 

After I attached the cloud, I thought of adding a sentiment on the cloud. So I carefully removed it and stamped my sentiment. I decided to make this a thinking of you card. My cards are always a work in progress so sometimes I have to backtrack in the creating process (lol)!!! 
Step 2: Now that all the card elements are cut, I am ready to start assembly. Attached the background designer paper and the designer paper that is element 3 of the sketch with double sided tape. This is my favorite adhesive. 
For Element 4 of this sketch I decided to use purple cardstock. I cut it 1/2" x 4 1/8". 
 To complete my card I added the image panel and it was done. I hope I have given you some inspiration on a way to use this die. I made another card with these same dies and sketch but the card colors and paper are different. You can see that one here
That's it for me for this week see you next Saturday. 
dies I used to create card: