Showing posts with label Pierced Wide Rectangle Frame Set. Show all posts

Monday, July 16, 2018

Framed Lighthouse

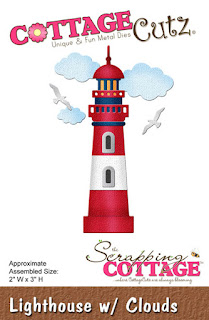
Hi, Lois here with another throwback card.  Because CottageCutz isn't having a new release this month, the design team members are pulling out older dies and giving them a fresh look.  Today I have pulled out Lighthouse w/Clouds, Rope Corner, and the Pierced Wide Rectangle Frame set to make my card.


This card is a standard A2 card which folds at the top.  I started by cutting the cardstock and patterned paper for the card base, as follows:

Turquoise - 4 1/4" x 11", scored at 5 1/2"
White - 4" x 5 1/4"
Waves patterned paper - 3 7/8" x 5 1/8"


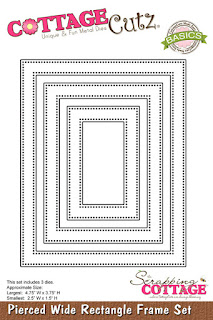
Next I cut the middle Pierced Wide Rectangle Frame from gray cardstock and a piece of sky patterned paper 2 1/2" x 3 1/2".  I applied two layers of foam tape to the back of the frame and adhered the sky paper to the frame.


I then die cut the Lighthouse and Rope Corner pieces from white cardstock . . .


. . . colored and constructed the images.


All that was left was to place the lighthouse, seagulls, and clouds in the frame, attach the frame to the card, and add the rope and anchor appropriately -- and my card was finished.


CottageCutz dies used on this card are:

https://02f2a55.netsolstores.com/cottagecutzlighthousewclouds.aspx


https://02f2a55.netsolstores.com/cottagecutzropecorner.aspx


https://02f2a55.netsolstores.com/cottagecutzpiercedwiderectangleframesetbasics.aspx


Monday, July 09, 2018

Special Thank You


Hi, Lois here again with my Monday card.  As I mentioned last week, during the month of July the CottageCutz design team is reminding you of some older dies when making their cards.  My card uses two such dies -- Stitched Leaves and the Pierced Wide Rectangle Frame Set.


To start my card, I cut the stitched leaves from a piece of white cardstock.


I then colored the pieces with Copic markers.  I had originally planned to use a white pen to make the stitches more pronounced, as is shown on the packaging; but I was not happy with the results on the first leaf I tried.  So I turned it over and colored the back so it was not wasted.


I then cut the card base pieces and the frame.  The cream card base is 5 1/2" x 8 1/2", scored at 4 1/4"; and the inside of the frame is 3 5/8" x 4 3/8".  I used the largest frame die.


I adhered foam tape on the back of the frame.


After constructing the card, I laid out the leaves down the side of the frame to see how much room I would have for my sentiment.


I removed the leaves and stamped the sentiment.


I then replaced the leaves, gluing them down over and under the frame, as well as the acorns at the bottom.  And my card was finished.


CottageCutz dies used on this card are:

http://www.scrappingcottage.com/cottagecutzstitchedleaves.aspx

http://www.scrappingcottage.com/cottagecutzpiercedwiderectangleframesetbasics.aspx

Thursday, April 05, 2018

Spring is Here!


Good Morning Friends

It is Pam getting crafty with you today!

It has been such beautiful weather here in South Carolina that I have been able to clean out my flower beds.  We had a cold winter and even snow.  So some of the more tropical plants didn't make a come back this spring.  I am going to have to pick some new plants to replace the ones that didn't make it.  So with plants on my mind that was my inspiration for my card this week!
 Design Steps:
1.  Cut out the water can in silver metallic paper using the Spring Watering Can die.  Next cut out all of the flowers and leaves in white using the same die.  I cut out 2 each of the flowers and 3 of the leaf stems.
2.  Color the flowers and leaves using copic makers. Add shading to the watering can using copics
3.  Tape the leaves and flowers to the back of the watering can
4.  Cut the hello using the Hello Spring die.  I cut one in yellow and one in gray.  Glue the gray one in the back of the yellow one slightly off center.  Also cut a frame using the Pierced Wide Rectangle Frames dies the second from the largest in vanilla card stock
5.  Use a vanilla A2 card base a yellow piece cut to 4 x 5 1/4 and a piece of DP 3 3/4  x 5.  Make sure to add the ribbon before you glue the panel to the front of the card. Add the vanilla frame to the card just slightly to the left of center
6.  Add the watering can onto the frame as shown
7.  Place the hello to the upper right side of the card and it is complete
Cottage Cutz Products
I hope you check out these cute dies in our store today!  
This card would make a great Mother's day card too!
Blessings
Pam

Thursday, March 15, 2018

Bee Happy!

Good Morning Crafty Friends!

It is Pam from Stamper at Heart Blog sharing ideas with you!  Before we get started I wanted to remind you that we are having a sale in our online store!!  So don't miss out!!
Now onto today's project! I am using the new Collection In Stitches.  If you haven't checked out this collection please take a peek it is just adorable!
Designer Steps:
 1.  Cut a white piece of card stock 4  5 1/4 use a hexagon stencil to add the honey comb to the top of the card
 2.  Cut a piece of DP 3 1/2 x 4 and glue to the lower half of the card
 3.  Using the largest die from the Pierced Wide Rectangle Frame Set and cut out of white card stock save the inside piece
 4.  Before you glue the frame to the front of the card add the black and white twine
 5.  Use foam tape on the rectangle frame and pop to the card as shown

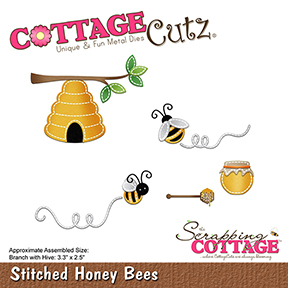
 6.  Cut all of the pieces from the Stitched Honey Bees die out of white card stock
 7.  Use copic markers to shade and color the bees and hive.  On the inside retangle stamp bee happy then glue the retangle flat to the center of the frame
 8. Cut the wings out of vellum.  Glue the hive and little bee trails to the card then add the bees and sequins to finish

Cottage Cutz Products


Thanks for stopping by and please remember to stop by our store for the awesome sale!
Blessings
Pam


Thursday, February 15, 2018

Easter Peeps!

Good Morning Scrapping Cottage Family!

Cottage Cutz has a brand new release of two collections of dies.  They are In Stitches and Spring Designs in all there are 33 new dies.  And for a limited time the new dies are 25% off!
Today, I am really excited to be sharing one of our brand new Easter dies!  This little chick is just adorable!


Design steps:

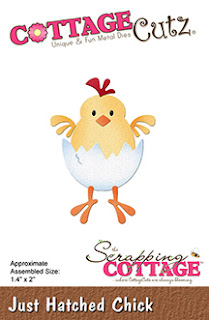
 1.  Using the Just Hatched Chick die cut the chick bodies and wings out of yellow card stock.  Cut the eggs out of white, cut the feet using orange and the little head feather out of red
2.  Use TH ink and add some shadowing to the different pieces
3.  Assemble the chicks and add tiny rhinestones for the eyes
4.  Cut the word Easter using the Stitched Alphabet dies
 5.  Using the Pierced Wide Rectangle Frame die cut out a white frame.  Use an A2 white card base, cut a yellow chevron piece of DP slightly smaller than the white card base.  Cut a piece of kraft card stock 4 1/2 x 3 1/2 and run through an embossing folder
6.  Assemble the card as shown
Cottage Cutz Products


Please make sure that you check out all of the new release dies! They are amazing!!

Blessings


Pam