Showing posts with label Picket Fence Border. Show all posts

Monday, March 27, 2017

Get Well Scene

Hi, Lois here today with a card that has many small pieces.  That's what I like about the CottageCutz dies -- all the elements included on them.  I'm using another new-to-me die -- the Tree of Nature die with lots of cute elements.  I've made a get-well card with the look of spring.


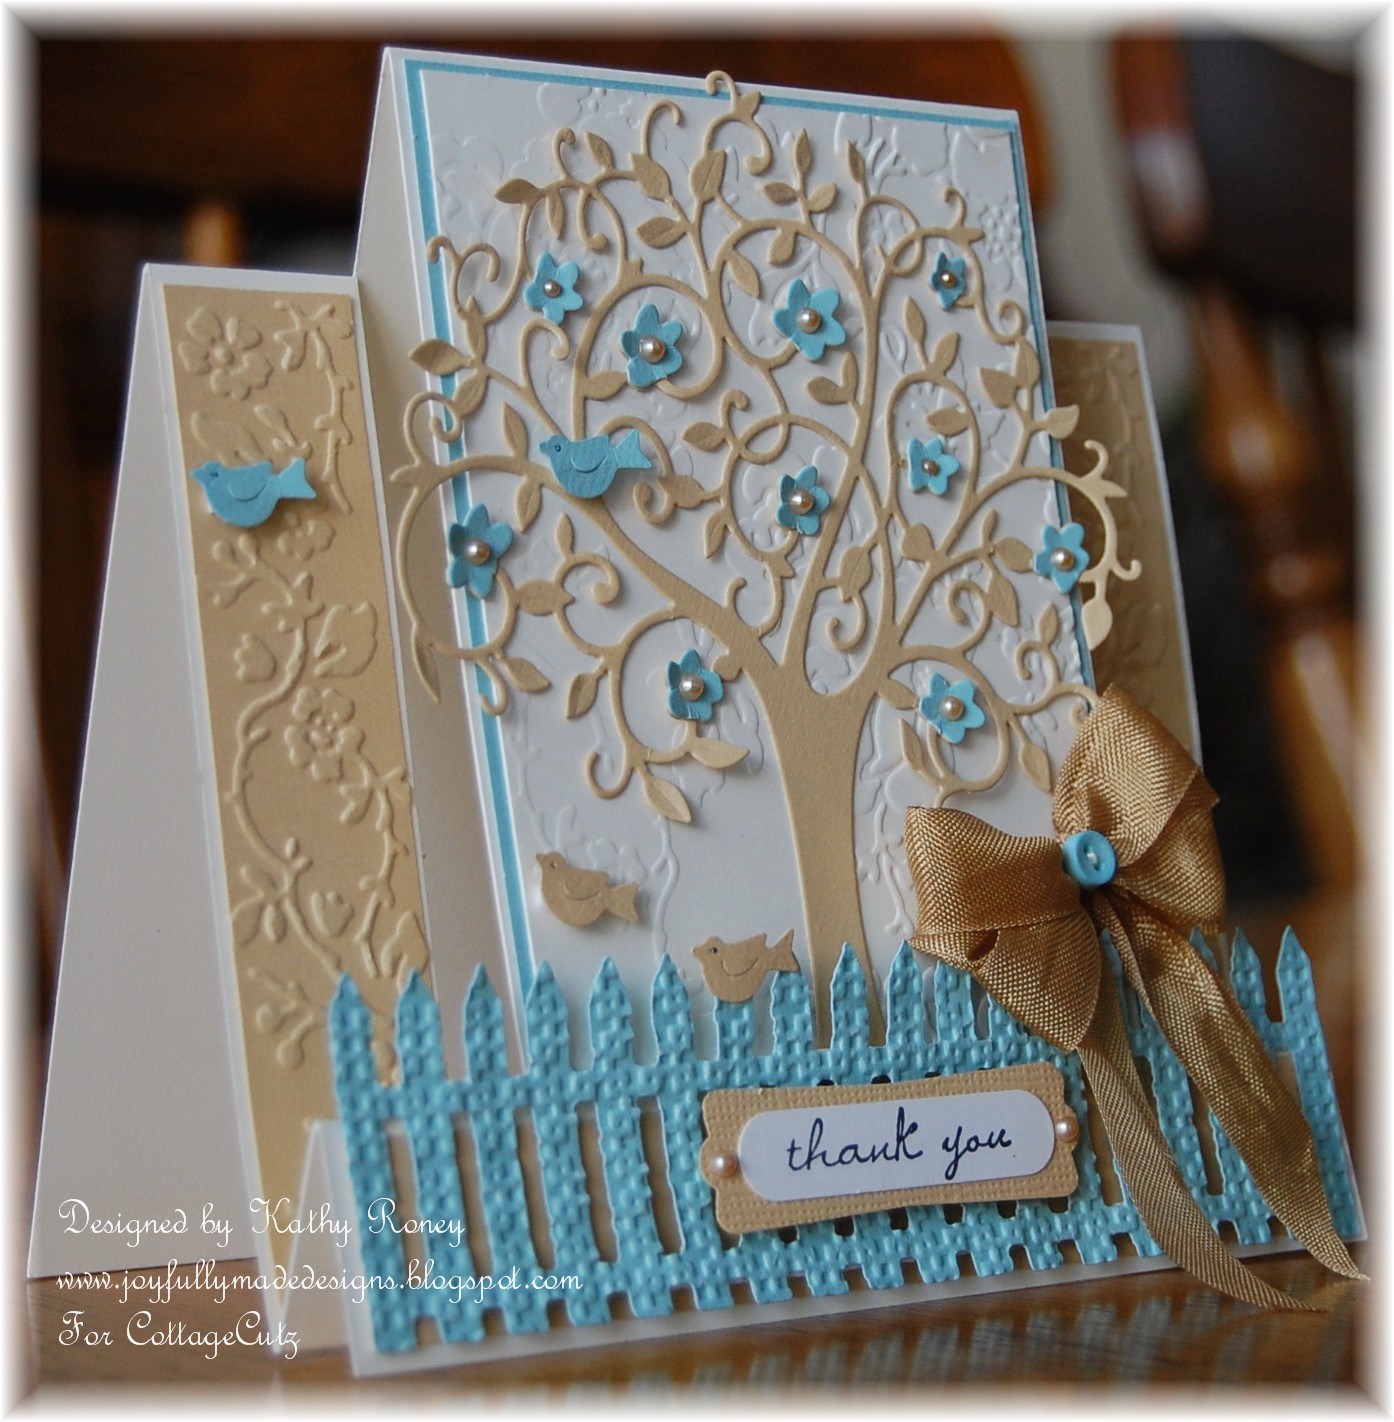
Supplies used on this card are:

Tan cardstock for the base, 8 1/2" x 5 1/2" folded in half at the 4 1/4" mark
Dark brown cardstock 4" x 5 1/4"
Light blue cardstock 3 7/8" x 5"
White cardstock for the die cuts
Copic markers
Ranger Distress Mowed Lawn ink
Foam pop dots
Googlie eyes
Tape runner
Xyron X sticker maker
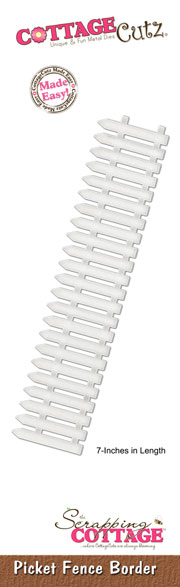
CottageCutz dies:  Tree of Nature, Picket Fence Border, Spring Grass


Instructions for card:

To avoid having to make many passes through my Big Shot with different colored cardstock, I cut all my pieces from white -- and colored them afterward.


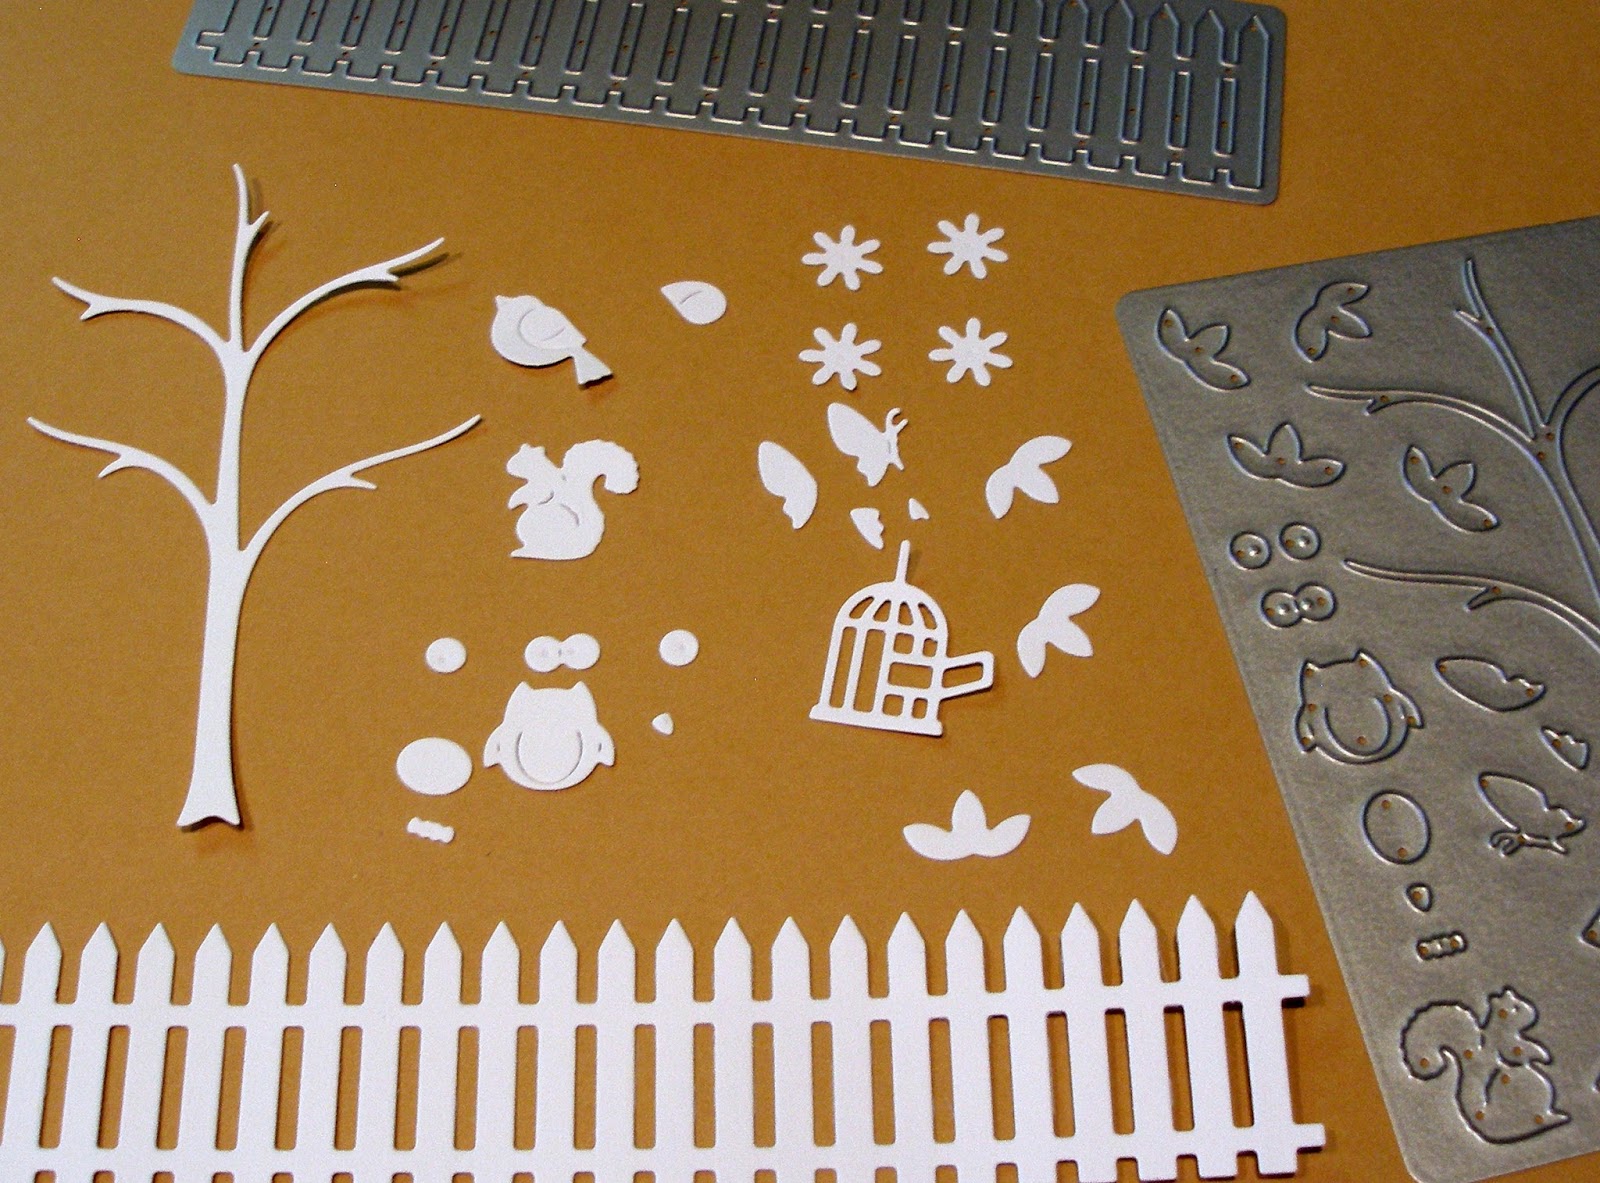
As you can see there are four blossoms and four sets of leaves already on the die.  I used a variety of Copic markers, as well as a fine black pen, to color my die-cut pieces.


As you construct a scene on your card, you could decide to cut more of them.  As you can see with my colored images, I decided I needed more leaves and blossoms.  While I was at it, I also cut two strips of grass using the Spring Grass die and sponged on some green ink for texture.


Next I cut the cardstock for my card base -- tan, dark brown and pale blue.


I then constructed my scene.   I used my Xyron X sticker maker to put adhesive on the back of the smallest pieces.   I had cut two strips of grass because I wanted one strip behind the fence and one in front.   As it turned out, I actually cut four more blossoms for my tree.  Here is a close-up of the 3-D pieces (the butterfly, the bird and the owl).  I used tiny foam pop dots to create the 3-D look for the wings of the butterfly and bird -- and larger ones to adhere all three critters to the card.   I love using googlie eyes on owls, so I used them rather than the eye pieces from the die.


I then stamped the small sentiment at the top and I was finished.  Again, here is my card:


Dies used on this card are:


By the way, check out the BIG Anniversary Sale.  You could save up to 50%.


Thursday, August 08, 2013

Spring Treehouse

Hi, Vladka here today with you!


Tree is perfect place to hide from the world and time and to catch the moments of peace and pleasures. I wanted to catch such moment in my card and for this I used CottageCutz  Spring Treehouse die. First I've coloured it with Distress Inks (Walnut Stain, Vintage Photo in Forest Moss). Then I've embossed it with clear embossing powder and tree gets the shine and special look. I love the results. I also added a piece of fence, which I cut out with Picket Fence Border die and also coloured it with Distress Inks. Simple and special. I hope you like it.


It is really hot here in our little country these days and this could be excuse to catch some more moments of peace, with some good book in one hand and with a cool drink in the other. Have a nice day. 


Monday, July 15, 2013

Spring Tree Frame

Hi, Everyone! Today I have created a new card
for The Scrapping Cottage, with the 


Used designer paper from Heidi Grace and Bazzill cardstock, 
to cut the frame and finish the card.  Placed the picket fence
between the layers.


Also used a paper doily, twine, pearls and large button to
embellish my card.  Sentiment was attached with a small brad.


Hope you have enjoyed your visit and 
come back again! 
Hugs,

Friday, July 12, 2013

Bella Spring Tree


Hi there!

Today I have a center-step card using the Bella Spring Tree, Picket Fence Border and Birdcage & Stand Dies from CottageCutz!


This tree is so cute! I cut it with the Iced Cocoa and Reflecting Pool papers, trimmed off the flowers from the Reflecting Pool and added them to the Iced Cocoa tree. The birds were cut from both papers using the Birdcage & Stand Die. These were all glued to the Natural White mat that was embossed with the Rosa EF (Cuttlebug). I like having the diecuts against white or cream, but still giving it a little texture from the embossing folders.

The three panel were done with the Iced Cocoa, embossing the two sides with the Rosa Border EF. The Picket Fence Border was cut with Reflecting Pool paper and then embossed with Square Lattice EF.

I added pearls, bow, button and sentiment to finish it!

Here is a side view of the card.


Here are the dies I used:


Thursday, May 02, 2013

Garden Hello Wall Hanging


Hi everyone!  Kathy here and today I have a wall hanging to share with you!


I used lots of beatiful CottageCutz Dies and Secret Garden Designer Papers from Graphic 45 to make this. The base is a page from a 8" x 8" scalloped chipboard album I got at Michaels. I covered it with an off-white designer paper (dp) that has crack lines on it and added a piece of peach dp to look like the side of a house. The outside border is a piece of the designer paper that I trimmed out the center of leaving just the border. Under the top of the border, I placed a piece of striped dp that was punched with a scalloped border on it. Under the bottom of the border, I added a picket fence using the Picket Fence Border Die and peach dp. I inked the edges a little and placed green dp under it.

All these pieces were glued together and added to the chipboard with Mod Podge. After letting it dry well, I trimmed the out side edge of the paper to match the scallop on the chipboard. (Note: Next time I do, this I will trace the chipboard shape on the back of the dp with pencil and trim it before adhering to the chipboard!)

The Garden Bird Branch was cut with the green dp and the 2 birds in it were cut with the peach and glued in place.

For the branch along the fence, I used the Bluebird Die with green dp, shaped it and tucked it in in the fence a little. The flowers on the 2 branches are from the Blossom Branch Die that I cut using peach dp and Solar White. I shaped these with my tool kit and mat and inked them.

For the window, I used the Springtime Window Die and cut it with green dp. The image in the window is a piece from the dp that I trimed to fit. I added the birdcage in peach dp and 2 birds all from the Birdcage & Stand Die. On the bottom of the window I added a piece of lace and mini pompom trim (a sample from Really Reasonable Ribbon) with Scor-tape.

Here's a little close up for you.


The little flower pots are from the Springtime Window Die that I cut with the green and peach dp and some Solar White and terra cotta color papers I had in my scraps folder.

For finishing touches, I added liquid pearls to flower centers, added twine bows and adhesive pearls. The chipboard tag, from Secret Garden, was added to the bottom with a tiny piece of the Moss Ribbon. Moss Ribbon was added to the back to use as a hanger and them covered with paper to finish.

Here are the dies I used on my project.


Tuesday, January 08, 2013

A Happy Hello

Hello! Judy here with my first post as a member of the CottageCutz team~!

Today I am sharing a valentine I made for my college sophomore daughter. I used Elephant Peeker, Picket Fence Border, and the Scalloped Doily for my dies.
 
My little elephant is a girl, so she has painted her toes pink! I hand cut the little tag, punched a hole, and added a little stamped sentiment ("a happy hello") from Stampin' Up! The ruffled ribbon and twine are from Really Reasonable Ribbon and the felt flower is by Bride's.

My daughter lives 700 miles away, so I hope this little sweet elephant brings her some sweet love and cheer in her mailbox!


Monday, April 16, 2012

CottageCutz Happy Birthday Kitty


Good morning, and happy Monday to ya!  It's Lorie here today with a cute little kitty card that's just purrrrfect for celebrating a happy birthday for someone special.  This adorable kitten was cut out using colored card stock, and the edges were sponged to give it dimension.  After sponging, I added some stripes to the kitten using Copic markers, and the facial features were all colored using Copics as well.  For the white tip on the tail, I simply used a white gel pen and colored in the top part of the tail.  
 The edges of the card are hand crocheted, and you can drop by my blog, The ThINKin' Spot to find out more about how I crocheted directly onto the paper. I did include some faux stitching around the plaid panel.  I threaded some seam binding through the picket fence, and I distressed the edges of the circle frame.  The happy birthday sentiment and the sweet little face on this gal both come from Peachy Keen Stamps

Here's a closer look at this cutie!  I used the following CottageCutz dies for this card (just click on the picture to go directly to The Scrapping Cottage for all the info and pricing):


I hope you've enjoyed my little project today.  I sure enjoyed creating it for you!  I'm so happy you could join us today here on The Scrapping Cottage Blog.  May you have a blessed and beautiful day filled with lots of happy crafting!