Showing posts with label Melinda Beltran. Show all posts

Thursday, April 11, 2024

B Spring Daffodils and Tulips Table Decor Sign

Hey crafty friends,
So glad you stopped in today! It is my turn to share on the Cottage Cutz blog. So I created this cute "B" sign that will be a part of my table decor.


Here's another view of my sign. I started with a piece of white cardstock measuring 5x7. I then added a mat of some designer paper I created. I then cut out the pretty Trellis background die. I layered that onto some cream cardstock. I cut the B out of some yellow cardstock and then cut out the daffodils, tulips and butterfly from some cardstock and then colored and shaded the various white pieces.  In case you're wondering I used a capital B as that is the first letter of our last name :-).


Here's a closer look at the pretty folk art butterfly. I colored the detail pieces with my yellow markers. However the wings were cut from some red cardstock.

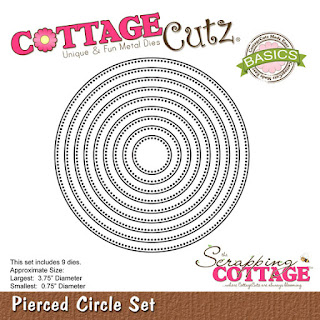
I used the smallest pierced circle die to place a tulip head onto with some of the foliage. All of the leaves started out as plain white cardstock. I just used my markers to color them. I mounted the B onto some foam tape and then onto the mat. This gave it some lift and I thought it made it look very nice.


Here is one last look at my completed sign. I thought it turned out so festive and with a ton of cheerful spring vibes.


Dies Used For This Project

Spring Daffodils

Spring Tulips

Folk Art Butterfly

Pierced Circle Set

Trellis Background


Well, that about covers it for today. Be sure to come back real soon. You will want to keep up with all the beautiful projects the design team is creating.  Don't forget to follow Cottage Cutz on all their social media accounts too! Links are below.
Until the next time, have a wonderfully crafty day!
Melinda


Head over to Cottage Cutz and do a little shopping today!

Get Social With Cottage Cutz

Sunday, March 31, 2024

Blessings Card

Hey crafty friends,
So glad you stopped in today! Happy Easter! Today I am sharing a card I created with an Easter or even just a thoughtful blessings card. Here is what I created.
My card is a top folding A4 card.

As usual, I started by cutting all of my pieces out in white. I used my markers to color my various pieces.


I layered the two white cross pieces together. I wanted to keep the crosses white but wanted to add a little extra pizzaz to it. So I decided to brush a little sparkle on it.

I then proceeded to build my flowers and leaves around it. I also built the cute little bird after I colored all of the various pieces. I went ahead and mounted all that to a double stitched oval with a piece of patterned paper. I put that onto the next largest white double stitched oval mat. I used a piece of green plaid paper 

Here's another view of the finished card to show you the depth of the pretty flowers and the little bird.


Dies Used For This Project


Double Stitched Oval Set

Well, that about covers it for today. Be sure to come back. You will want to keep up with all our crafty adventures!  Don't forget to check out our YouTube Channel! Links are below.
Until the next time, have a wonderfully crafty day!
Melinda


Head over to Cottage Cutz and do a little shopping today!

Get Social With Cottage Cutz

Sunday, March 17, 2024

Risen Empty Tomb Home Decor DIY piece

Hey crafty friends,
So glad you stopped in today! Today I am sharing a pretty home decor piece that I created for the passover, resurecction season. Here is what I came up with.
My piece is a little mini sign that sits on a wooden easel that I picked up from Dollar Tree.


I started with a variety of Cottage Cutz dies. I cut them all out from white cardstock. I typically do this so I can use my markers and coloring to match the color scheme of whatever paper I am working with. 
My finished piece is 4.5 x almost 7". I started with a piece of cream cardstock for the base. I then found a piece of pretty paper that I thought would be nice. It is not the traditional type of Easter theme, but I thought it would work. I did have to cut my paper and add some extra to the bottom as it was only a 6" piece of paper from a 6x6 pad.


Here is a closer look at my finished cross. I colored the cross to look like wood coloring. I then cut the draped cloth in that same cream color. I did lightly add some pink shading to it. I then went to work on my flowers and the foliage and picked colors from my marker stash that I thought were close to the colors in the paper. I then took the draped cloth and gave it some slight curve to give it a feeling of movement. You can see in the YouTube video project share the depth it creates!


Next I went to work on my hill and tomb. I had to try and color them to look like stone. So I used my different gray markers and did some stipling, squiggles and shading to try and make it look like stone. I then colored the little hill in a variety of greens to make it look like a combination of grass and dirt. I did have to put a piece between the back of the tomb piece to make it some up to the grass/dirt hill. I then colored in the little grass pieces with some of the same green colors as the grass.


I went to work attaching all of the pieces onto the mat. I used some foam for the cross to give it a little lift. Here is one last look at my finished piece. I think it turned out pretty good. I know it isn't a traditional look, but living here in Florida, the palm fronds in the paper really attracted me.


Dies Used For This Project


I created a quick project share video so you can see if a little better than the pictures.

Head over and check out my quick project share video


Well, that about covers it for today. Be sure to come back real soon. You will want to keep up with all that our wonderful design team is creating!  Dont' forget to head over to the Cottage Cutz YouTube Channel where you will find so many great inspirational projects and pick up some great crafting tips too!

Until the next time, have a wonderfully crafty day!
Melinda


Head over to Cottage Cutz and do a little shopping today!

Get Social With Cottage Cutz