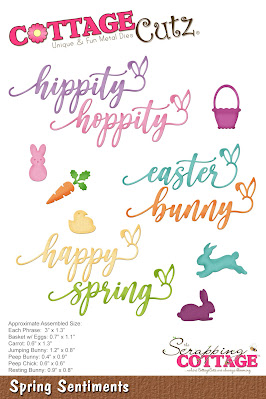
Showing posts with label Hello Spring Bunny Cottage. Show all posts

Tuesday, March 15, 2022

Hello Spring Chicken Pop Up Slider Treat Box

Happy Terrific TuesDIE Scrapping Cottage friends!
Melinda here with you for another fun Tuesday. My project features a couple of dies from the marvelous new SPRING RELEASE along with some others!  Here's what I created.


I decided to make a little Pop Up treat box! Check out this fun interactive box.
Here it is closed and standing on an angle.

Here's a look at it with the little "drawer" slightly opened.

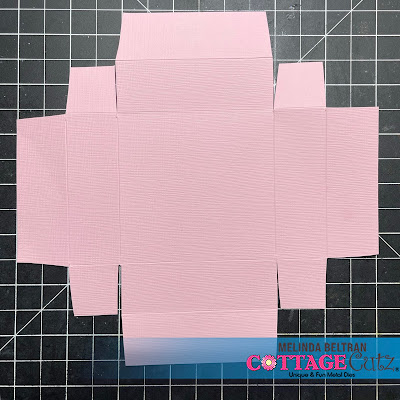
I started by creating the box base. It comes from a 7x7 piece of cardstock. I simply scored it on all four sides at 1" and 2" . I cut the squares and trimmed in the "flaps" just slightly.

I added adhesive and began to fold the sides up.

I made sure to add some ribbon around one of the two sides that has the flaps. This way the ribbon wouldn't pull out as I used it as a "pull" See photo above and below.

I turned in all four sides and that gave the interior of the box some sturdiness and gave it a finished off look.

Next, I turned to making the box "top" or belly band if you will. I used the largest die from the Slimline Stitched Rectangle set. I then scored it to match the top and sides.


I then added glue to the back side of the largest slimline scallop stitched die. I glued this to the pink "top" we just made. See photos above and below.


I scored the mats again once the white was adhered to the pink.


I then used the second smallest die from the double stitched rectangle set.

I ran it through my die cut machine a couple of times and it cut out fine. 


Next, I burnished the score lines and then ran a bead of glue along one of the seams and adhered the two ends together. 


I cut a strip of pink paper 1x4". Scored it and that is the base for the easel part.
Once I attached it to the under side 

Here's what it looks like with nothing in the box and once it was adhered to the inner top of the top and the center of the inside of the box. Here are some additional photos at varying stages of it opening.


Here is a pic of it closed.


I proceeded to decorate one of the square scallop eyelet stitched dies with the cute Spring Chicken Die. I added the word Hello from the Hello Spring Bunny Cottage Die.

Here is another photo of the sweet little box open. Inside is a bunch of sweet "chewy" little (bubblegum) eggs.


The Dies I used to create this project:


In case you didn't hear, The CottageCutz YouTube channel is up and running.  Head over and check out the latest video! There is a giveaway for subscribing too!

Well that about covers it for today! Until the next time, have a wonderfully crafty day!
Melinda Beltran

Friday, February 25, 2022

Bunny Cottage

Hello CottageCutz friends! Thanks for taking the time to stop and visit with us today. It's Mary Marsh here bringing you the Wednesday edition of the Blog.

IT'S NEW RELEASE TIME! The Spring Release with 20 new designs is in the online store. The individual dies are currently at 30% off. There is a nice combination of both religious and whimsical designs. So perfect for all card makers out there.

And the dies don't have to be used strictly for Spring or Easter. The team has done Valentine, Birthday and Thinking of You cards with these new dies. Take a look back on the Blog for lots of ideas.

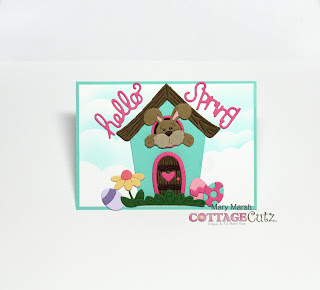
Today for your viewing pleasure, I have a whimsical Easter card using the cute Hello Spring Bunny Cottage. So, let's get started on some details of how I created this card. 

Design Steps:
Since I knew the die, I was going to use, I looked for a layout that would allow the image to be front and center and also use some designer paper. I found this sketch online from the Tuesday Morning Sketches Blog and thought it would work well. 
Then I looked through my paper collection for something to coordinate with the playful image. I found these papers with a stripe, a geometric pattern and one that had an ombre appeal. 

Card Base: 4 1/4" x 5 1/2"
Background designer paper layers: 2" x 5 3/8"
Angled border layer: 2 3/8" x 4 1/4"
Designer paper angled layer: 2 1/4" x 4 1/8"
Image panel border: 3 7/8" x 2 3/4"
Image Panel: 3 3/4" x 2 5/8"
Next, I cut my images in shades of cardstock that matched the designer paper. 
Now that my card elements are prepared, I am ready to start card assembly. I attached the background layers to the card base with double sided tape. 
The images were attached with glue dots and Glitter Art adhesive (dries clear). I stenciled some clouds on the white panel with salvaged patina distress ink. I used dimensional adhesive to lift it off the background layers slightly. 
And that's my card for this week. I will stamp an Easter greeting on the card inside.  I hope I have given you an idea of a way to use this ever so cute Bunny Cottage die. See you next Saturday. 

Reminder: Our YouTube channel is active again. Check out the latest video from Marla, and we are having a giveaway for subscribing, liking the video and giving it a thumbs up. Click here. 

die I used to create card:


Tuesday, February 15, 2022

Hello Spring Peeker Bunny Easel Card

Happy Terrific TuesDIE Scrapping Cottage friends!
Melinda here with you today. I am super excited to be sharing with you today. Tuesdays will be my new day to post! So today I am sharing a cute little card I created with dies from the new SPRING RELEASE! Here's my project.

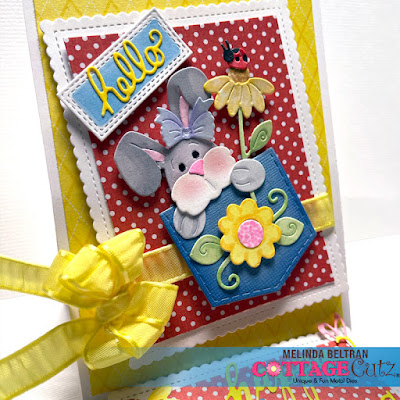
I created this cute Easel card featuring the Bunny in Pocket Die.


To create the Easel Fold

I started with a piece of cardstock measuring 4.25 x 11. That is exactly half of a letter size piece of cardstock. I folded it at the 5.5 mark. That is in half. I then folded the "top" or the right side in half again. I simply folded it to the center fold line.

Here's a picture of the two folds. It is hard to se the center fold on the left, but it is there.

Next I took a piece of white cardstock and cut it to 4.25 x 5.5. I added a pretty patterned paper mat to the top. That mat measures 4 x 5.25. I put adhesive on the bottom half only of the top folding. Next I put the mat onto the top part and lined up the bottom and sides. So only half of the mat is adhered to the base.

Here's a view of the side of the card with the base. This shows you that the mat is only attached to that bottom half. Once that is done, I went ahead and assembled my layers and the main die onto the card.

Here is the panel I added to the "bottom inside" of the card. This piece acts as a stopper of sorts for the top piece. It allows for that piece to be on top.


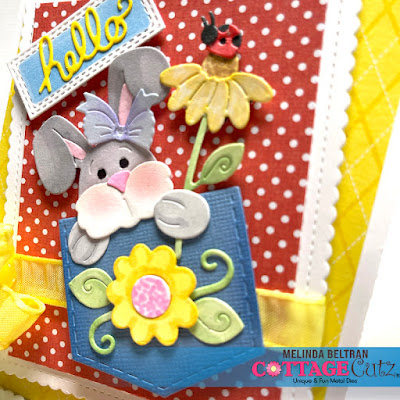
Here you can see all the fun dimension the layers have. I put some foam tape behind the mats to get them a little extra dimension. I added a sweet little bow in a matching yellow ribbon.

All of these pieces with the exception of the pocket started out as plain white cardstock. I have used this sweet little die in a couple other projects, but this one has a gray bunny. The others I colored that sweet little bunny in more of a brown. If you would like to see those projects head over to that blog post. CLICK HERE.


Here's another look at my finished project.


The Dies I used to create this project:


I used the Stitched Scallop version. That one is currently unavailable, but this is an excellent alternative.


In case you didn't hear, The CottageCutz YouTube channel is up and running.  Head over and check out the latest video! There is a giveaway for subscribing too!

Well that about covers it for today! Until the next time, have a wonderfully crafty day!
Melinda Beltran