Showing posts with label Grapevine Wreath w/Bird. Show all posts

Wednesday, September 26, 2018

Group Post w/Christmas Designs

Hello Scrapping Cottage friends! Thanks for taking the time to stop and visit today. We are sampling DT cards from Part 2 of the 2018 Christmas release. There are 29 new designs in this release. 

And, speaking of new releases Christmas Part 3 has just been released along with some new Halloween dies. You will find these in the online store at a 25% off sale. There is also an exclusive die that can only be purchased through the online store. Check out the sweet Dakota the Husky die.

The DT will be showing samples soon with these new dies. Today, we have a group post showing samples from the recently released Christmas Part 2 dies. All the card samples today are ones that could easily be mass produced for Christmas card giving.

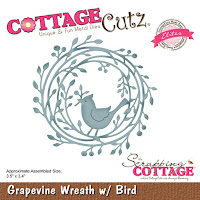
Card 1: This first sample is from Jeanne Knobbe. She used the Grapevine Wreath w/ Bird and the Love, Peace & Joy dies to create this soft and serene card. The wreath was colored with Copic markers except for the bird which was left in white. The bird and peace word are covered in two coats of wink of stella for a bit of shine. Notice that she continued the sparkle by layering the image panel with silver metallic cardstock.
Card 2:  Our next sample is from Anja Zurga. She used the Christmas Village 1 & Christmas Village 2 dies to create her beautiful night time scene. The background is sponged with distress oxide inks and then she splashed with a bit of water. She also sponged a little yellow ink to give the effect of a soft glow coming from the buildings.
Card 3: Our next sample is from Janja Albreht. She used the Winter Deer Oval + The Merry Christmas w/Deer Family dies to create her woodland scene. She used patterned paper with a subtle design that gives a beautiful whimsical look to this card. It reminds you of a misty moor. Her oval cut in the medium shade of brown draws your eye right to the deer image.
 Card 4:  Our last sample for today is from Anja Zurga. She used the Peeker Snowmen die to create a beautiful Christmas tag. By using black cardstock as a background it created a dramatic look for her sweet snowmen. The sentiment in white ink gives a chalkboard look to her tag. Wouldn't a tag like this look great on that special Christmas present. It's a gift in itself.
That's our samples for today. Hope the team has given you some new ideas for using these fabulous Christmas dies. 
 
Dies used to create samples:
http://www.scrappingcottage.com/cottagecutzgrapevinewreathwbirdelites.aspx
 
http://www.scrappingcottage.com/cottagecutzchristmasvillage1elites.aspx

http://www.scrappingcottage.com/cottagecutzchristmasvillage2elites.aspx
 
http://www.scrappingcottage.com/search.aspx?find=winter+deer+oval

http://www.scrappingcottage.com/search.aspx?find=Merry+Christmas+Deer
 
http://www.scrappingcottage.com/search.aspx?find=peeker+snowmen


Saturday, September 15, 2018

Country Christmas Wreath

Hello Scrapping Cottage friends! Thanks for taking the time to stop and visit with us today. It's Mary Marsh here bringing you the Saturday edition of the Blog. 

Our  Christmas Part 2 dies are available, and on a 25% sale,  in the online store.  There are 29 new designs in this release. The Christmas Part 1 dies are still on sale as well for a limited time. 
The DT has been showing sample cards with the new dies. So if you haven't seen them page back and take a look at all the beautiful eye candy.

For my card today, I am using two  of the new dies from Christmas Part 2. I am featuring the Grapevine Wreath w/Bird and the Country Merry Christmas Phrase. So let's get started with some details on how I created my card.

Step 1: This week I started my card with a sketch. I had this one saved to one of my Pinterest boards and I thought it would work well with the dies I used. This sketch gave all the measurements so it made it easy for me to do the cutting. Instead of an oval on this sketch I used my wreath. 
Step 2: I already knew I wanted to use this red gingham patterned paper so I layered it with white cardstock and then red for my card base. For the center rectangle, I decided to use wide (1.5") ribbon and layer red ribbon (5/8") over that. Just in case the measurements are to small to read, I have listed them below.
Red card base: 4 1/4" x 5 1/2"
White layering panel: 4" x 5 1/4"
Gingham patterned paper: 1 7/8" x 5"

Die cut the wreath and the merry Christmas phrase using white cardstock.
Step 3: Now that all the card elements are prepared, I am ready to start card assembly. Attached the gingham paper to the white layer panel with double sided tape. Then I adhered the ribbon with Tombow power tabs. I like to use this adhesive with ribbon because it gives a strong hold.
Next, I attached the white wreath and the corner flourishes. I used glue dots on the bird and then Ranger multi matte medium sparingly on other parts of the wreath. I didn't want the wreath to be completely attached. I like the look of it being lifted slightly off the ribbon.
To complete my card I attached the red card base.
I used the Merry Christmas phrase on the inside of my card. I punched a few white dots and scattered them around the sentiment. I never do much with the inside of my cards. My focus is always on the card front.
 
Well, that's it for me for this week. I hope I have given you an idea for using this new Grapevine Wreath die. It's a card that you could easily make multiples of. By changing the card colors this could also be a fall wreath for a harvest or Thanksgiving card.

See you next Saturday!

Dies I used to create card:
 
http://www.scrappingcottage.com/cottagecutzgrapevinewreathwbirdelites.aspx
 
http://www.scrappingcottage.com/cottagecutzcountrymerrychristmasphraseelites.aspx