Showing posts with label Flower 6. Show all posts

Tuesday, May 09, 2023

Flower 6 Thanks Card

Hello Cottage Cutz friends,
Melinda here with you this terrific TuesDIE. Today I am sharing another simple card that you can make in bulk to build your stash.
Here is a look at my completed card. I started with a side folding A2 card base. I used some white cardstock for the base.


I decided to use one of the scalloped slimline dies to create a scalloped edge on the top side of the card.
In this photo you can see how I positioned the die. The cutting edge of the one side is on top of the die cut. I then put the paper over the other edge of the second side so that it would not cut.


Here is a view of my sandwich for the die cut machine. Because the die is a bit longer, I had to use my full size Gemini die cutting machine. 

Here is a look at the finished edge after it is cut.

Because the edge would cause the cover to be smaller than the bottom (back), I put a piece of patterned paper on the inside. You can add a white mat to the right side to write your sentiment or you can use the inside left if using a white or light colored cardstock like I did.


Next, I cut out the Flower 6 die cut from white cardstock. I then cut the stem portion as shown in the photo above. I then proceeded to color my die cut pieces with my markers.

Here is a closeup of the finished flowers. Once they were colored, I adhered them to the patterned paper mat that I put on the top of the mat. I did add some stickles to the inside decorative piece. I also added some sequins scattered for a pretty decorative touch.

Here is a closer look at the edge. It is understated but adds a very nice touch.


I then cut out the thinking of you die cut from white cardstock. I then colored the words with my markers to match my card's color scheme.

Lastly, I added the sentiment to the scalloped oval. I used a little foam tape to give that a little lift.

Here is one last look at my completed card.

Dies Used


Well that about covers it for today! Be sure to stop back by and see what the other super talented designers create and don't forget to check out Cottage Cutz on YouTube!

Until the next time, have a wonderfully crafty day!

Thursday, March 09, 2023

Hello Flowers

 Hello CottageCutz Friends,

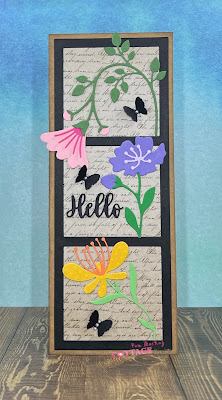
I like to send cards to family and friends with no special occasion.  So today I thought I would make a card just to say hello and I am thinking of you!

The dies I used for today's card are from the new collection.  They are Flower 2Flower 6 and Flower 7.  I decided to make a slimline to display these pretty flowers.

Designer Steps:

1.  Using the following dies Flower 2Flower 6 and Flower 7 cut out these colors of card stock: yellow, orange, pink, dark pink, purple, light purple and 3 shades of green
2.  Use a Kraft slimline base measuring 3 1/4 x 8 1/4
  • Use the Window Slimline and cut it out in black
  • Use the Hello w/Shadow and cut out the hello in black 3 times
  • Cut a piece of script designer paper 3 x 8
3.  Glue the 3 Hello's together.  Glue the black window frame to the designer script paper as shown above
4.  Glue the Hello and the purple flower in the middle window as shown above
5.  Glue the pink and yellow flowers as shown above
6.  Ink the edges of the kraft slimline card base in black 
7.  Glue the flower panel to the kraft card base.  Using the Spring Meadow die cut out 3 black butterflies.  Place 3 small pearls on each butterfly and then attach to the card front as shown below and your card is complete

CottageCutz Products


We have more inspiration on our YouTube Channel check it out HERE

Thanks so much for stopping by!  And I will see you next Thursday.
Blessings and Take Care


Monday, March 06, 2023

Floating Sentiment Shadowbox

Happy Monday CottageCutz friends!

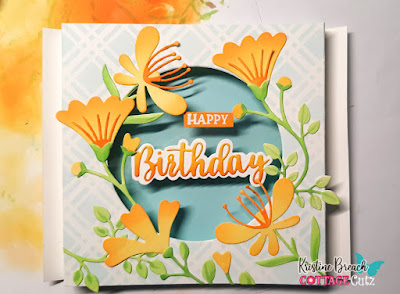
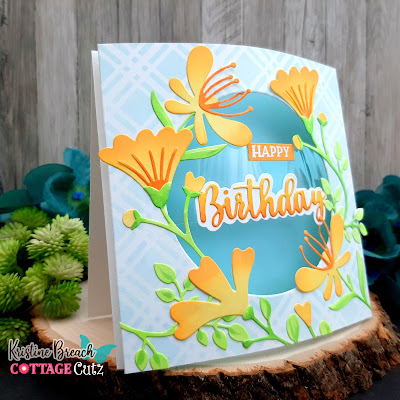
Kris here sharing with you today.  I have a Floating Sentiment Shadowbox type of card.  I've used Flower 1, Flower 6, and Flower 7 from the newest Flowers & More Release.


This style is very easy to make, but if you'd like to watch a video, Jennifer McGuire recently shared this one and I was inspired to try it for my card this week. ☺

Design Steps:

1.  I cut a white card base at 5" x 10" and scored at 5 inches.  

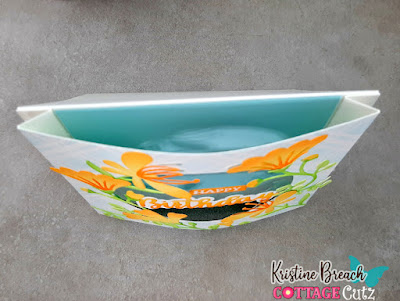
2.  I cut another piece of white cardstock at 5" x 7" and scored along the 7" side at 1/2" and 1" on both ends.  Accordion folded them and burnished.

3.  I stenciled a background with the Plaid stencil from the Daisy Stencil set (La-La Land Crafts) with Tumbled Glass Distress Oxide ink.


4.  I die cut a circle from the center of that piece using the 2nd largest Pierced Circle set.


5.  Next, I die cut my flowers from white cardstock and added Distress Oxide ink in Squeezed Lemonade, Wild Honey, Carved Pumpkin, Twisted Citron, and then I added some shading to the leaves with a Copic marker. 

6.  I then placed them around the opening and glued them down.


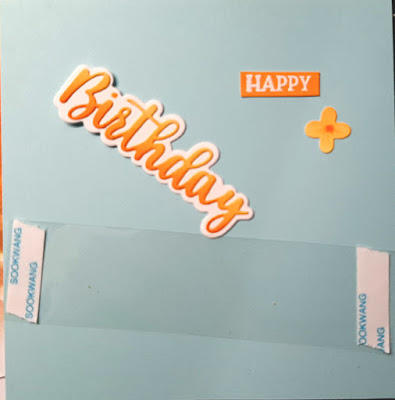
7.  I stamped & embossed my "Happy" sentiment and die cut the "Birthday" from the Happy Birthday w/ Shadow die.  

8.  I cut a strip of window sheet about 4-3/4' x 1-1/2" and added Scor Tape to each end.


9.  I then taped the window sheet to the back of my flower layer, in the center.


10.  I attached my sentiment pieces to the front of the window sheet.  I ended up cutting off one of the limbs from the stem on the left so it didn't cover up my sentiment too much. 

11.  I then tried out different colors of cardstock as my backdrop for my flowers and decided on this light teal color.  I cut it to 3-7/8" x 4-7/8" and set it aside.  *This is not attached to the front floral panel.


12.  I added Scor Tape to the 1/2" scored flaps of the flower panel piece and lined them up with the side edges of my card front.  I love how it causes the front panel to dome out!

13.  I then added glue to the backside of my blue panel and inserted it between my front floral panel and the card front so that the 4-7/8" is vertical.  


Done!


PRODUCT I USED:


Thanks for taking a peek!  I hope you are inspired to get creative with your favorite CottageCutz dies!

~Kristine