Showing posts with label Cottage Cutz Stitched Square set. Show all posts

Friday, January 31, 2020

A Chocolate Moose for Valentine's Day

Happy Friday!  Who doesn't like chocolate mousse?  I know I do, it's one of my favorites!  It's Jeanne today with a chocolate moose - the kind with antlers, but just as sweet as the kind you eat.
I thought I would make a Valentine's Day card for my husband that wasn't so pink, red or "girlie".  I started with the moose from the Arctic Moose & Polar Bear die.
I cut him out of chocolate brown, beige and black cardstocks, then assembled him.  I used some brown ink to shade his hair and antlers and to give him some depth.
Then I chose my papers.  I liked the striped paper with the coordinating small flower paper.  Although I could have used the pink or blue for the base of the card, I went with the beige.
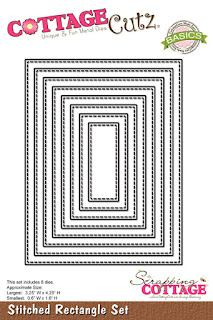
I cut an A2 panel from the beige and used the largest Stitched Rectangle die with the small floral paper, the third largest square from the Stitched Squares die with the striped paper and the middle die from the Nested Circle Scallop dies in white.  I cut chocolate brown panels about 1/8" larger than the rectangle and square so I could frame them.
I added some brown polka dot ribbon to the floral panel and used foam dots to pop up the square with the scalloped circle and moose.  I thought the wooden heart and flower fit the theme without being too feminine.
I stamped my sentiment in chocolate brown ink on a strip 3 1/8 x 5/8 inches.  I mounted this to a strip of the chocolate cardstock 3 1/8 x 3/4 inches.  You can see where I made trim marks on the left side.  I glued the strip directly to the panel and added a matching enamel dot.
I am certain my husband will love his chocolate Valentine's "moose".  (I may have to make him a dessert one as well - LOL!)

Dies:
http://www.scrappingcottage.com/cottagecutzarcticmooseandpolarbear.aspx

http://www.scrappingcottage.com/cottagecutzstitchedrectanglesetbasics.aspx

http://www.scrappingcottage.com/cottagecutzstitchedsquaresetbasics.aspx
http://www.scrappingcottage.com/cottagecutznestedscallopcircleset.aspx

Thanks for stopping by today!  I hope you have a fun and creative weekend!


Friday, December 27, 2019

Winter Birthday Card

Happy Friday Cottage Cutz fans!  It's Jeanne today with a clean and simple card for a winter birthday.
This card uses the Polar Bear Fishing from the new Arctic Animals release.  I started by cutting the pieces from white cardstock.
I used Distress Oxide inks and sponge daubers to colors the pieces.  Ink colors used - Hickory Smoke, Tumbled Glass, Abandoned Coral, Bundled Sage and Vintage Photo.
For the background,  blended several DO inks together and then splattered it with water and white paint to mimic snowfall.
I used the third largest of the Stitched Squares dies to cut the "diamond" background.
My card base is a top folding A2 card.  In order to center the diamond, I very lightly drew lines at the halfway point both vertically and horizontally.
After gluing down the diamond, I erased the lines.  I then stamped the sentiment on a strip of blue cardstock 1/2 inch high by 3 3/4 inch wide.  I used my scissors to fishtail the end.
I wrapped bakers twines around the card and used foam dots to pop up the sentiment over the twine.
I wanted the fish to glisten a bit so I added Wink of Stella to them.

This die is super cute and very versatile.  The Arctic Animals release and select others are on sale right now for a limited time in the online store.  Be sure to stop by to get your favorites before they're gone!

Dies:
http://www.scrappingcottage.com/cottagecutzpolarbearfishing.aspx

http://www.scrappingcottage.com/cottagecutzstitchedsquaresetbasics.aspx

Thanks for stopping by today.  I hope you have a fun and creative weekend!

Friday, August 30, 2019

Celebrate You!

Happy Friday!  It's Jeanne today with an easy, fun birthday card featuring the Mouse with Cake die from the new birthday release.  I love  this release; the dies make adorable birthday cards.
For this card I started with the color challenge colors on Splitcoaststampers this week.  They were chosen by none other than our own Mary Marsh!  She chose Lovely Lipstick, Gorgeous Grape and Coastal Cabana.  Just perfect for a festive card.
I cut the pieces from the Mouse with cake and Party Favors dies using the colors plus the neutrals Very Vanilla, Sahara Sand, and Mossy Meadow (my cherry stem.)  I used just a touch of the Lovely Lipstick ink to color the mouse's ears.
For my card layout I chose to use a sketch challenge that was on Splitcoaststampers awhile back.  A hint to make cards go faster - I download the sketch challenge each week from SCS, print it out and keep in a file.  I may not use it then, but I have it for future use.
I flipped this sketch and used two of the third smallest Stitched Squares in white, one of the largest Stitched Square in Grape and one of the fourth smallest Stitched Rectangles in white.
I glued them to an A2 card base.
I heat embossed the sentiment on Lipstick card stock and trimmed it close to the embossing.  I glued all the die cuts to the card, popped up the sentiment using foam dots and added a few glitter enamel dots in the corner.  Super easy!

Dies used:
http://www.scrappingcottage.com/cottagecutzmousewithcake.aspx

http://www.scrappingcottage.com/cottagecutzpartyfavors.aspx
http://www.scrappingcottage.com/cottagecutzstitchedrectanglesetbasics.aspx
http://www.scrappingcottage.com/cottagecutzstitchedsquaresetbasics.aspx

Thanks for stopping by today.  I hope you have a fun and creative weekend!

Friday, June 07, 2019

A Fairy Happy Birthday!

Happy Friday!  It's Jeanne and today I'm featuring a card made with the new Magical Garden dies.  These adorable dies are 25% off on the website for a limited time.
I'm trying to make more birthday cards this year and these cute fairies went perfectly with the sentiment I had.  One more done!  For the layout I used the sketch challenge this week at Splitcoaststampers and for the colors I chose some designer paper and used the colors from it.  I thought the clouds and sprinkles went well with the fairies.
I started by cutting the pieces in white and vanilla card stock, using ink and sponge daubers to color the pieces.  I used the vanilla for the fairies skin and the under part of the mushroom cap.
I assembled and glued my pieces together on a silicone mat.  This allows the assembled element to dry and prevents it from sticking to my paper or table.
I decided to make an A6 card - 4 1/2 x 6 inches.  I cut one panel this size, a strip 1 1/2 x 6, a rectangle using the largest of the Scalloped Stitched Rectangle dies, and a white square using the third largest of the Stitched Squares dies.
I then heat embossed my sentiment in white on the scalloped panel.
I glued the white square on top and added my fairies and floral pieces.  The fairies and mushroom caps are covered in several coats of Wink of Stella.  I used gold Wink of Stella to add a few "drips" from the watering can.
I adhered the panel and the strip to the card base along with a piece of ribbon.  Then I used foam tape to pop the panel up from the front of the card.
Since fairies are magical creatures that seem to beg for sparkle, I added a few sequins to the scene.  In this photo you can really see the Wink of Stella.

I hope you enjoyed my card today.  Don't forget to stop by the store and check out all the new dies!

Dies used:
http://www.scrappingcottage.com/cottagecutzmushroomfairygarden.aspx
http://www.scrappingcottage.com/cottagecutzfairygardenflowers.aspx
http://www.scrappingcottage.com/cottagecutzstitchedsquaresetbasics.aspx

http://www.scrappingcottage.com/cottagecutznestedstitchedscalloprectangleset.aspx

Thanks for visiting - I hope you have a fun and creative weekend!


Saturday, January 12, 2019

Love Cupcake (new die)

Hello Scrapping Cottage friends! Thanks for taking the time to stop and visit with us today. It's Mary Marsh here bringing you the Saturday edition of the Blog. Not sure what's happening where you are but it's cold and snowy here in Pittsburgh. One of those perfect days to enjoy some hot chocolate and do some crafting. 

We have a new release of Valentine & St Patrick Day dies in the online store. Each one is cuter than the next and they are on sale for a limited time at 25% off. There will be a group post next week and the team will showcase all of the Valentine dies. Today, I have for your viewing pleasure a Valentine card using the Love Cupcake die.

So let's get started with some details and a tutorial on how I created my card.

Step 1: I wanted to stick with the traditional Valentine colors of red & pink with black accents for my card. I chose some heart themed designer paper for my background layer.
Black card base: 5 1/2" x 4 1/4"
Red Layering Panel: 5 3/8" x 4 1/8"
Designer Paper: 5 1/8" x 3 7/8"

Image Panel: 3rd largest stitched square die
Black Layering Panel: 2nd largest square set die

I cut the cupcake from red and pink cardstocks. Love all the detail on the cupcake base as well as the icing. I adhered this with Ranger multi medium matte.
Step 2: Now that all the panels and image are cut, I am ready to start card assembly. I stamped the sentiment in black ink on the image panel before I attached my cupcake. Used my MISTI for placement.
Secured the cupcake to the image panel with double sided tape. I attached the love word after the cupcake was down because I didn't want it to cover the sentiment. I cut a few extra red hearts and added them to the panel just to balance out the layout. 
I attached the designer paper panel to the red base. I wanted something else so I decided to use some black velvet ribbon. I thought it balanced off that side of the card. 
I decided to angle the image panel for added interest. It's attached with double sided tape. 
Completed my card by attaching the black card base. And that completes my card and post for this week. I hope I have given you an idea for a way to use this new die. See you next Saturday!

dies I used to create card:
http://www.scrappingcottage.com/cottagecutzlovecupcake.aspx
http://www.scrappingcottage.com/cottagecutzstitchedsquaresetbasics.aspx
http://www.scrappingcottage.com/cottagecutzsquaresetbasics.aspx